previous arrow
next arrow
previous arrownext arrow
Slider

Anniversary!

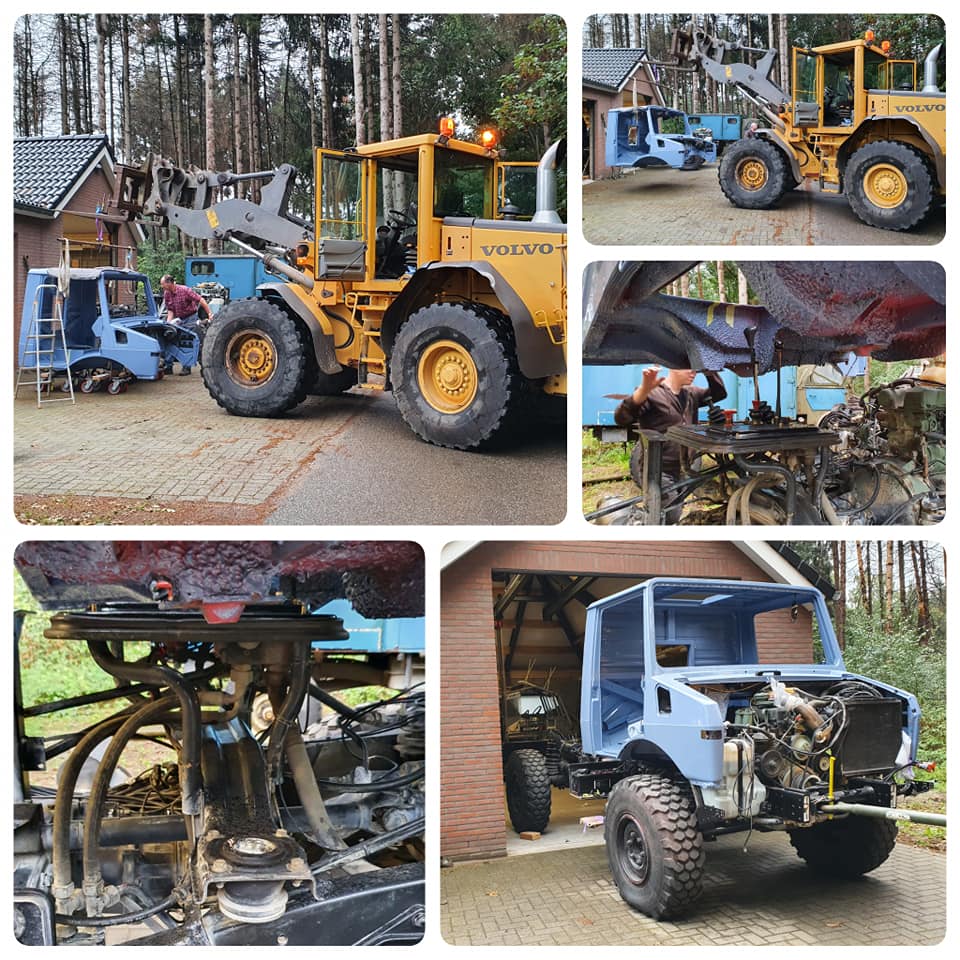
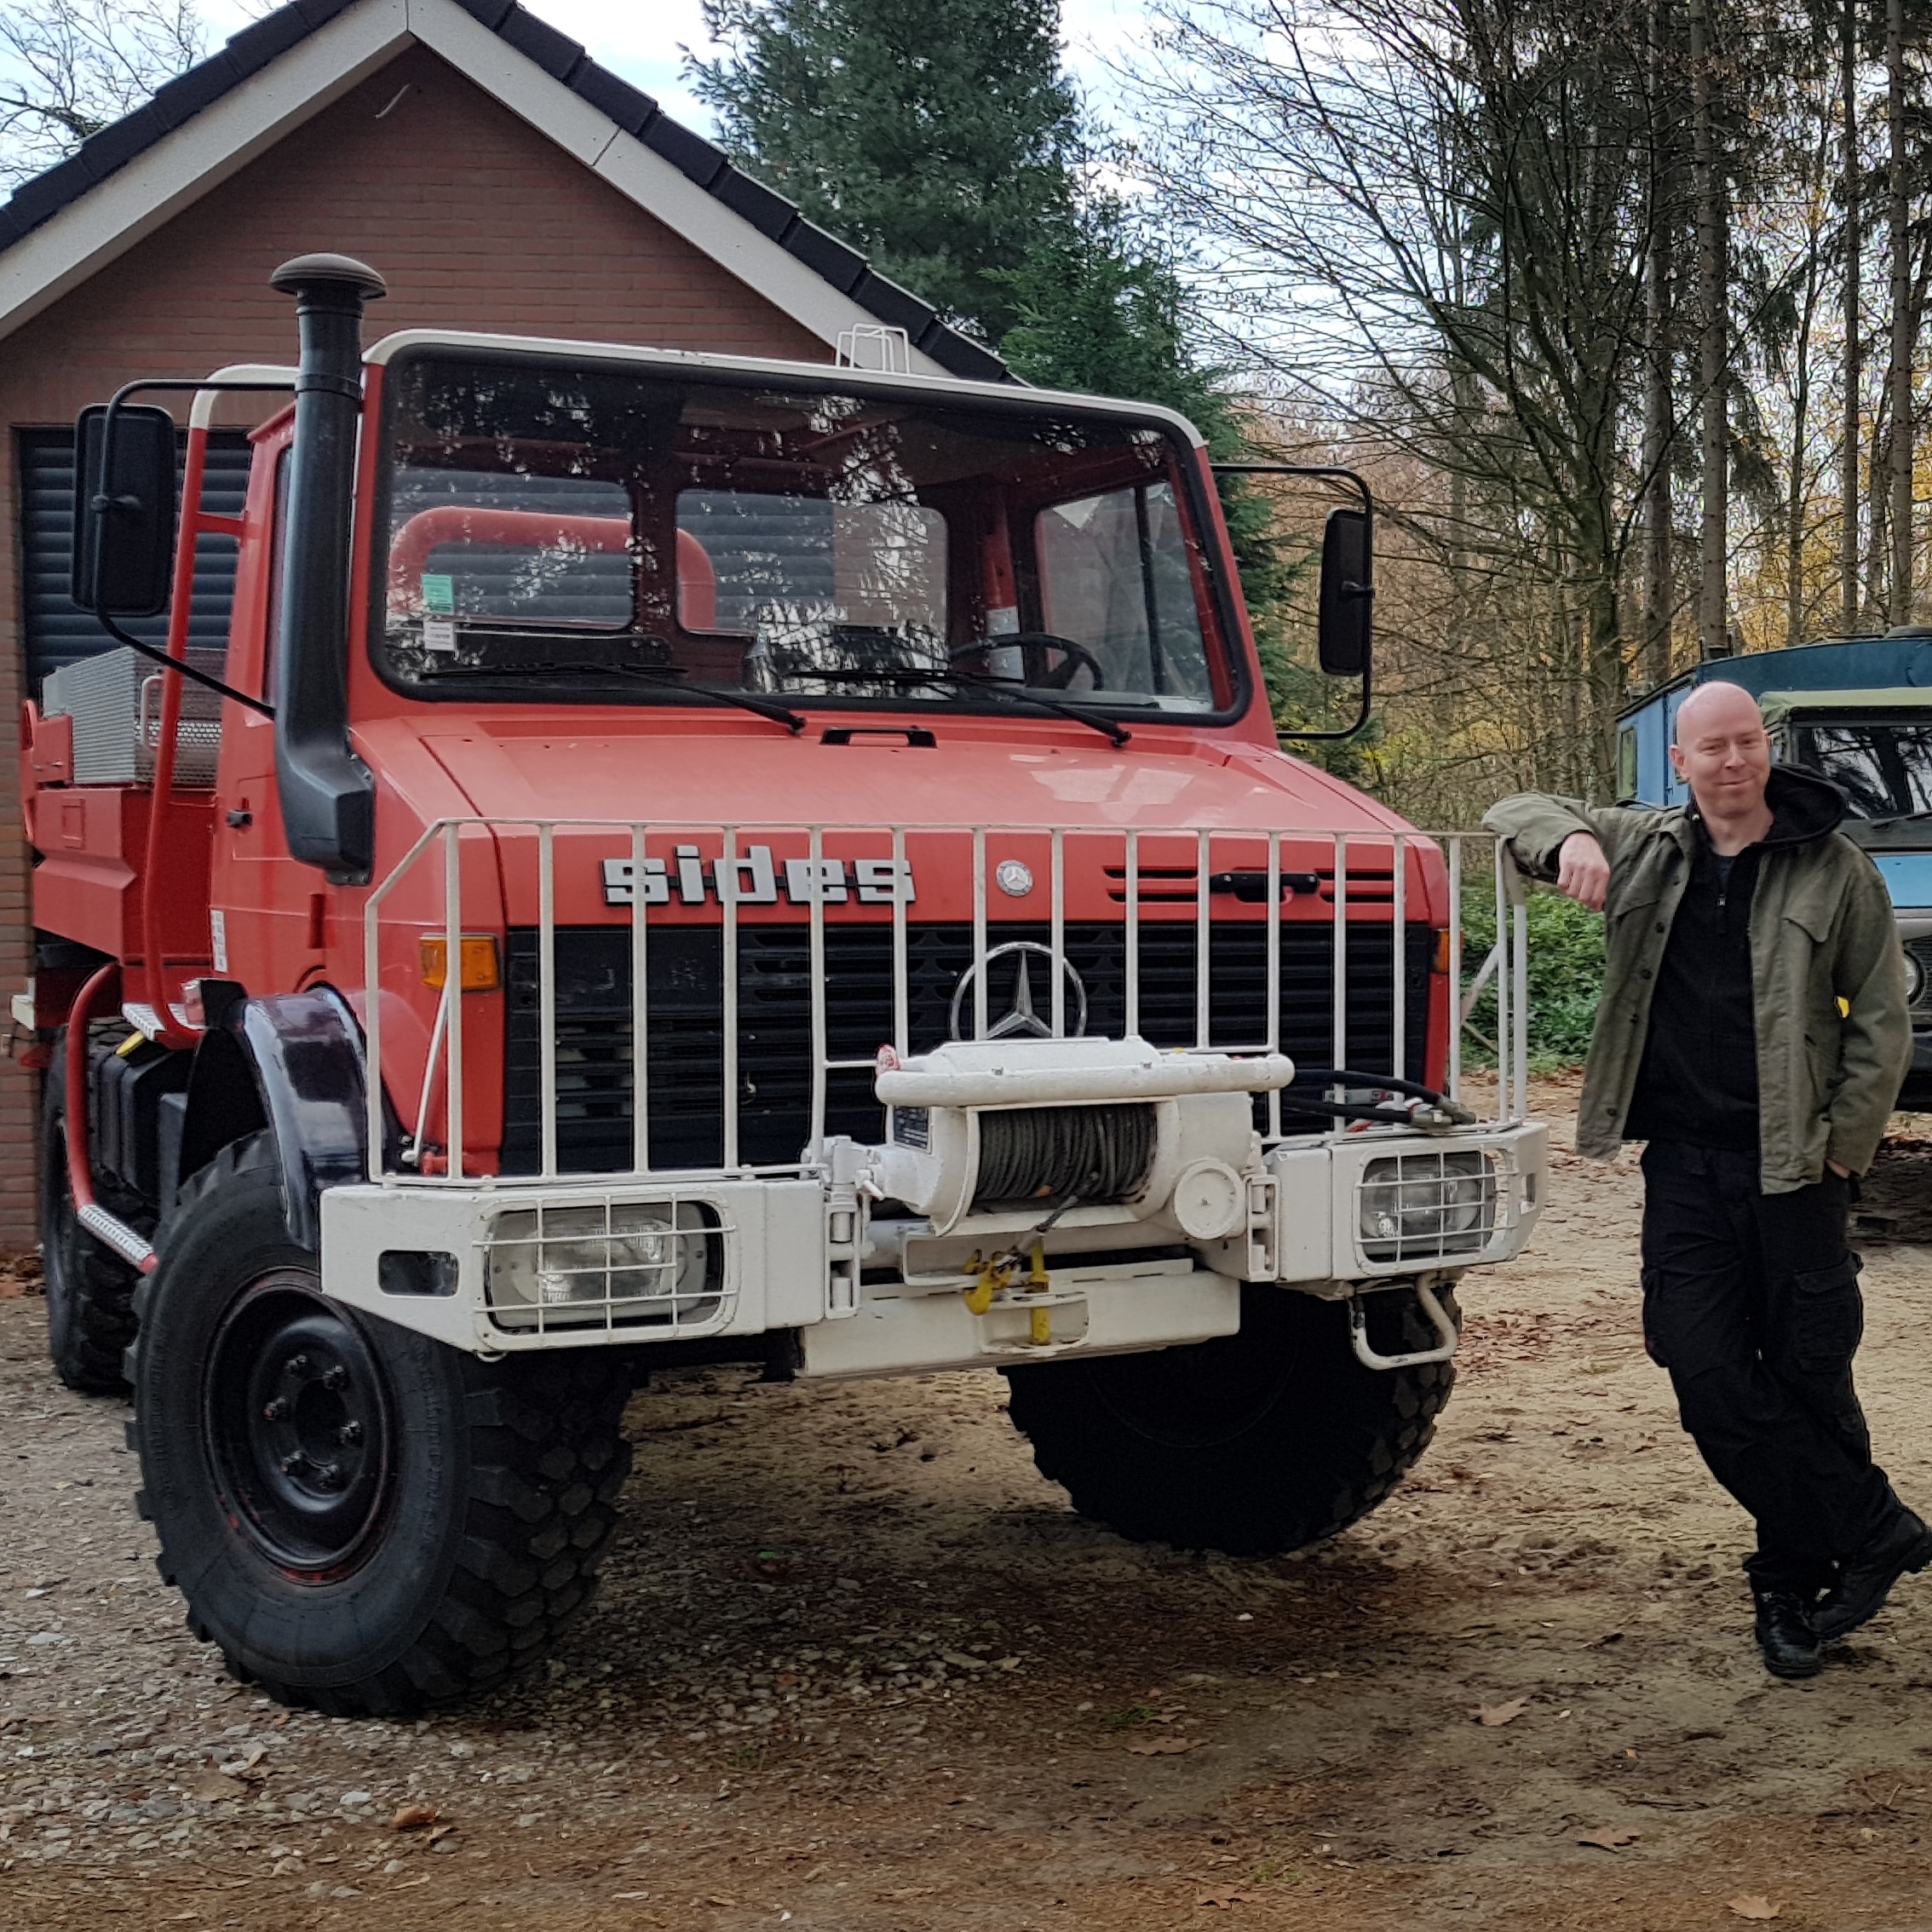
Today is our 2-year anniversary with the Unimog! Huray, party! And although it’s not quite finished, it’s time to reflect on everything we’ve done so far. A list:

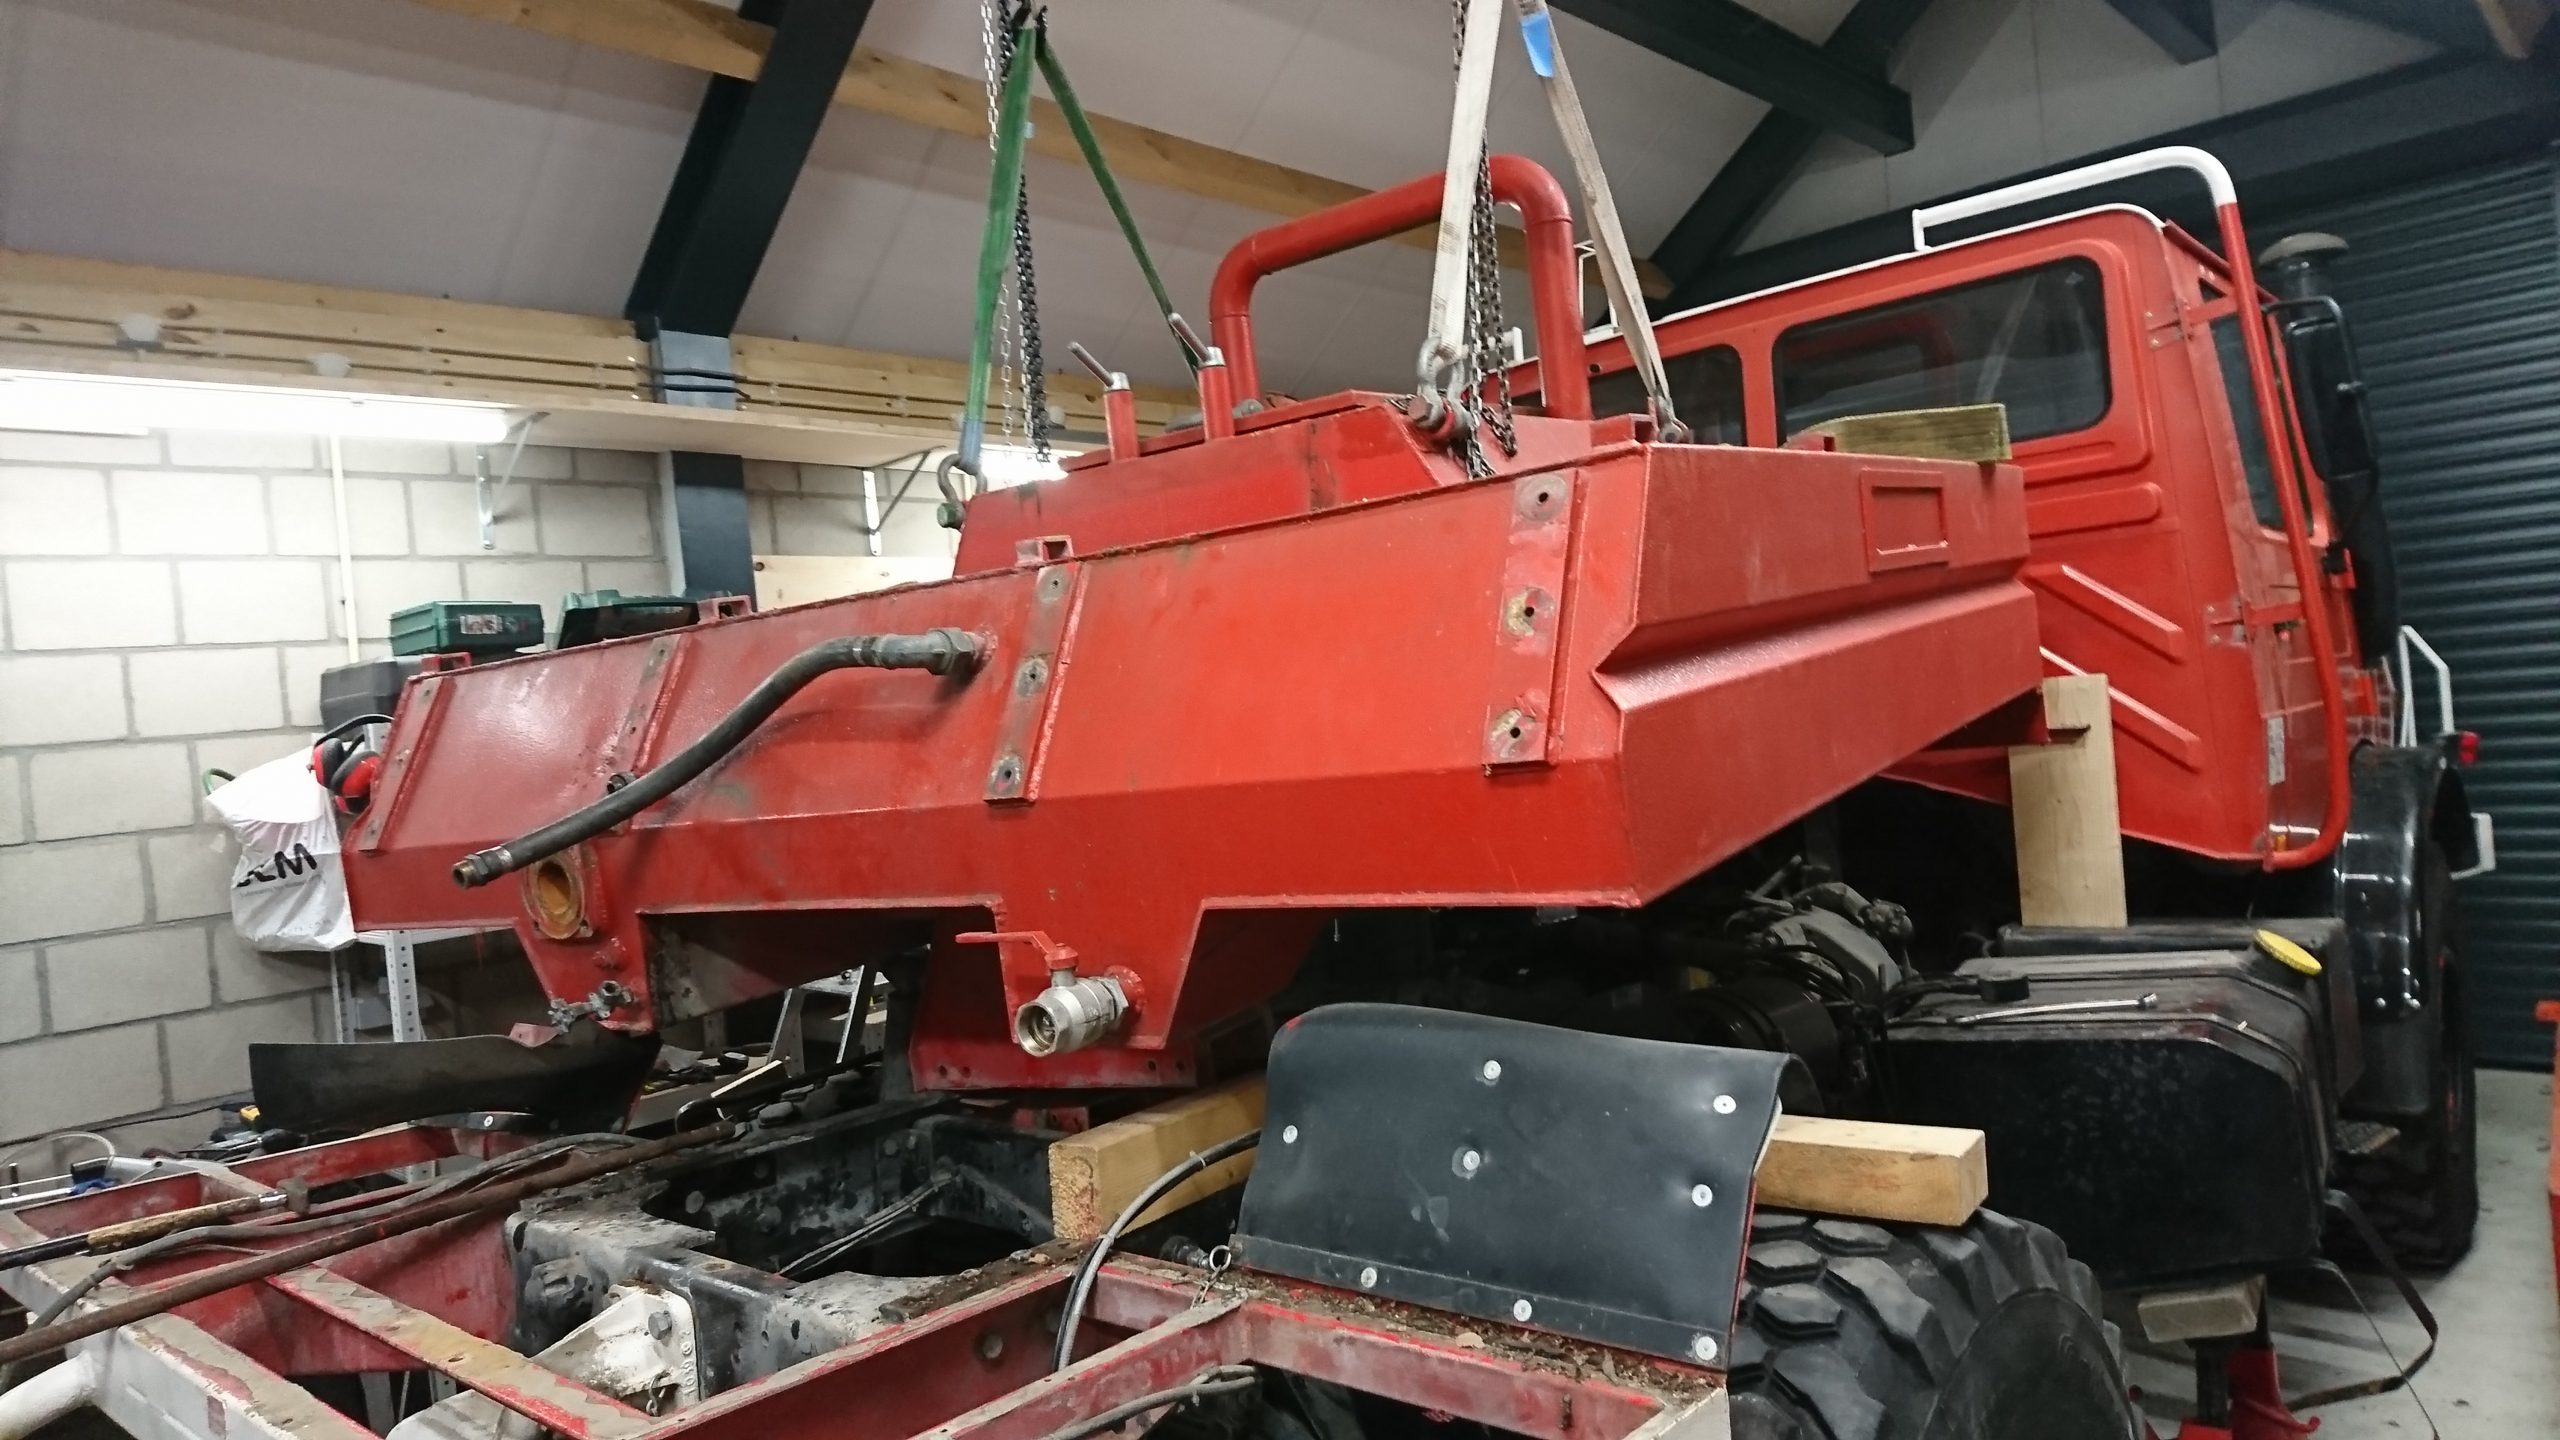
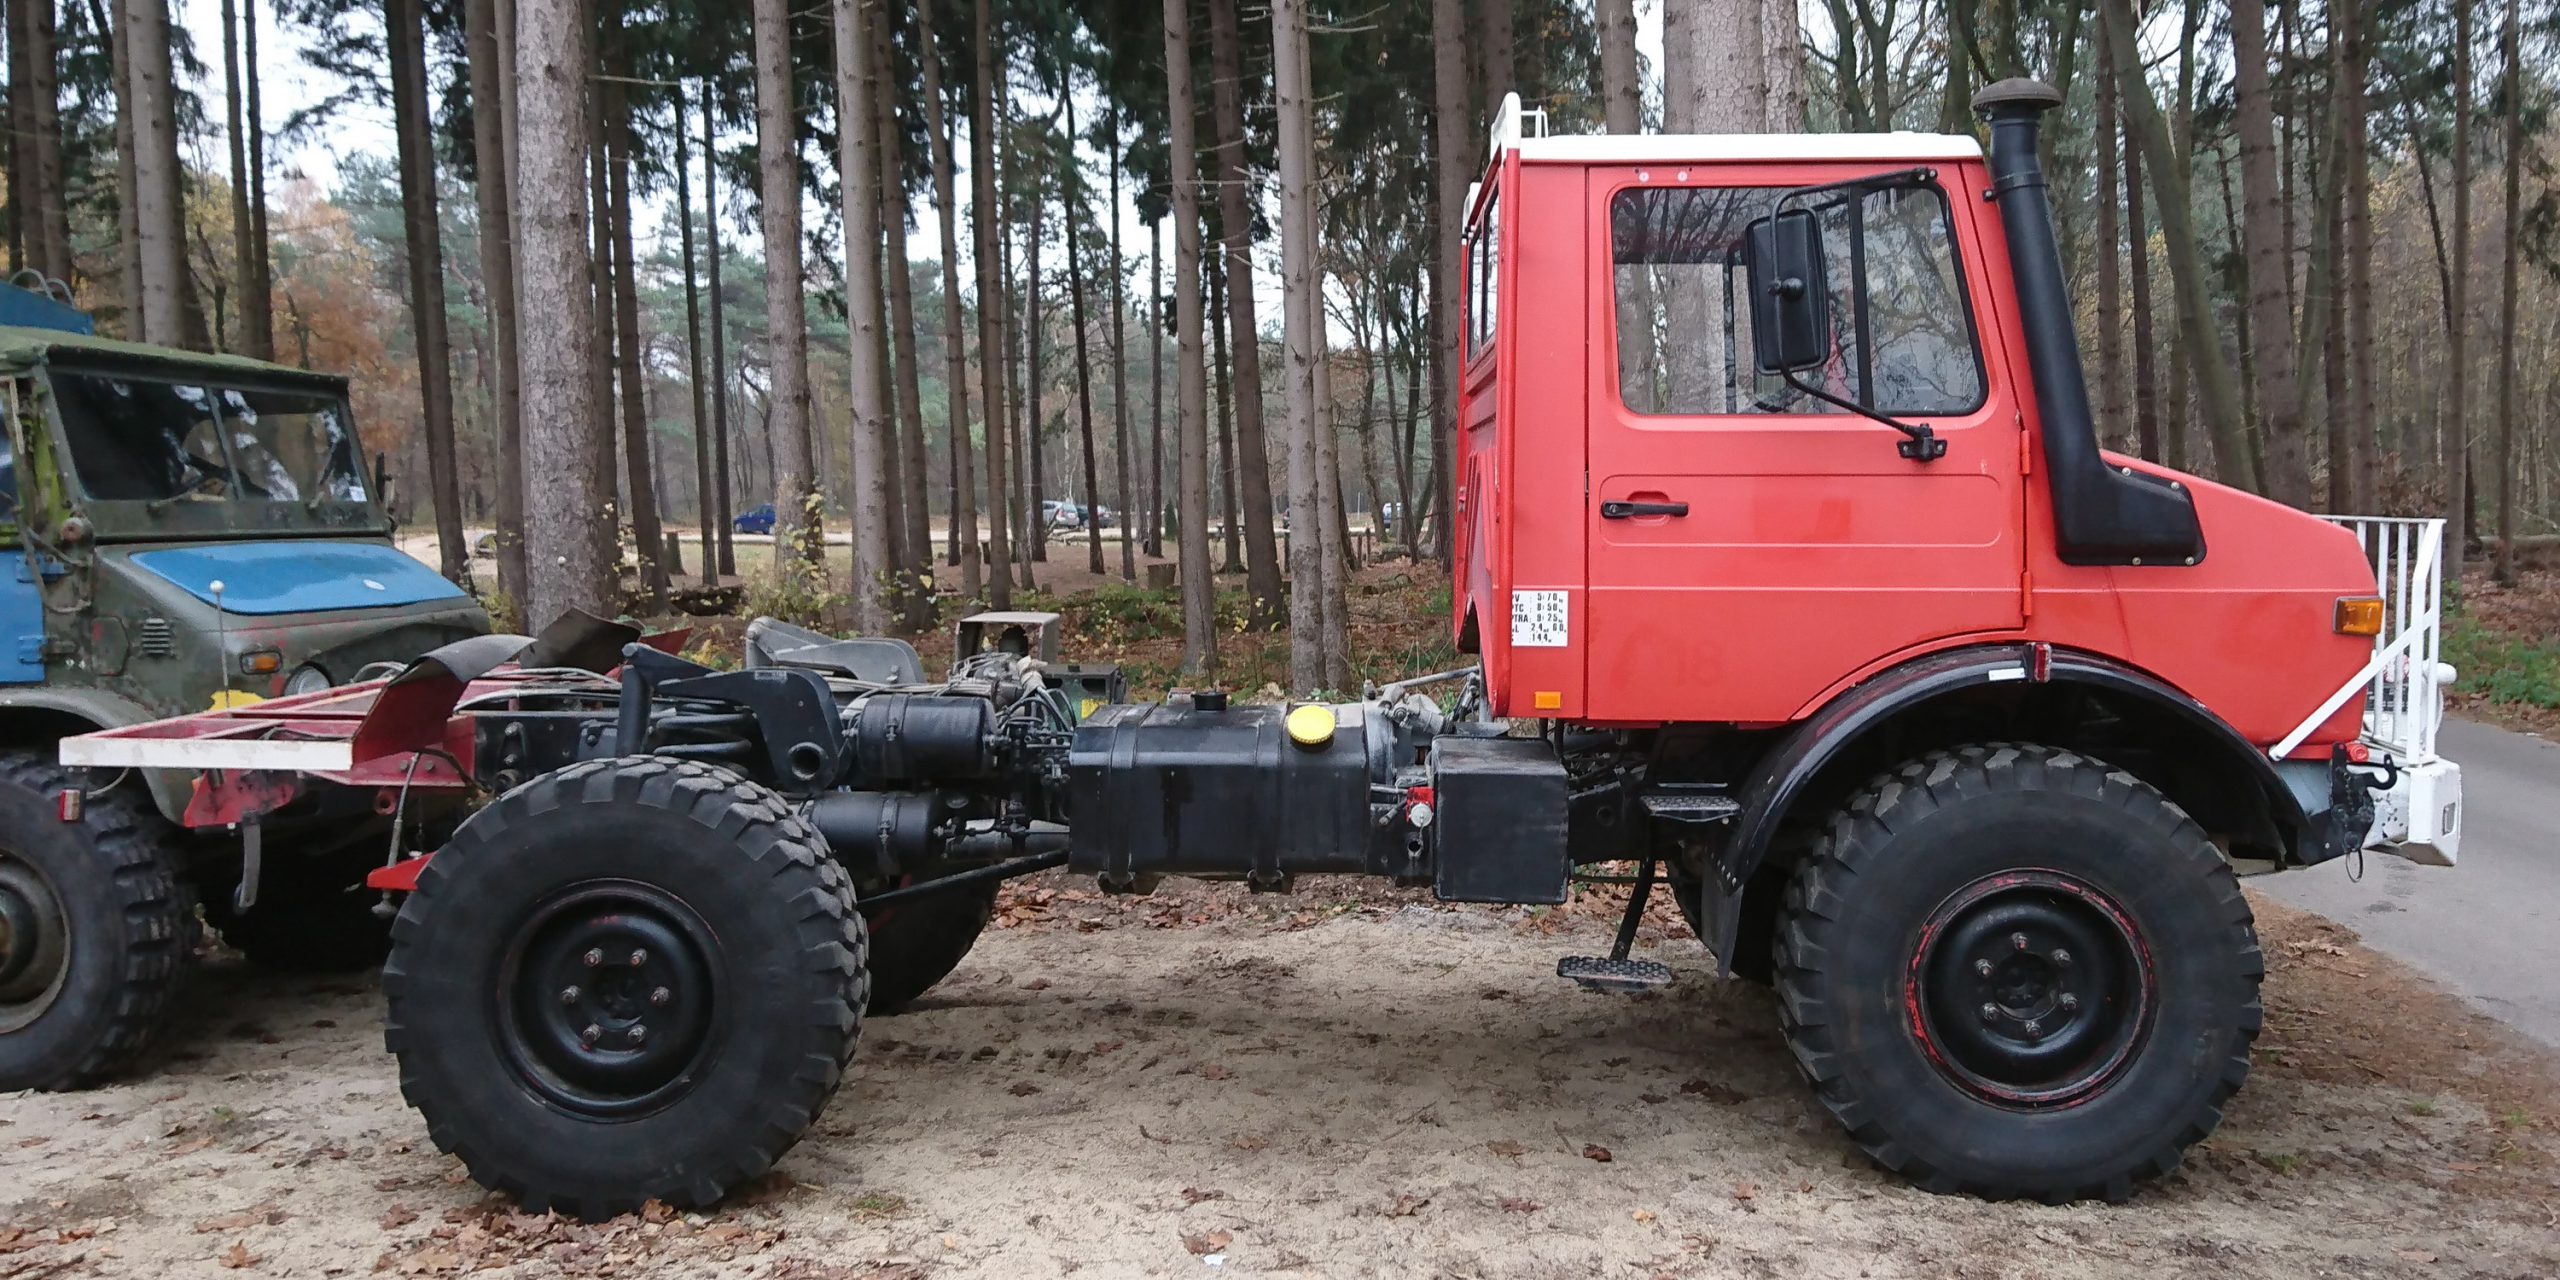
  • removed the fire-fighter watertank, pump and platform
  • removed PTO and it’s extra gearbox
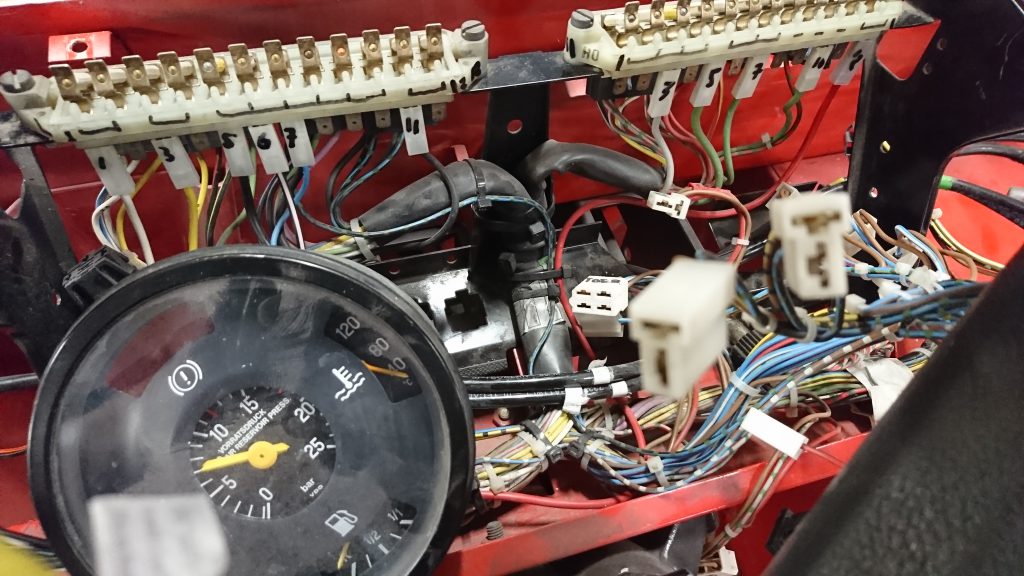
  • controlbox, wiring and instruments for flashlights removed
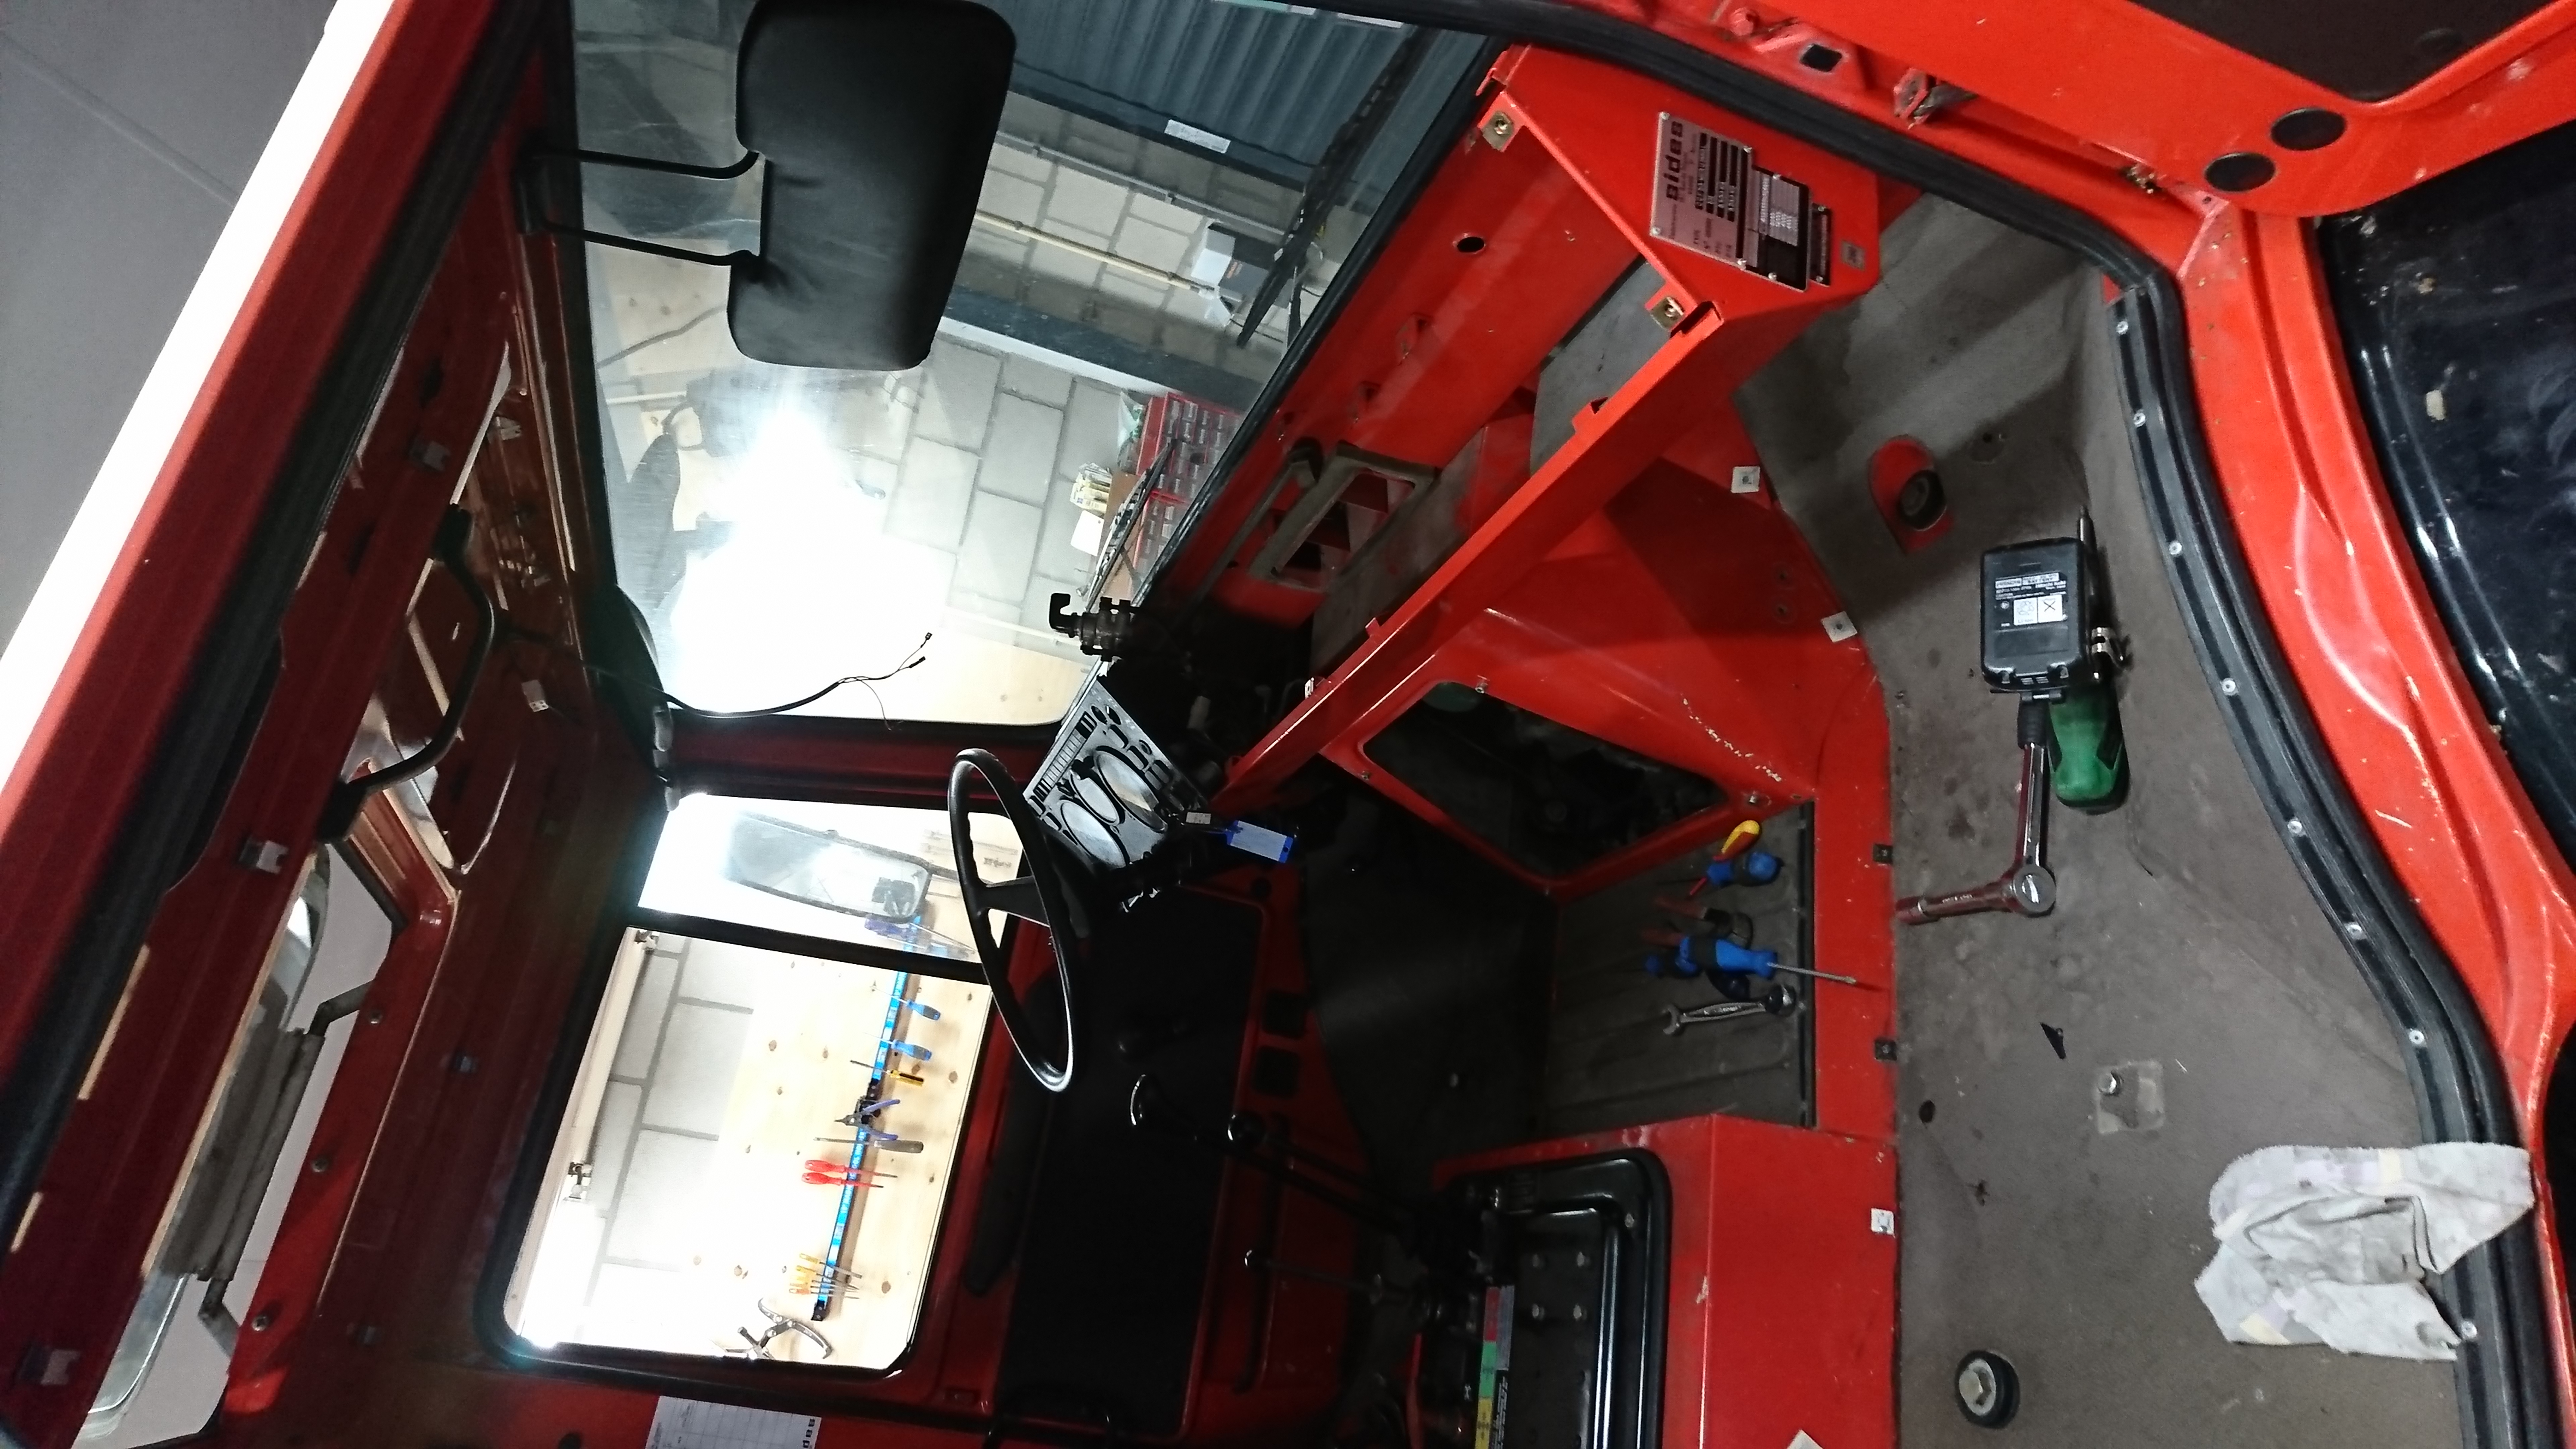
  • removed glove compartment, dashboard, heating channels etc en purchased two new heater channels cause the bolt-holes were torn off
  • push/pull cable for manual engine control from pump removed
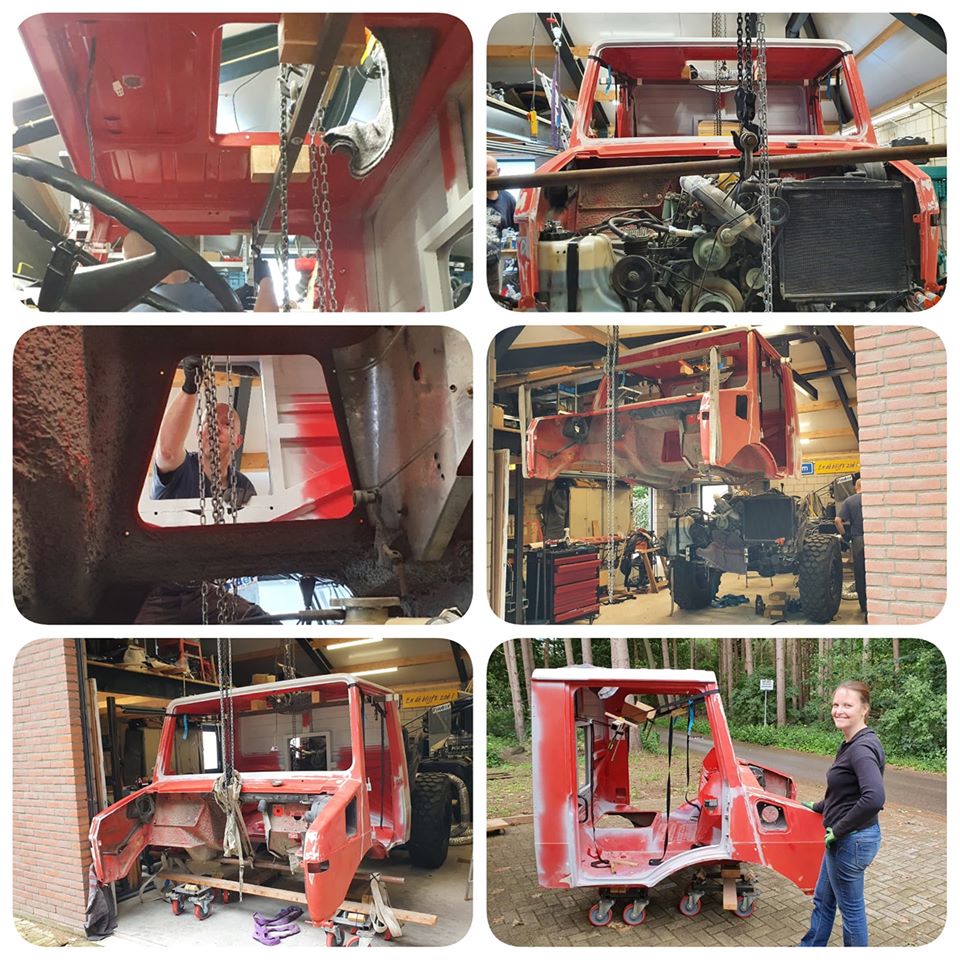
  • lifted the cab once to try it out
  • repaired right side step, there was a crack in the metal
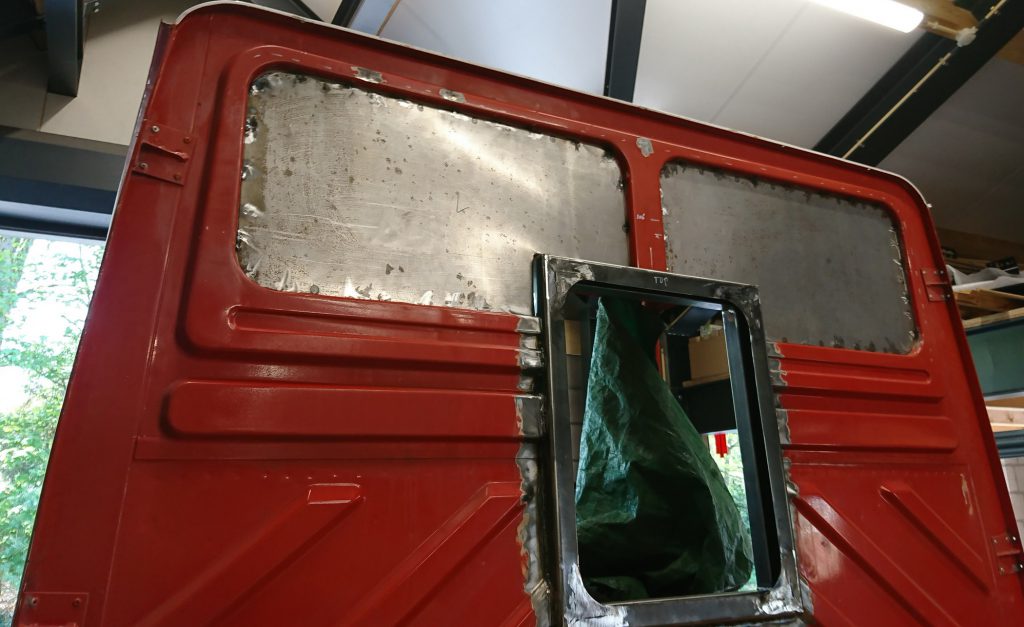
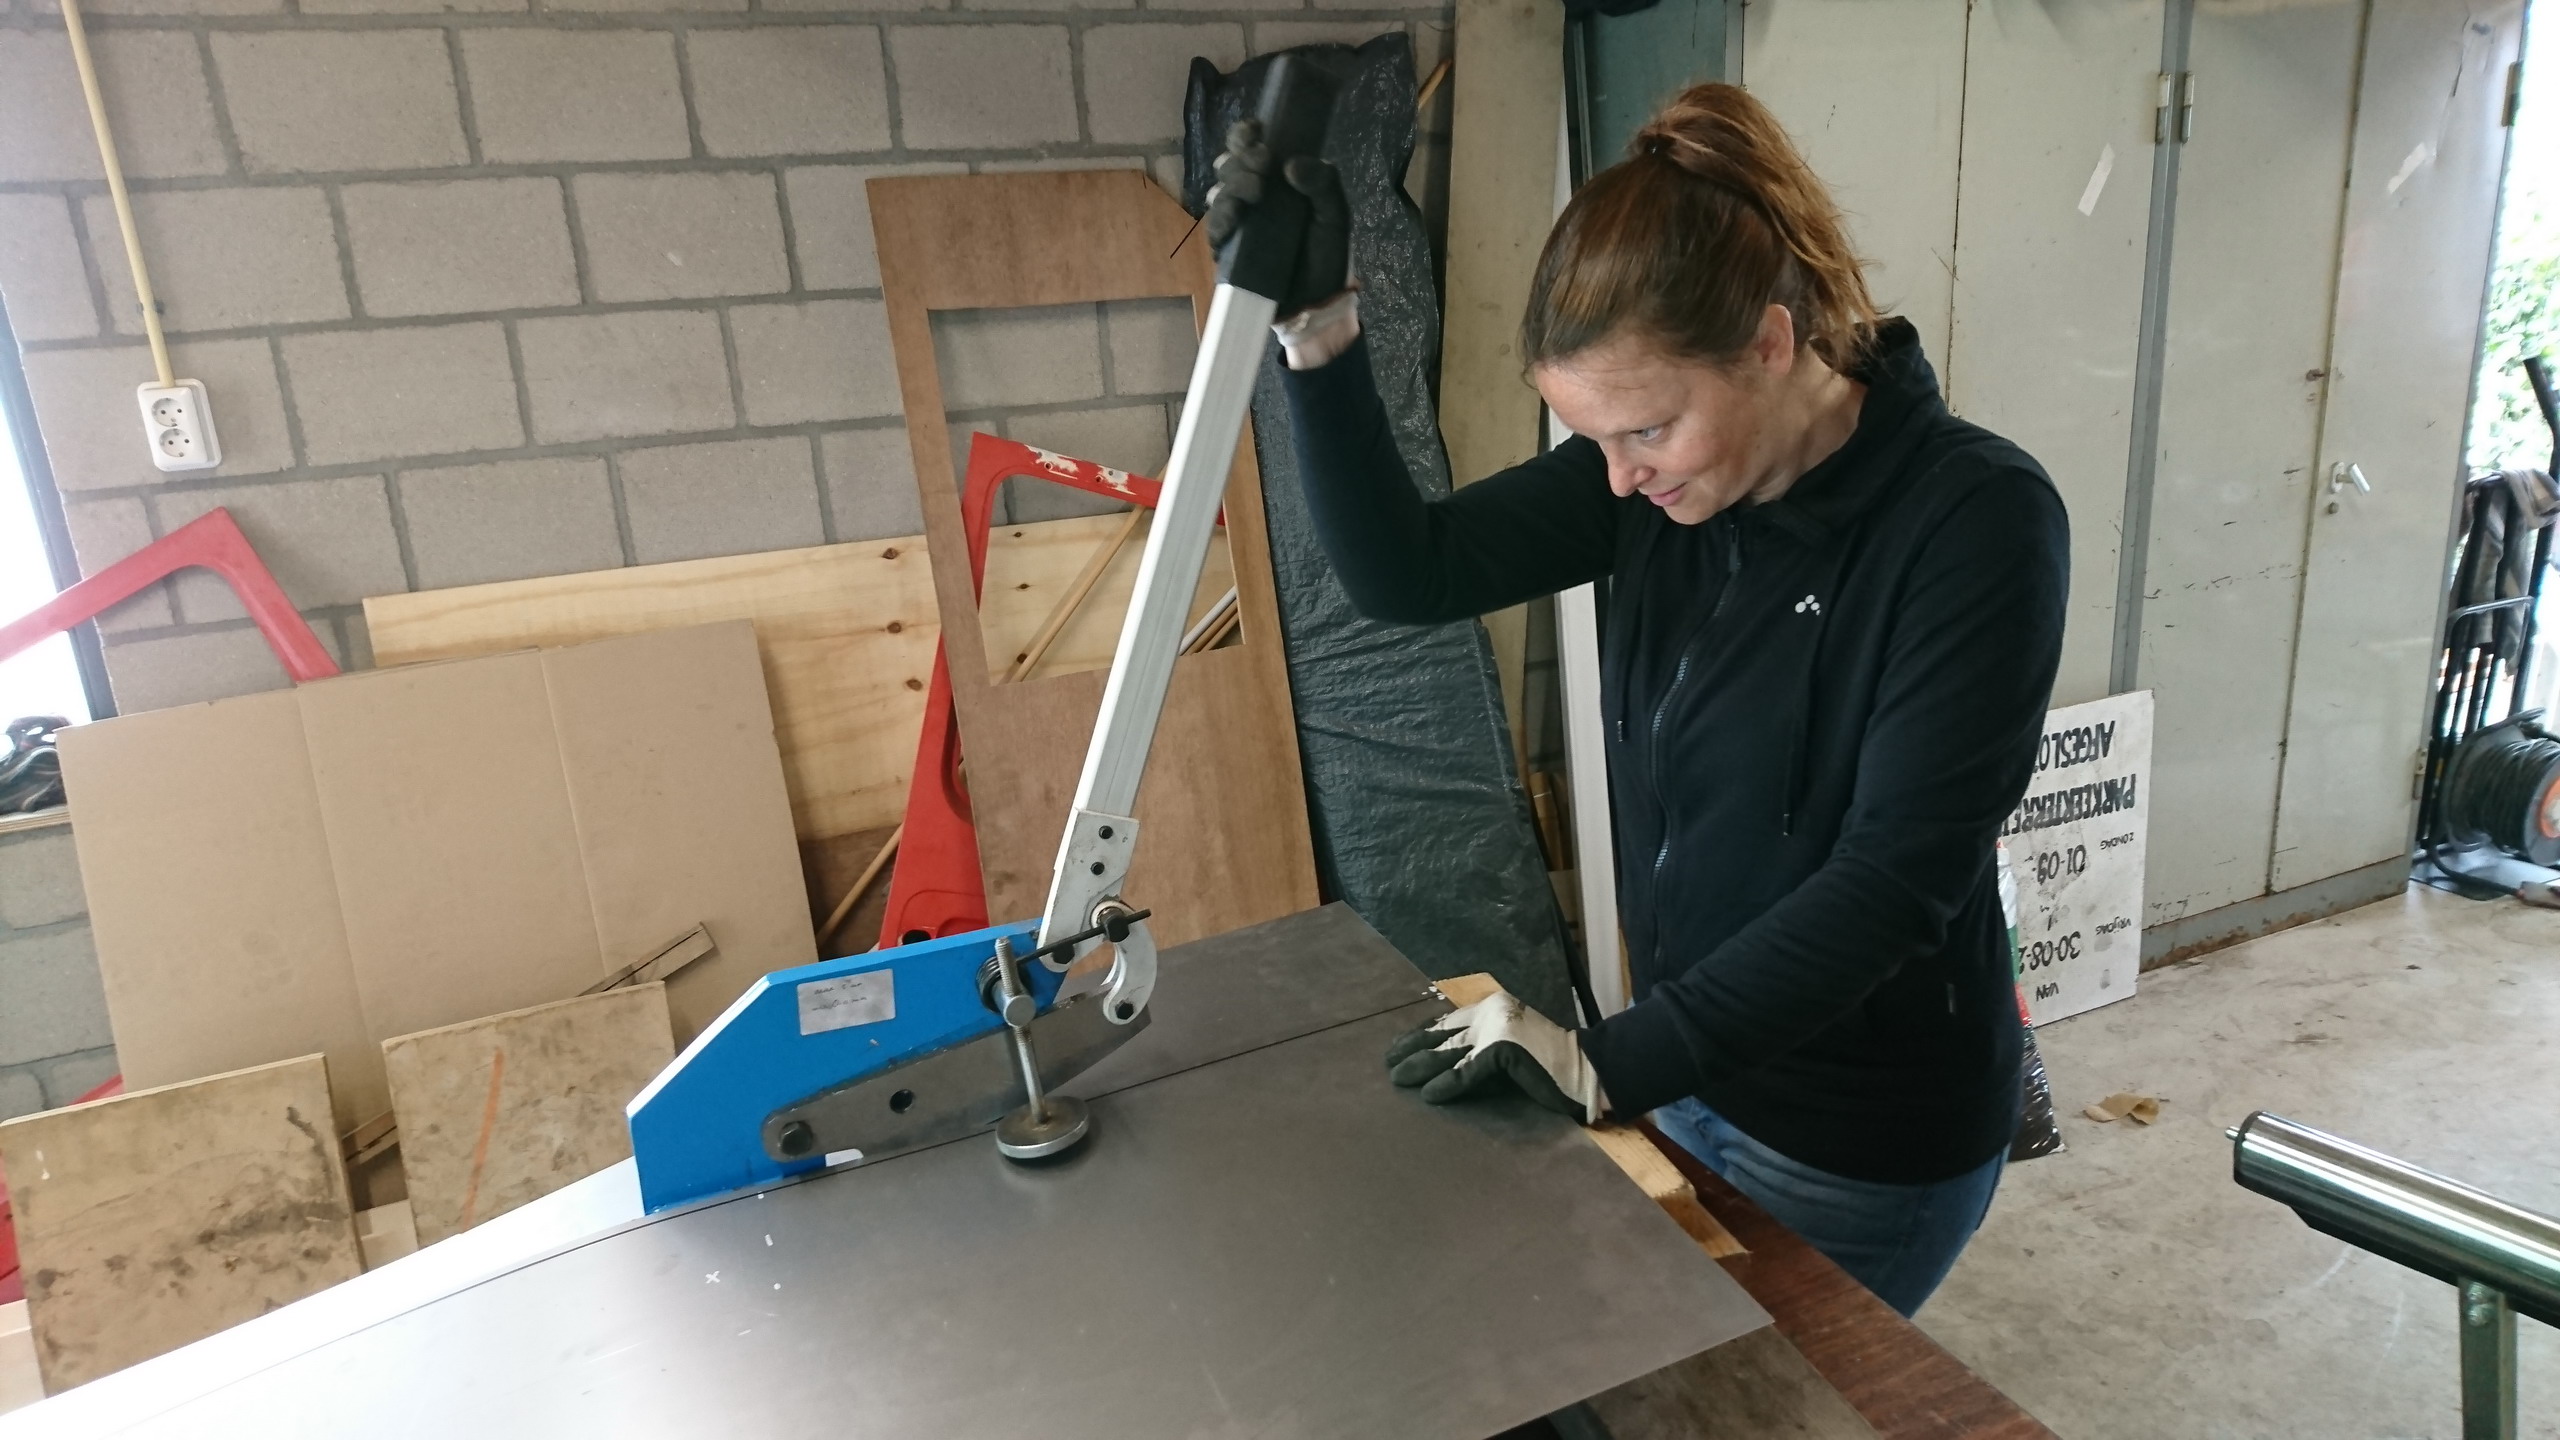
  • removed rear side windows and welded steel plate in place
  • repaired rear chassis cross member, a piece was removed there to make room for the pump
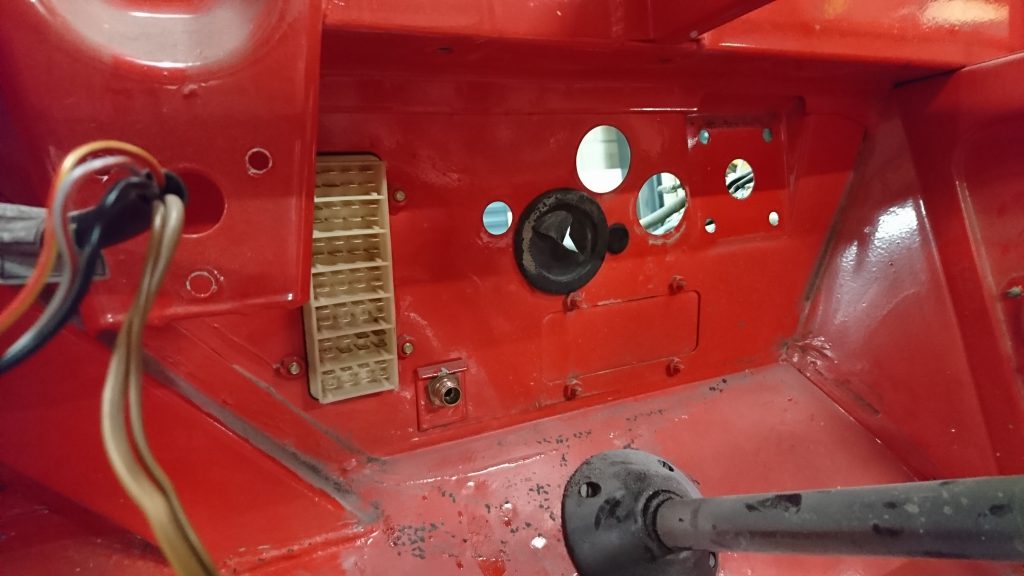
  • moved the fuel tank from the right to the left side
  • fixed a leak in the fuel tank and repainted it
  • removed glued floor covering
  • created fender supports and rear light supports
  • created rear safety bar
  • added towing points on chassis rear cross member
  • removed the gearbox PTO attachment point and covered it up with, well, a custom cover
  • had grill, bumper, steps and winch sandblasted and painted
  • prepared install of central door locks
  • added an always-on 12 volt cable to the dashboard
  • removed door windows and up/down mechanism
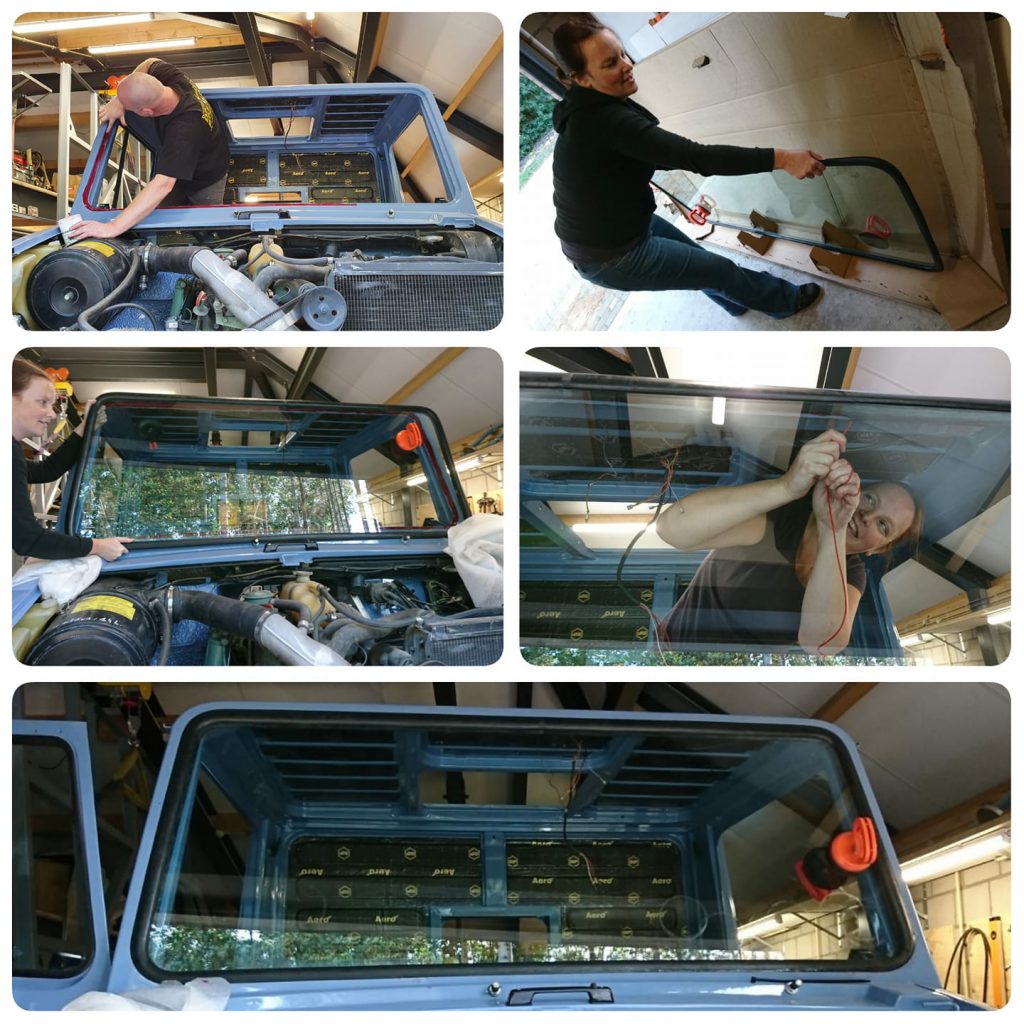
  • removed doors and windshield
  • cleared rust from windshield sill, closed holes and sanded everything
  • sanded glove compartment cover, fixed holes and covered with black foil
  • sanded dashboard, closed holes and covered with black foil
  • installed new exhaust and stainless steel muffler
  • modified safety bar at the rear
  • sanded body
  • tried making sun visor
  • moved the master brake cylinder slightly forward and downward
  • added a pneumatic quick connector
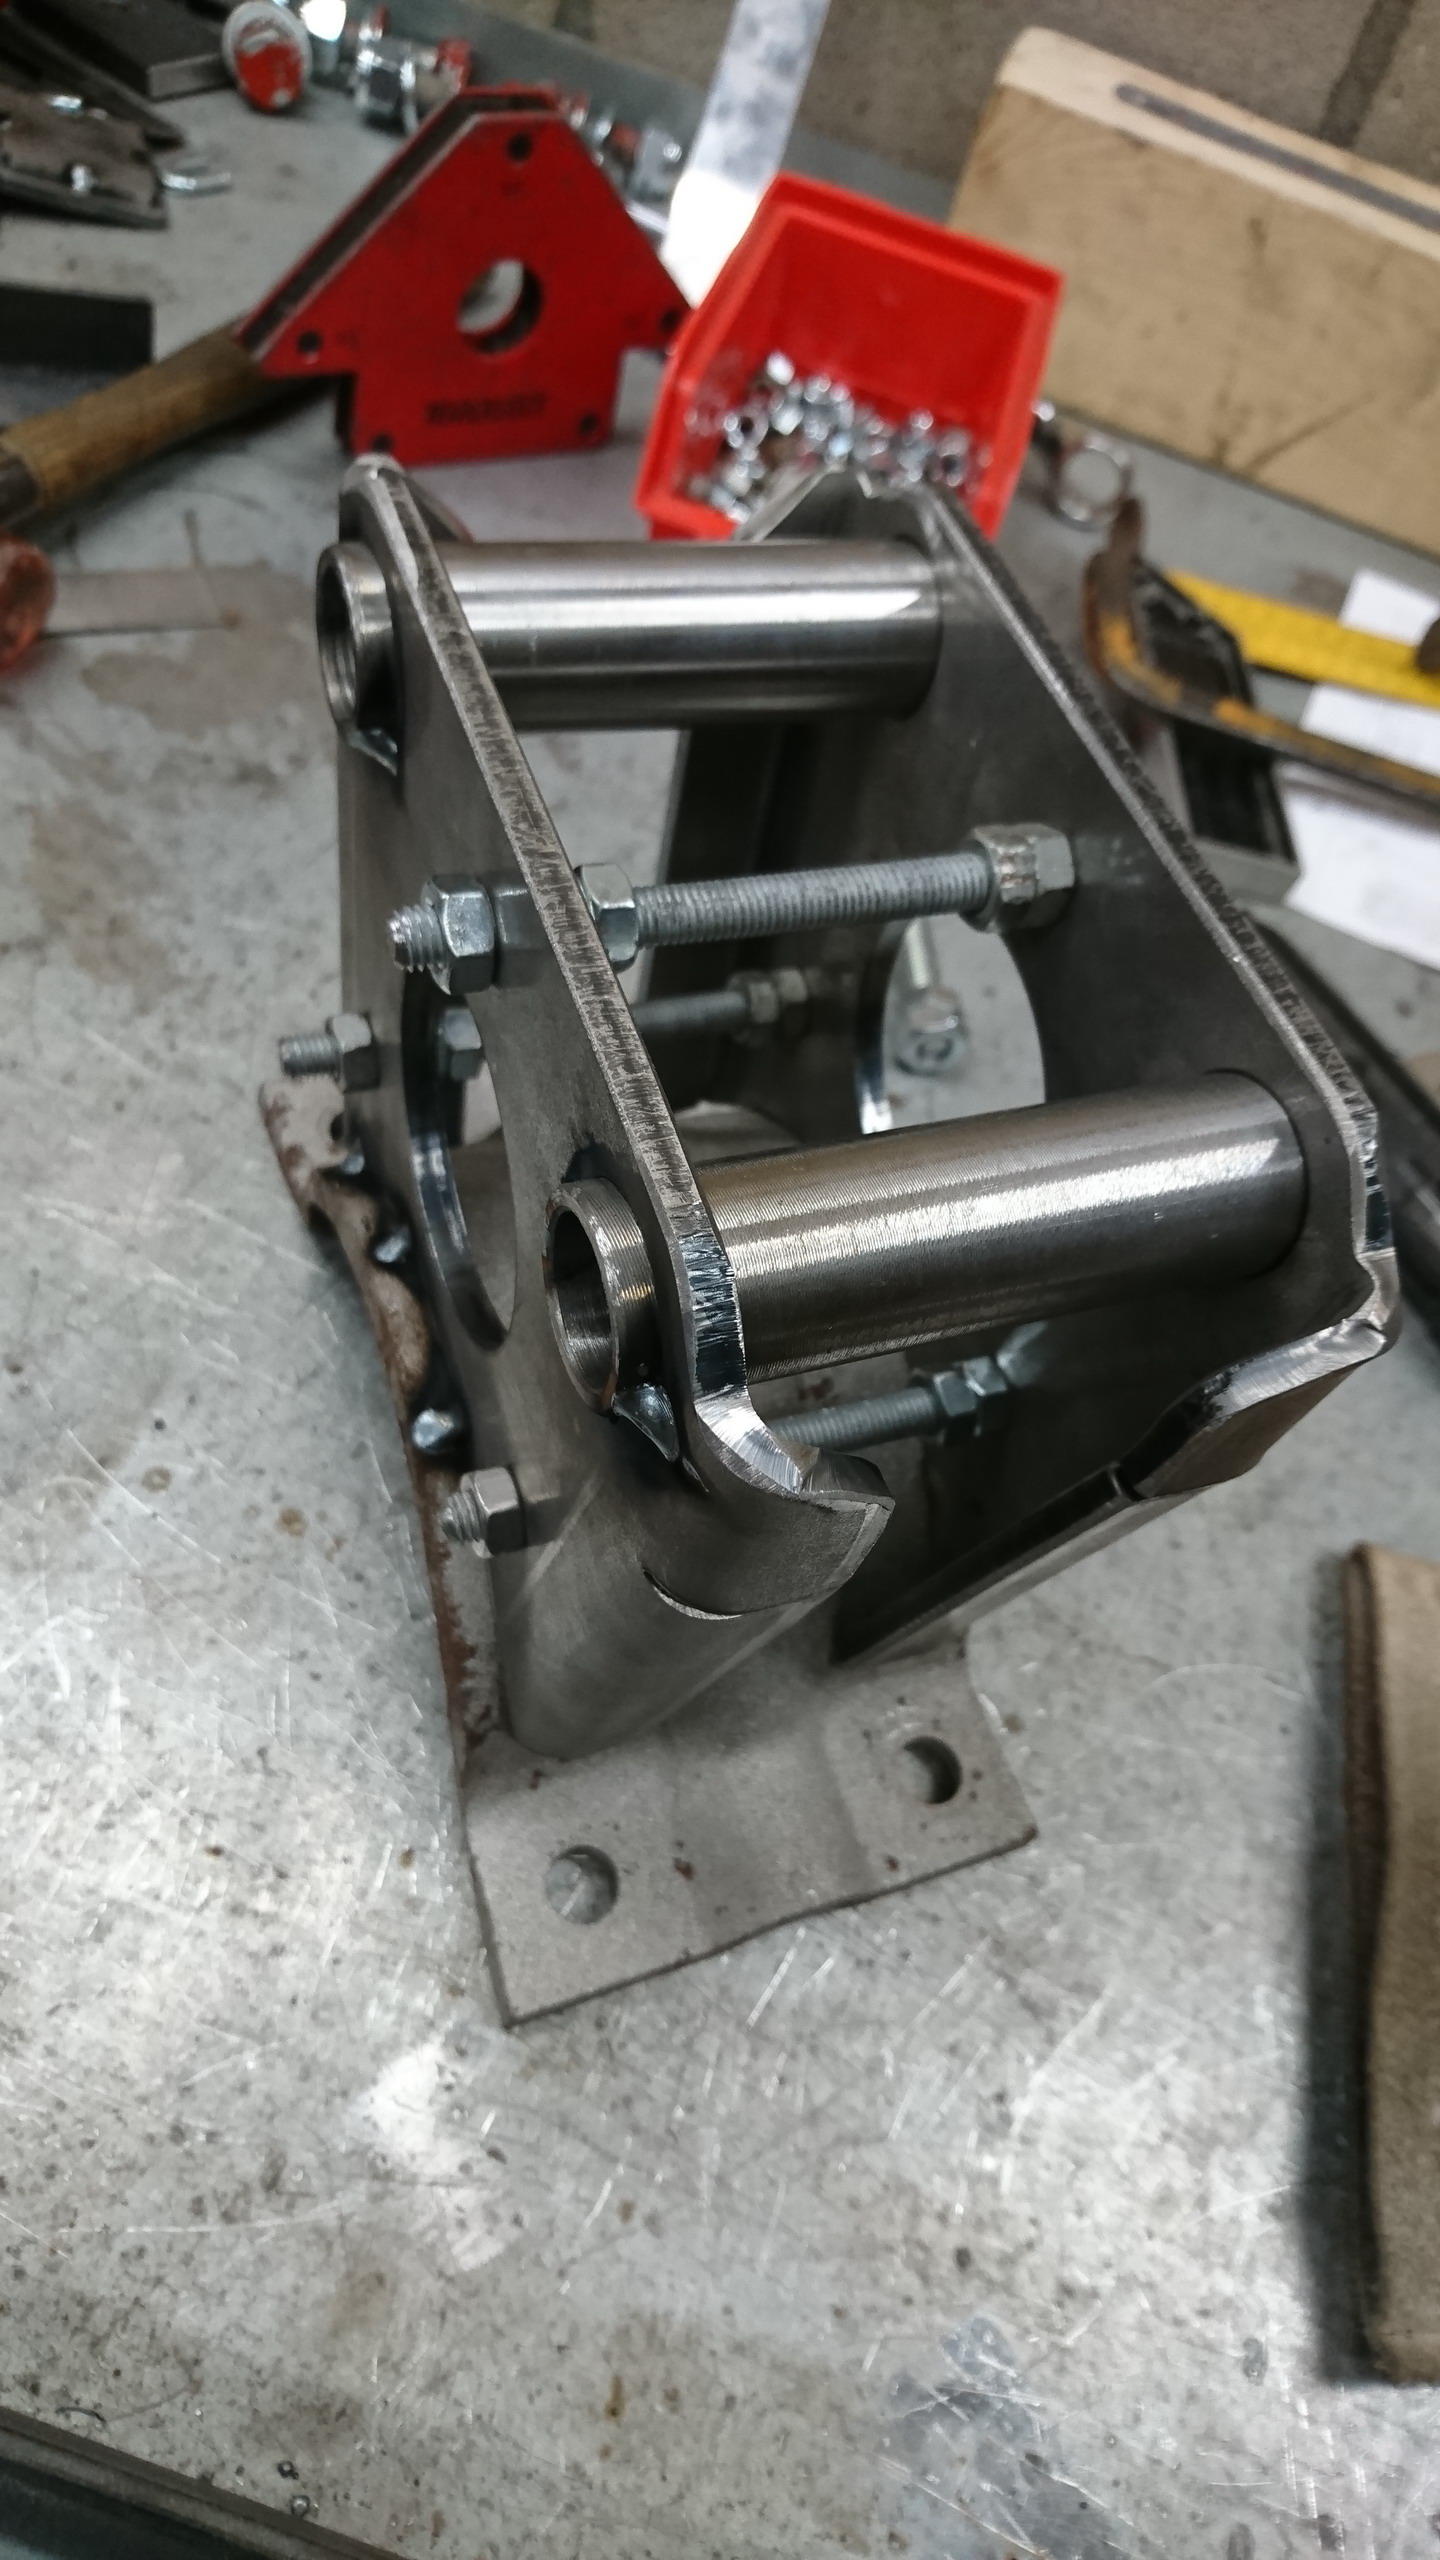
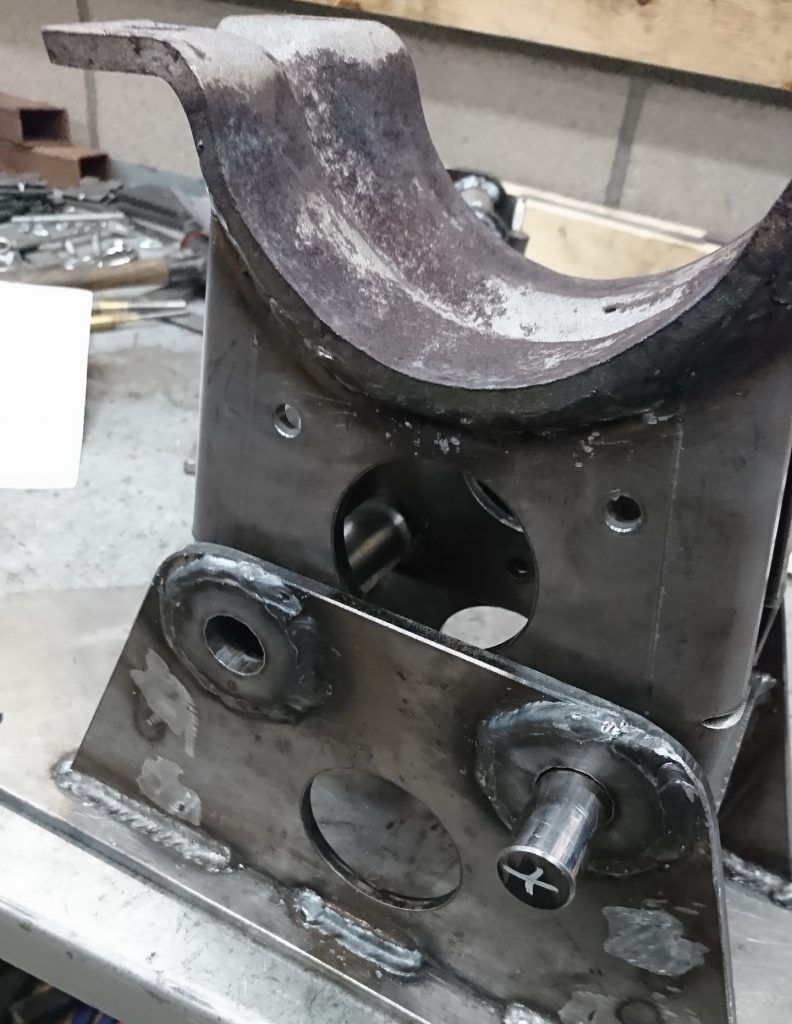
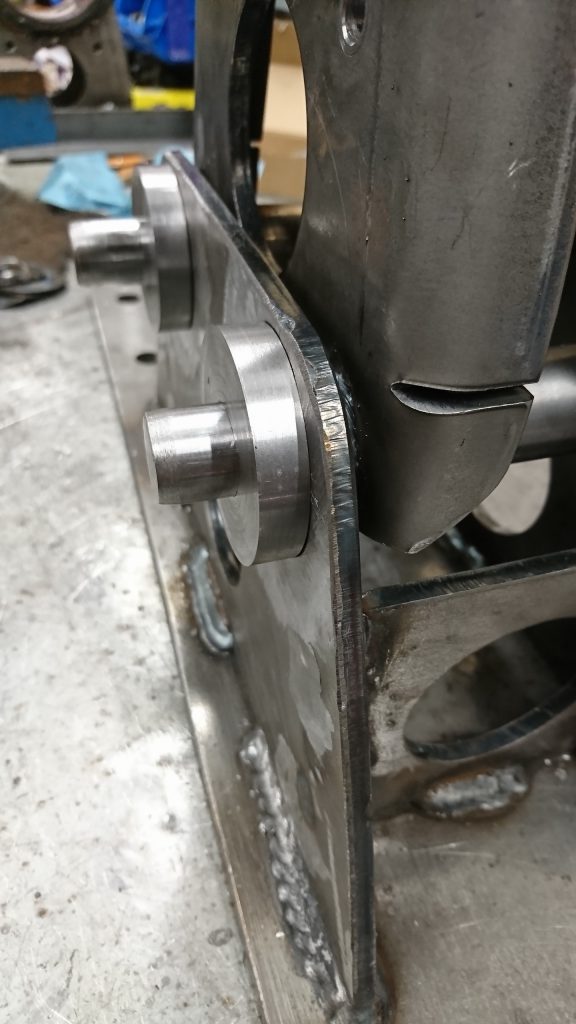
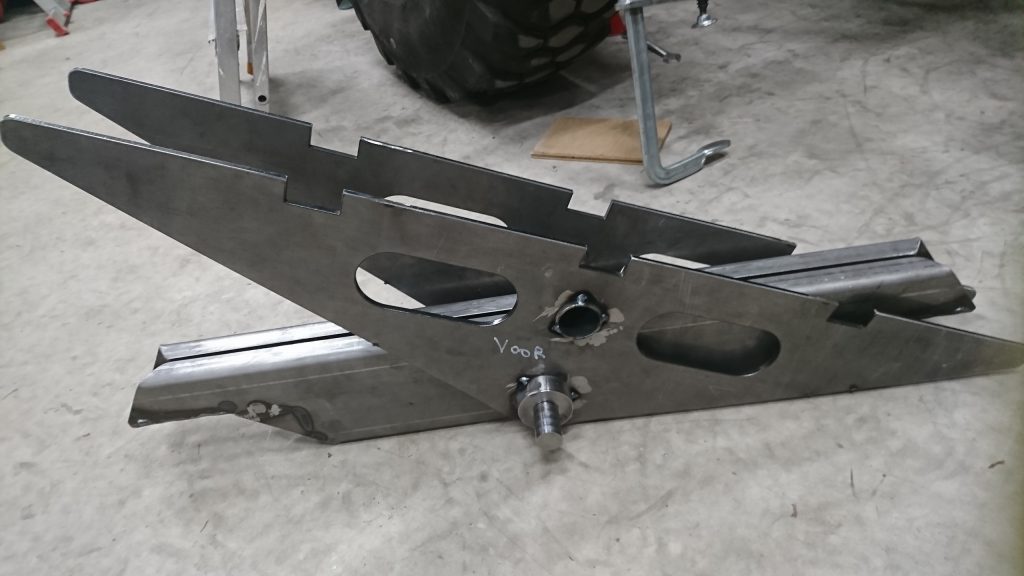
  • designed camper body attachment
  • designed camper body with lifting roof
  • added rear lights wiring, including pole lights, license plate lighting etc
  • found new dashboard indicator lights and switches, designed dashboard for it
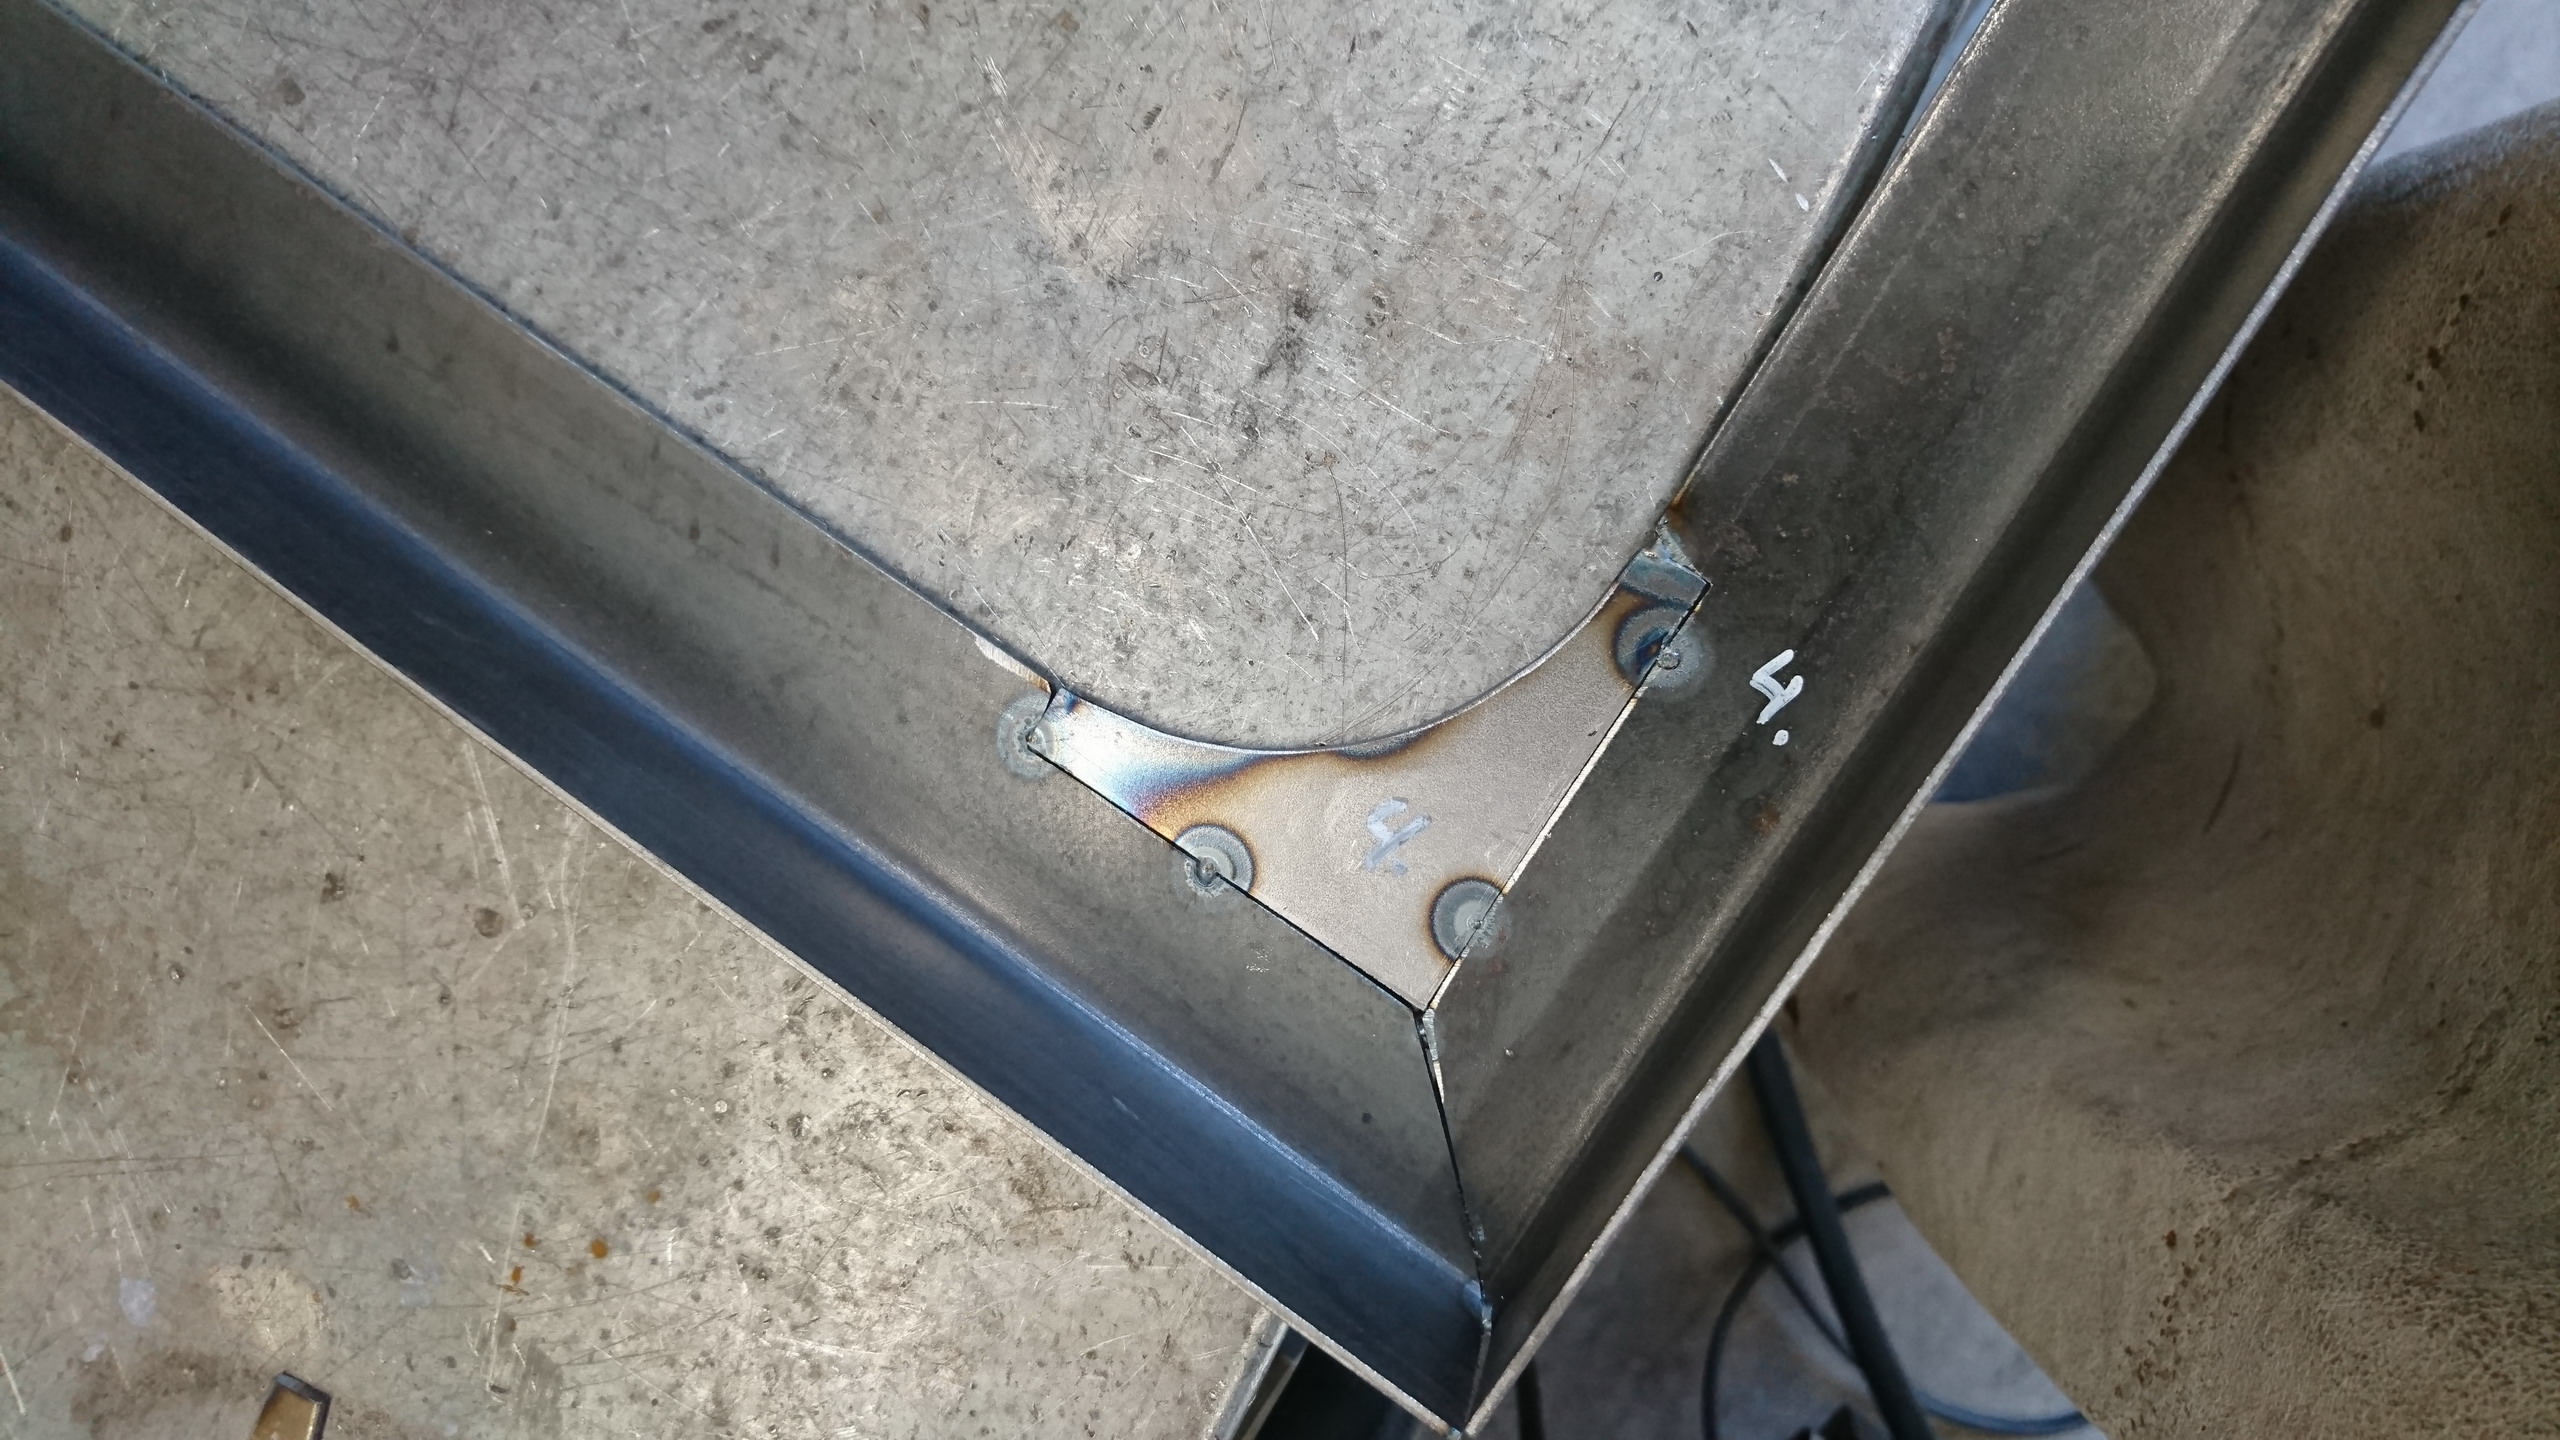
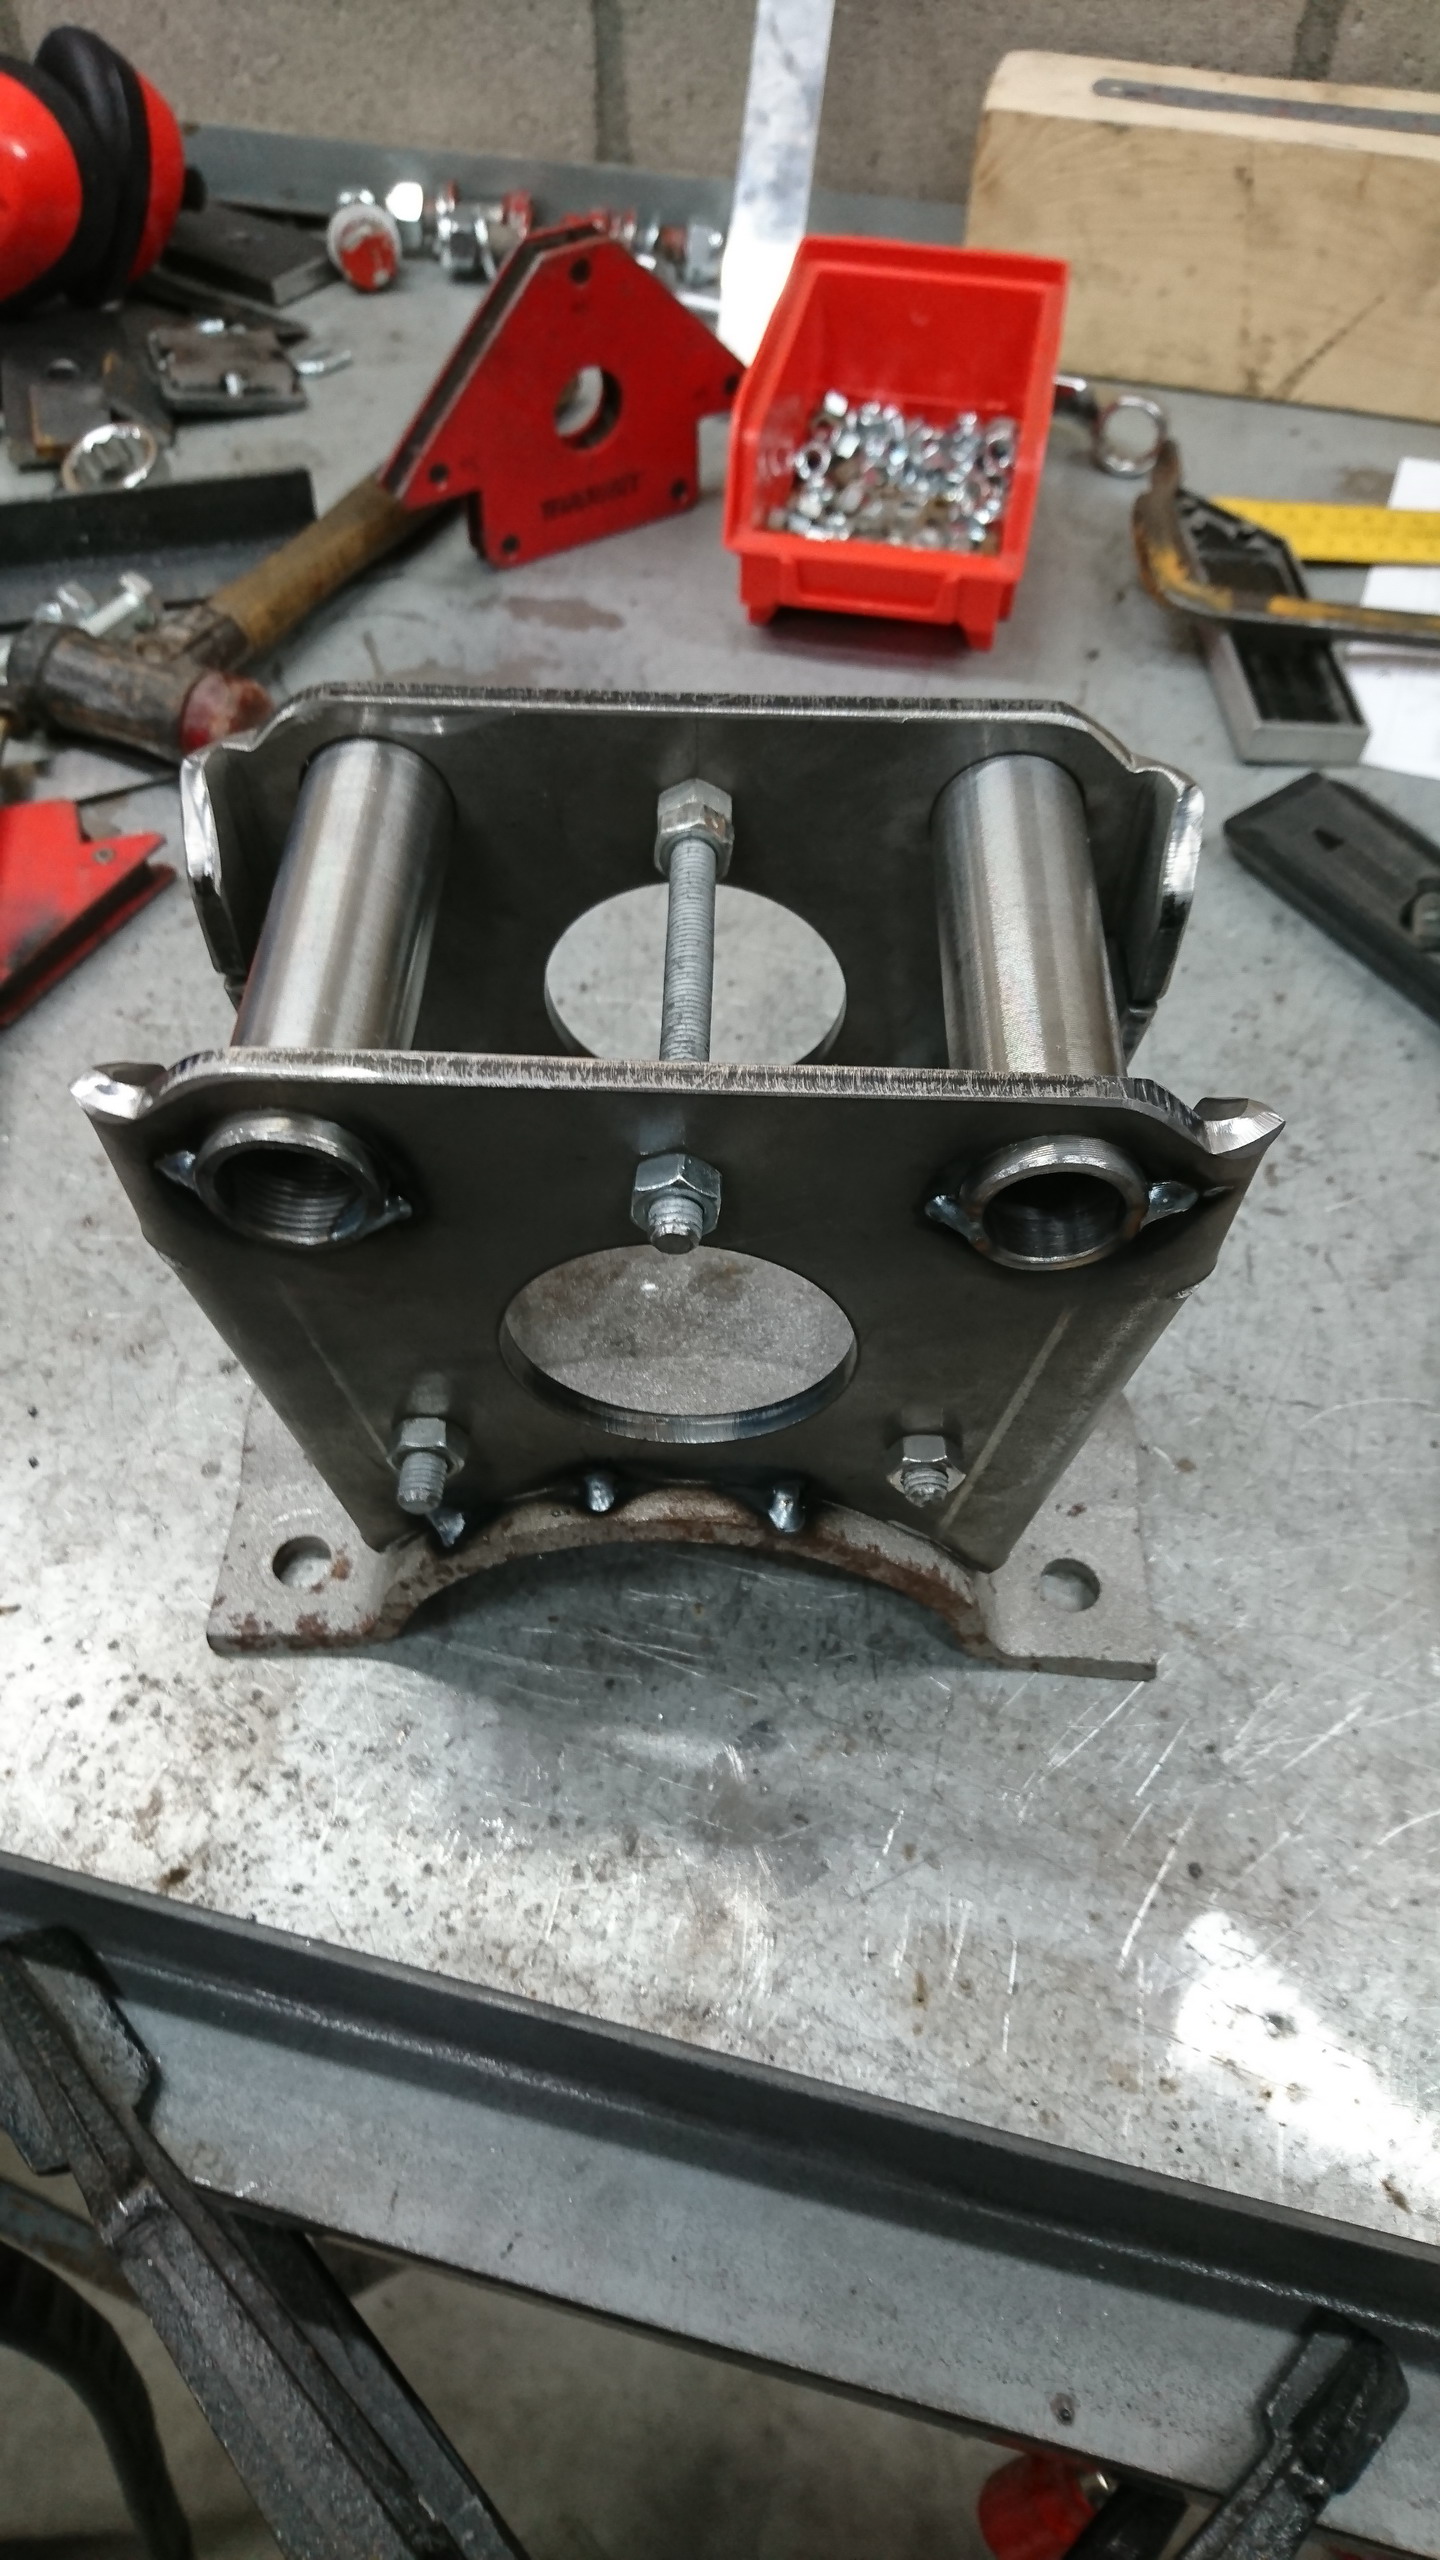
  • created technical drawings for camper body attachments and had parts laser cut from steel
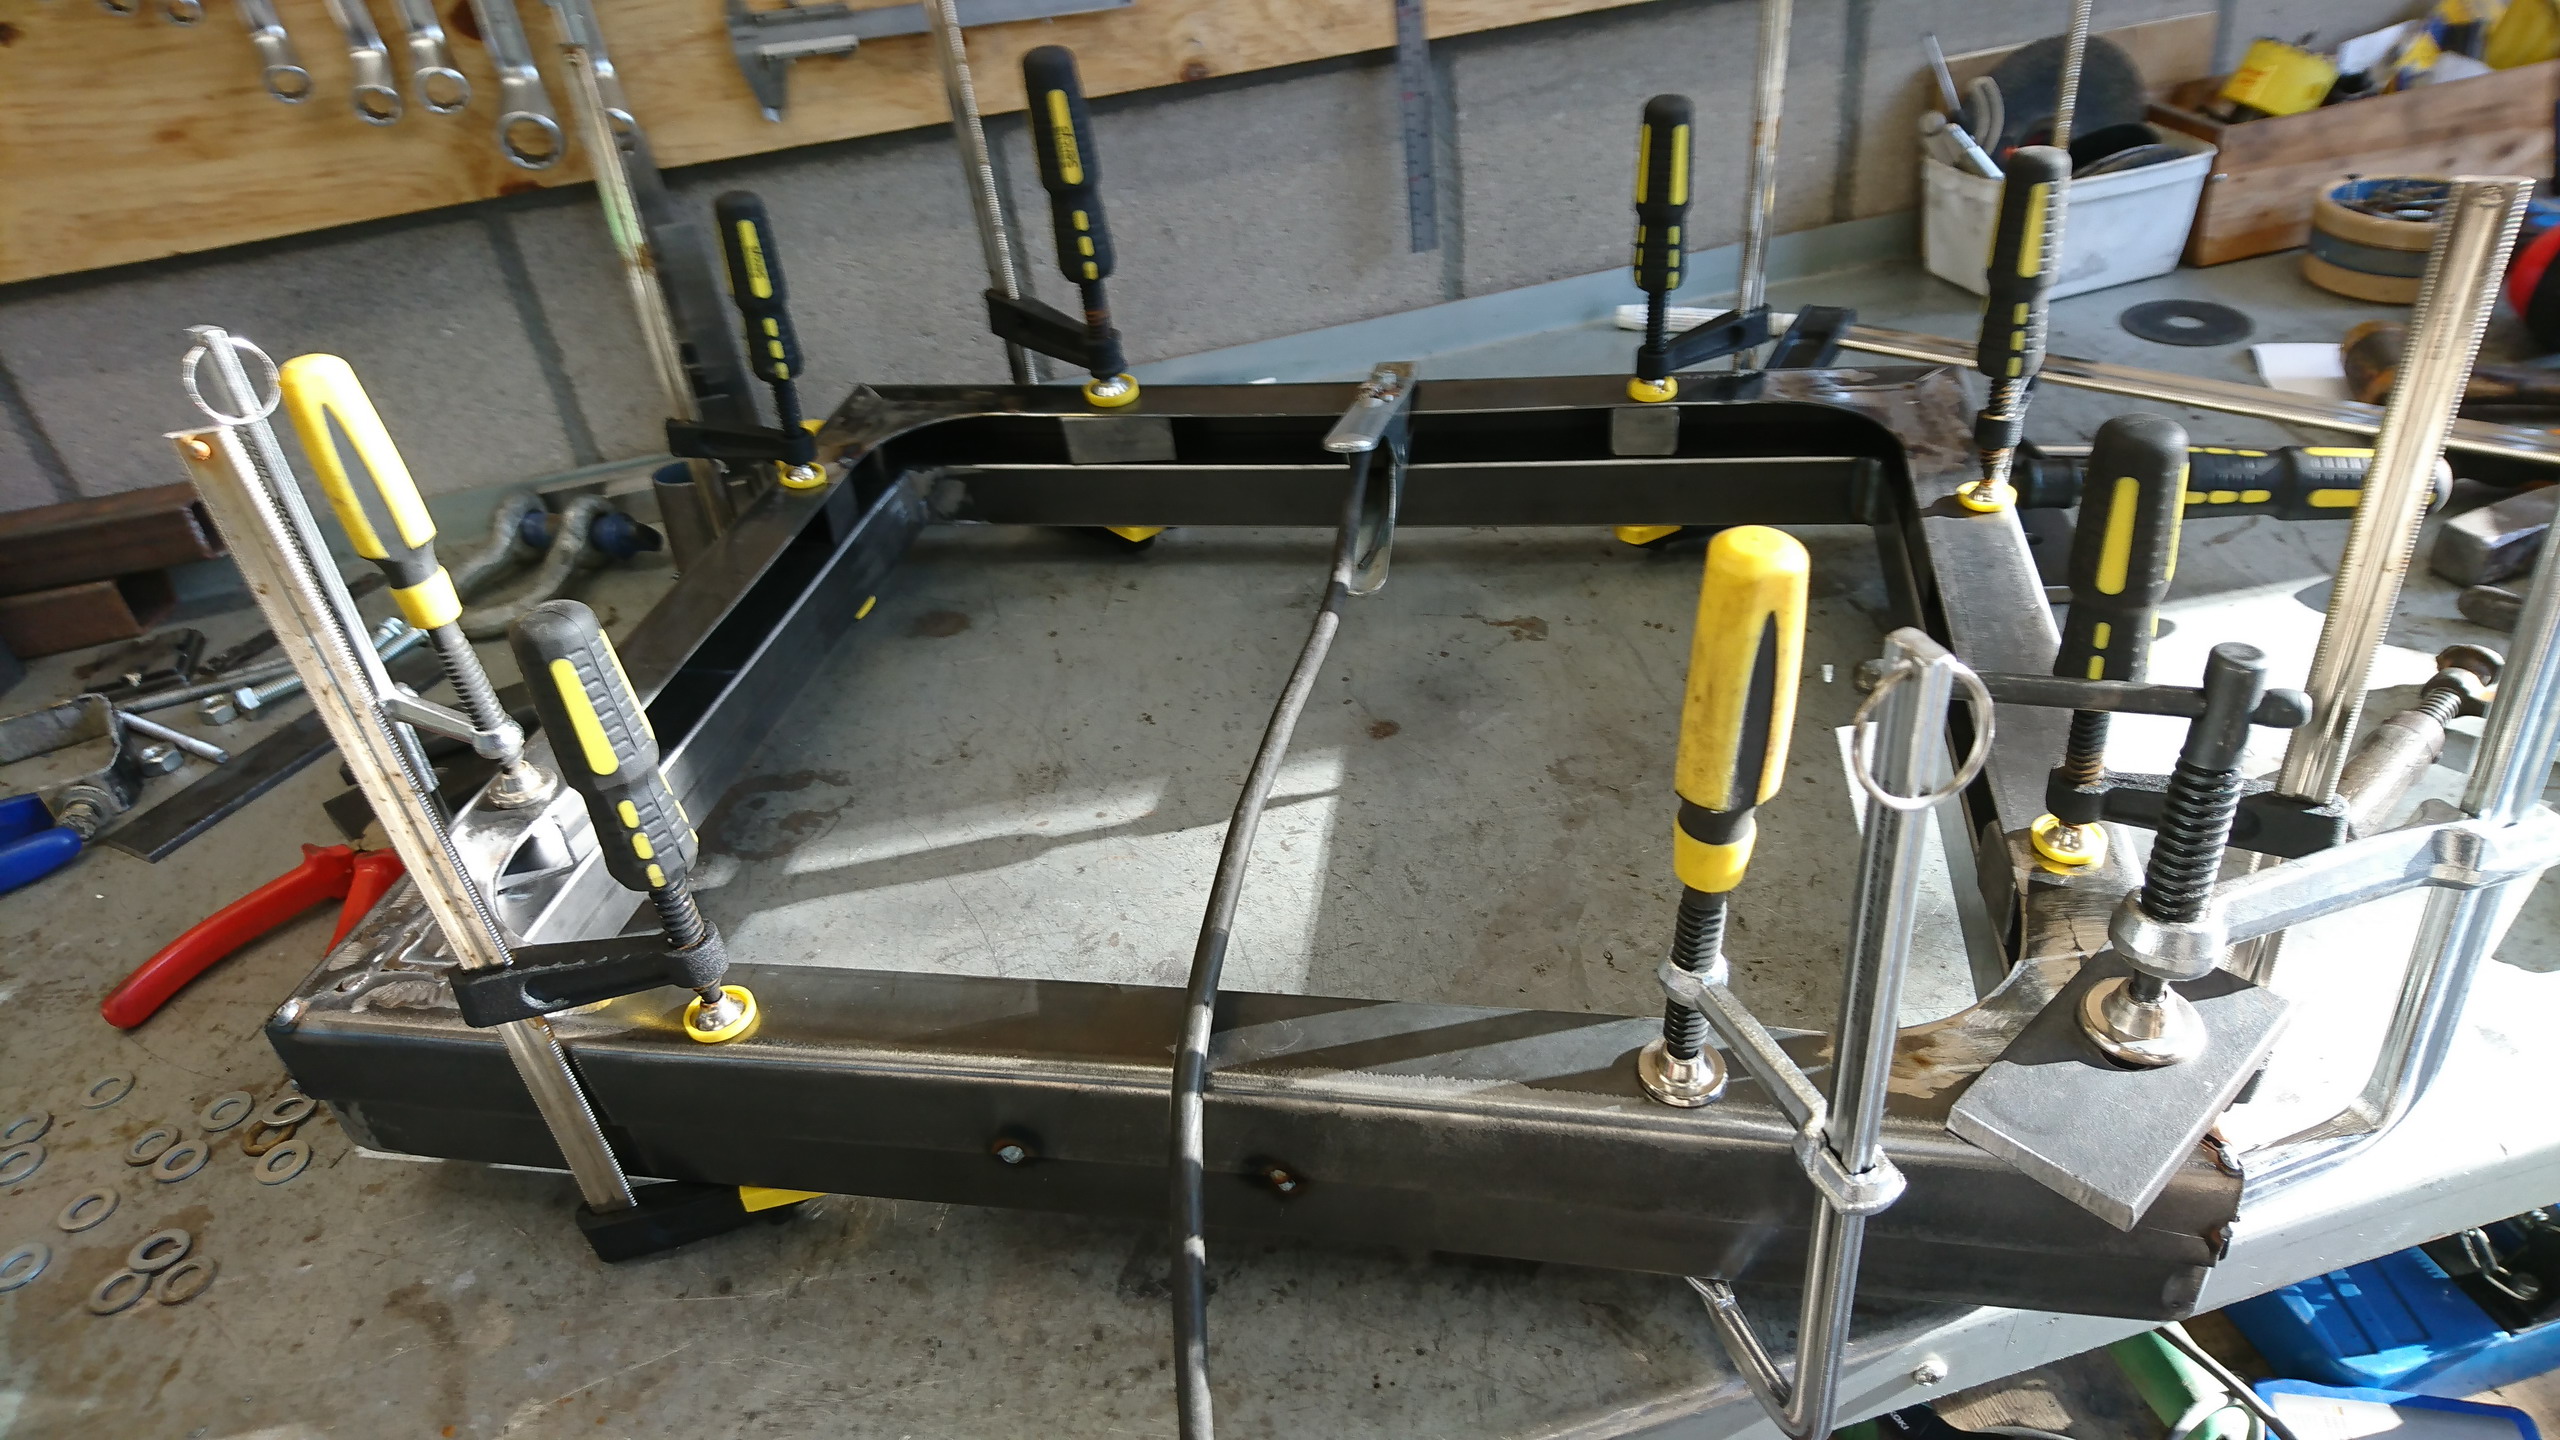
  • put together the camper body attachments, welded it and had it painted
  • added a very different hazard light switch
  • welded the floor frame for the camper body
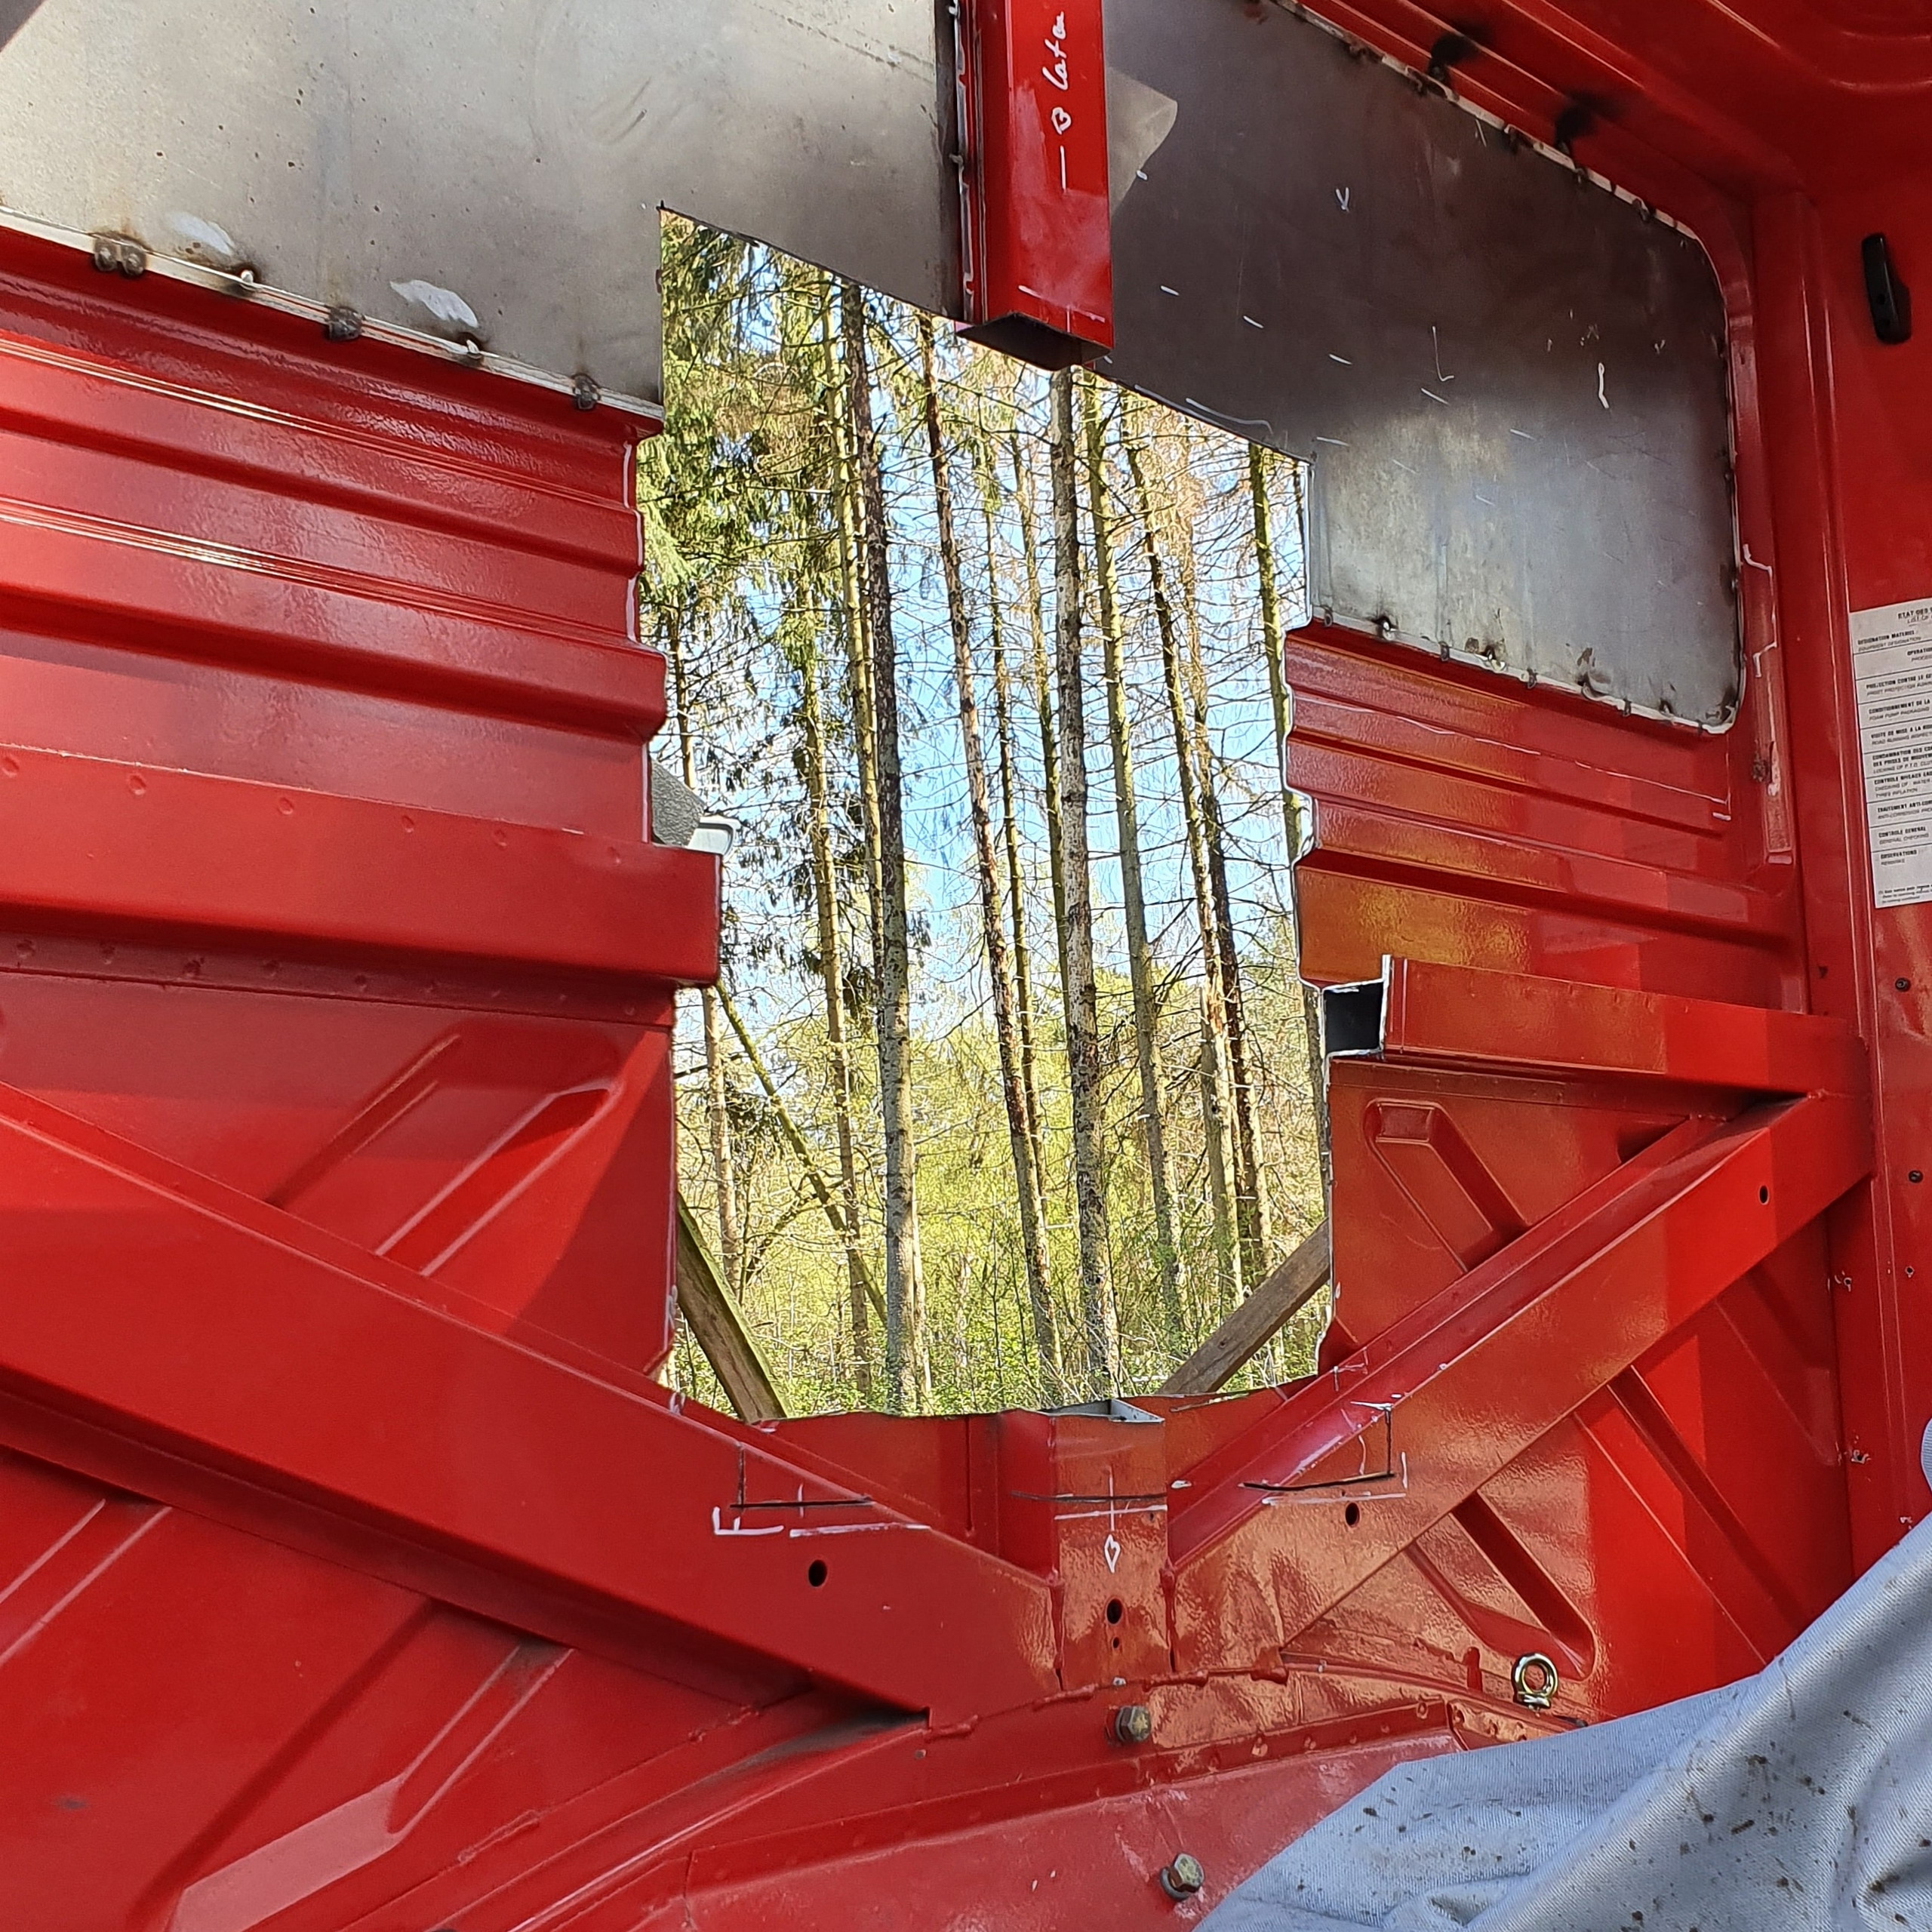
  • created a wooden pass through frame and tested it by crawling through it, it was large enough for the both of us
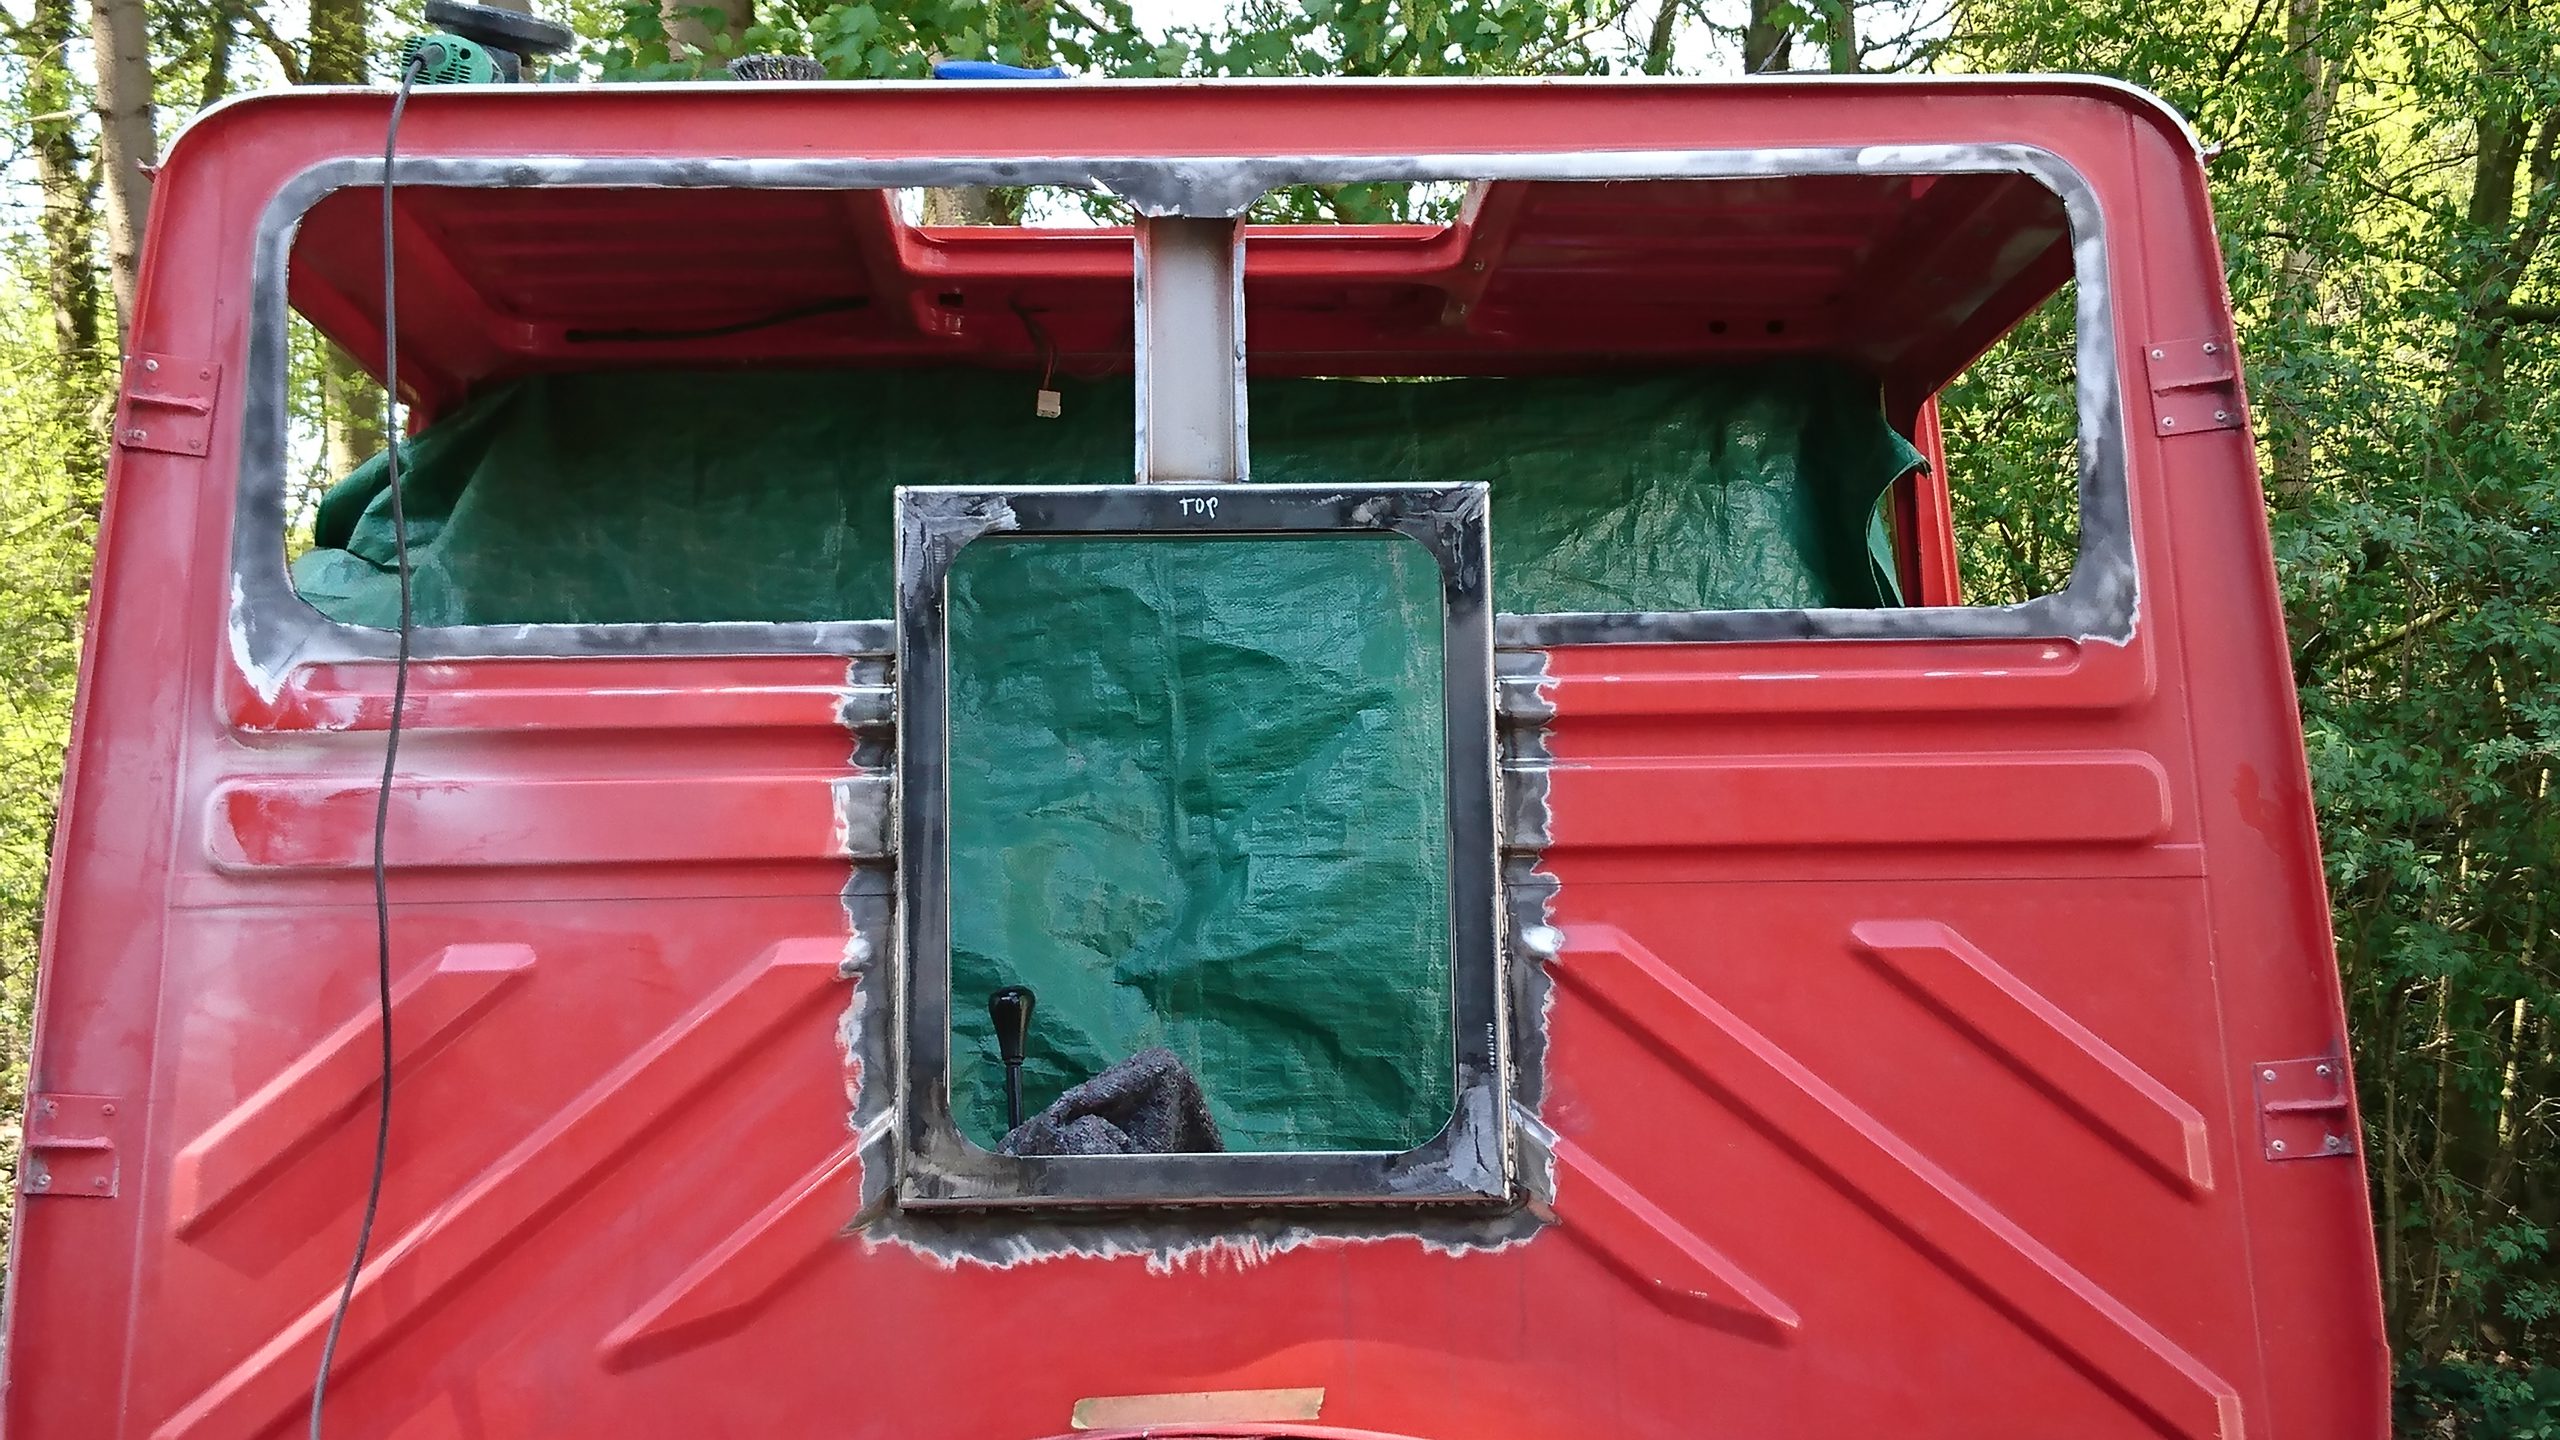
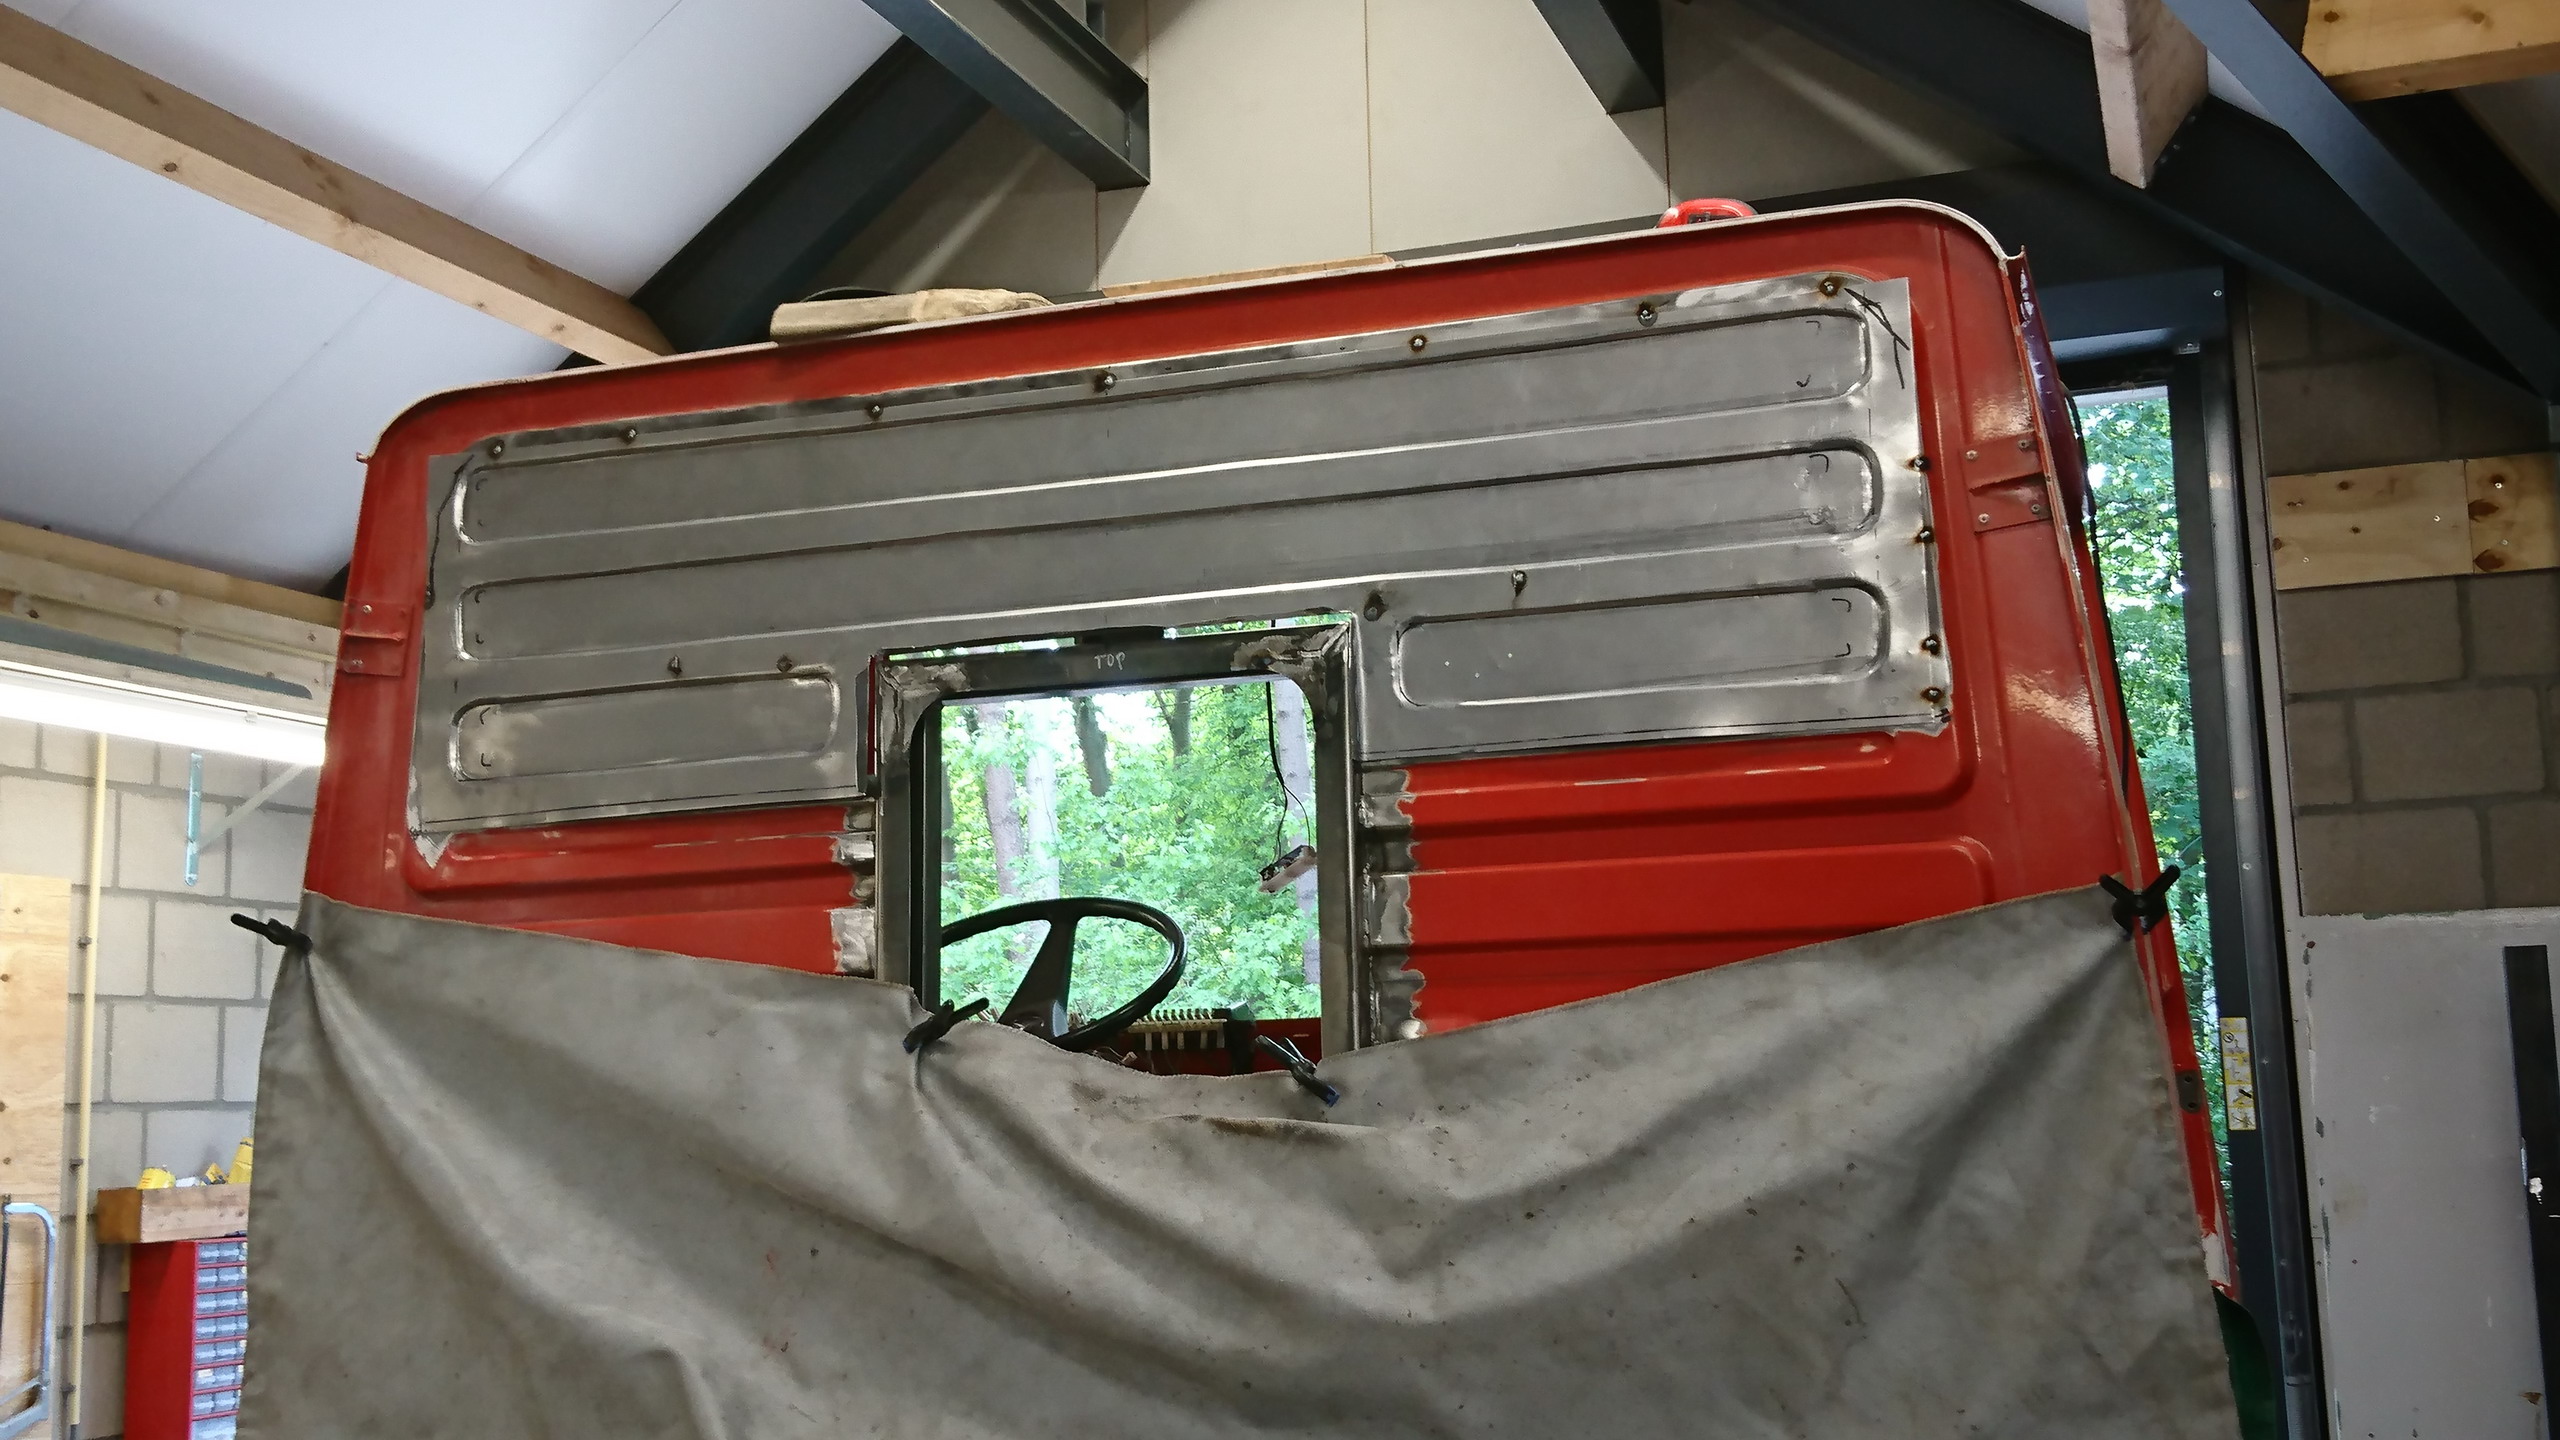
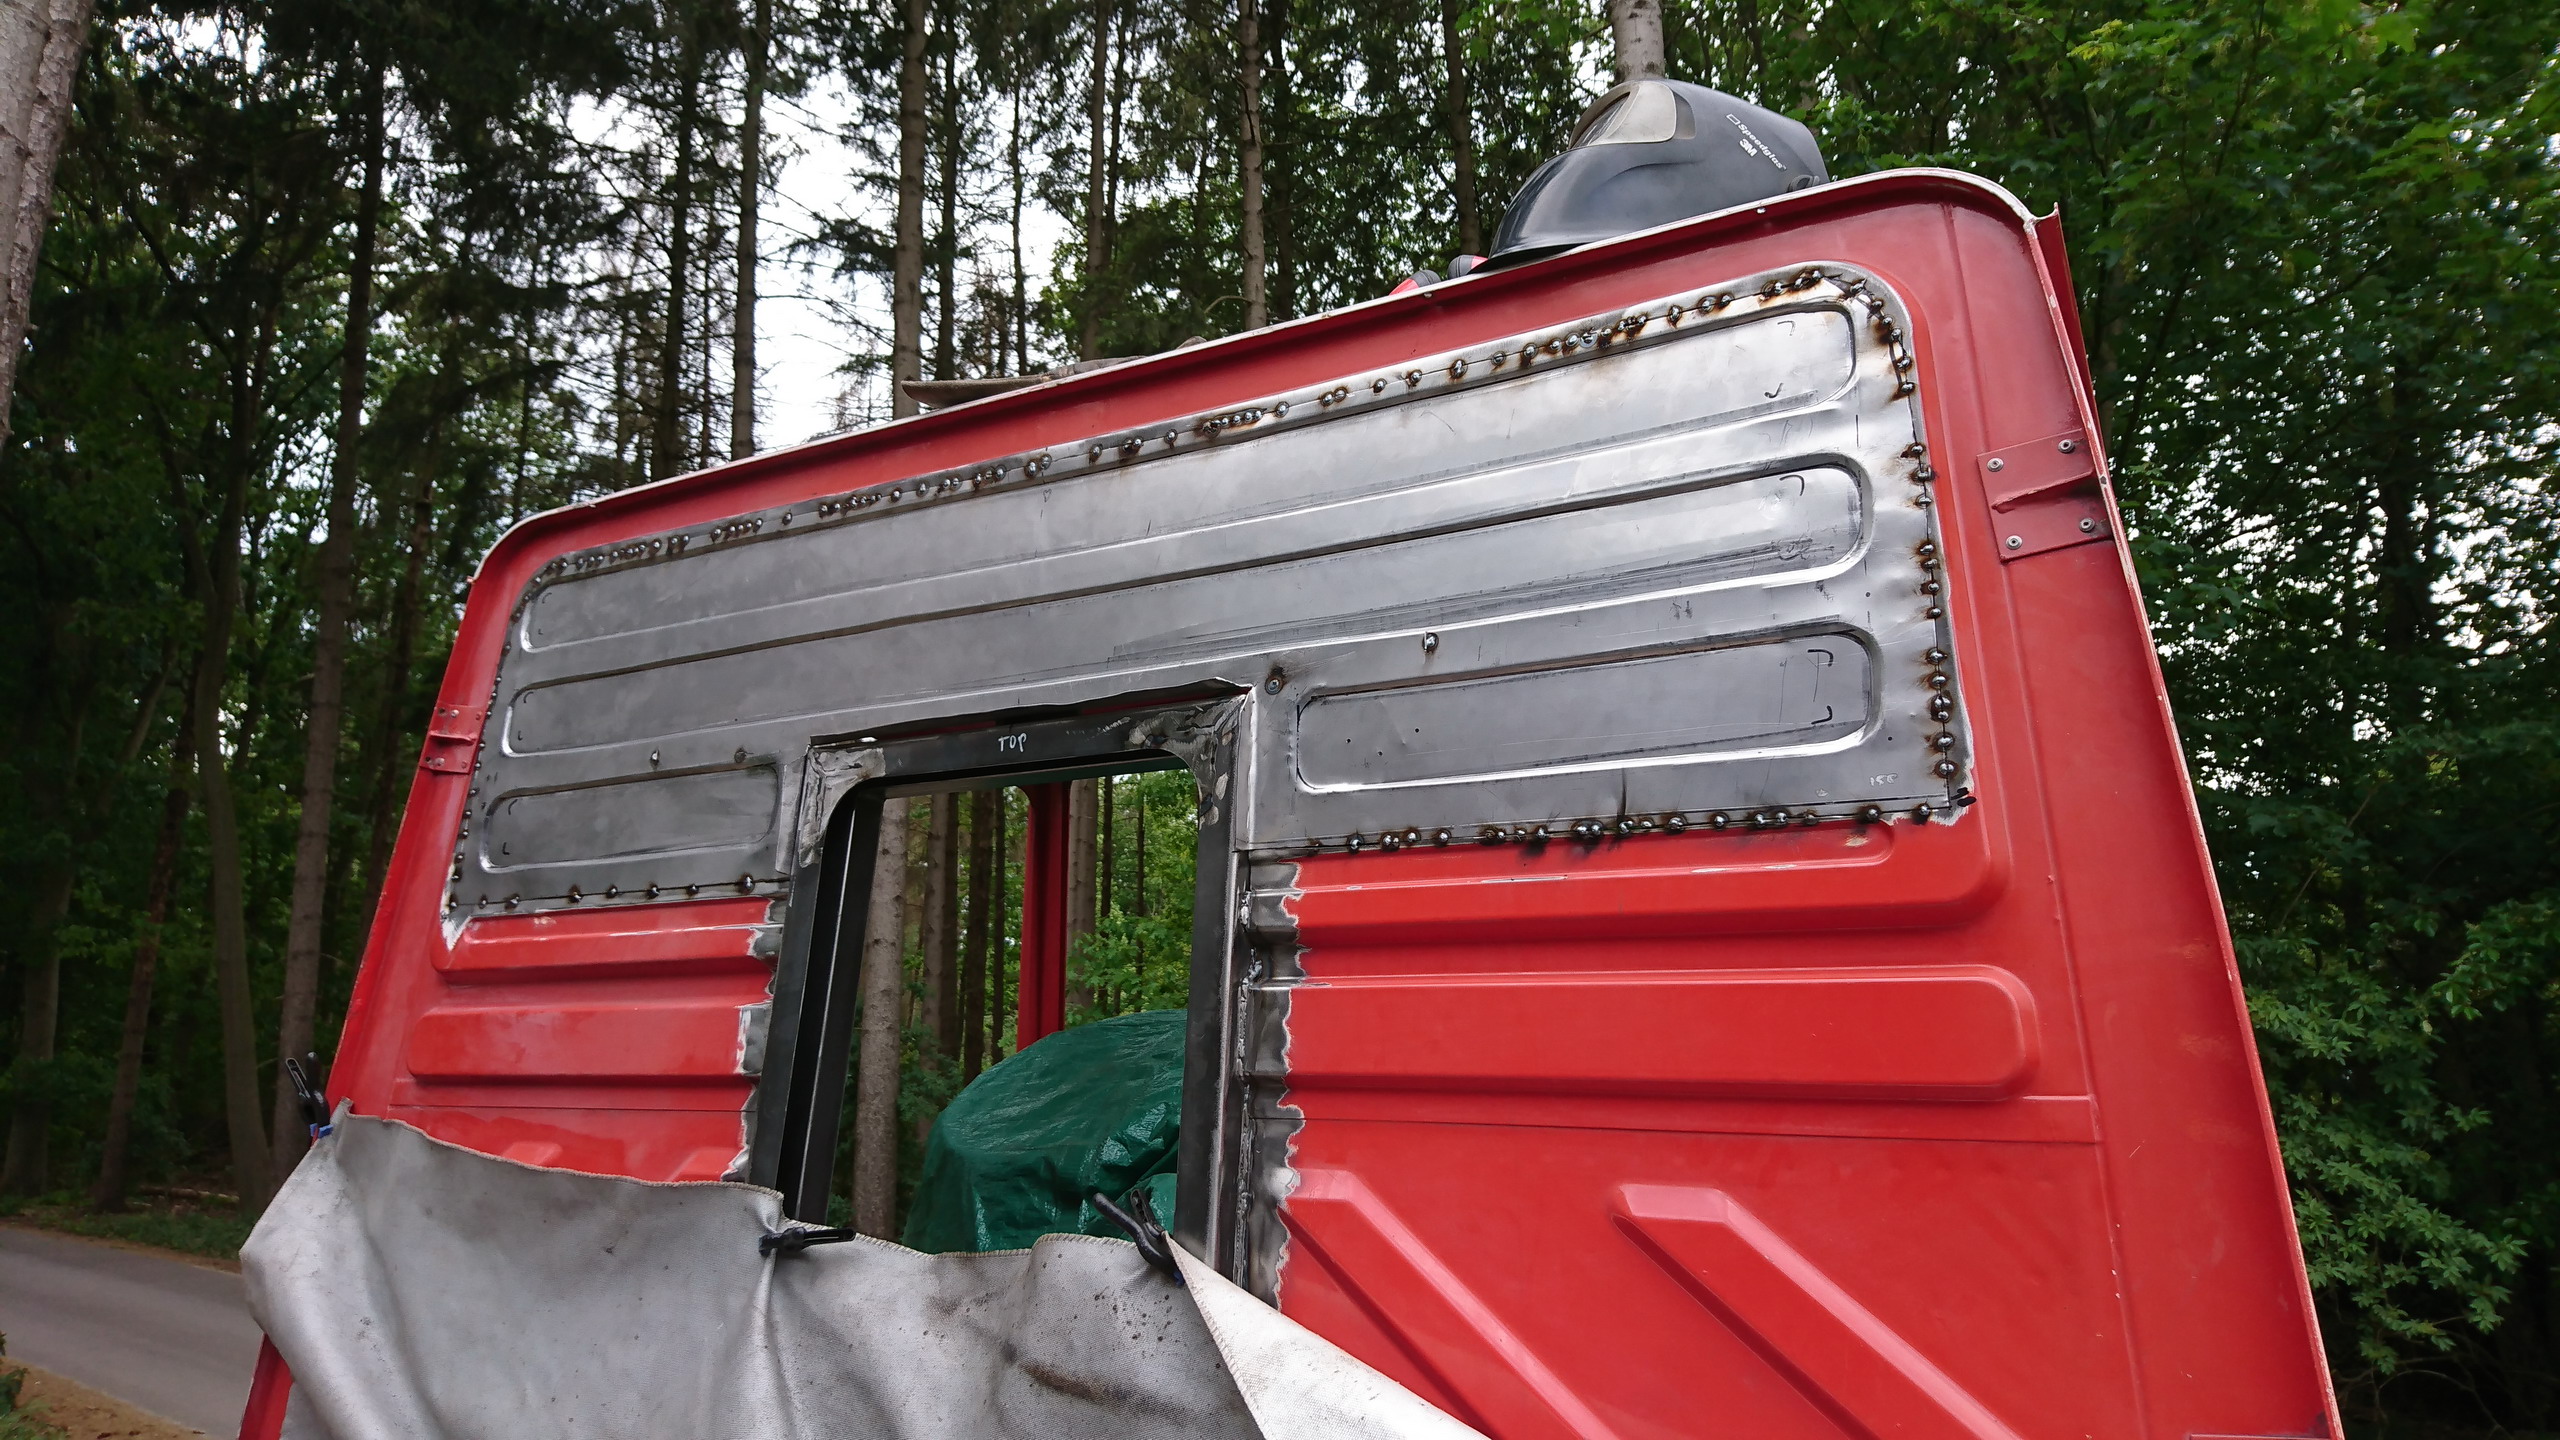
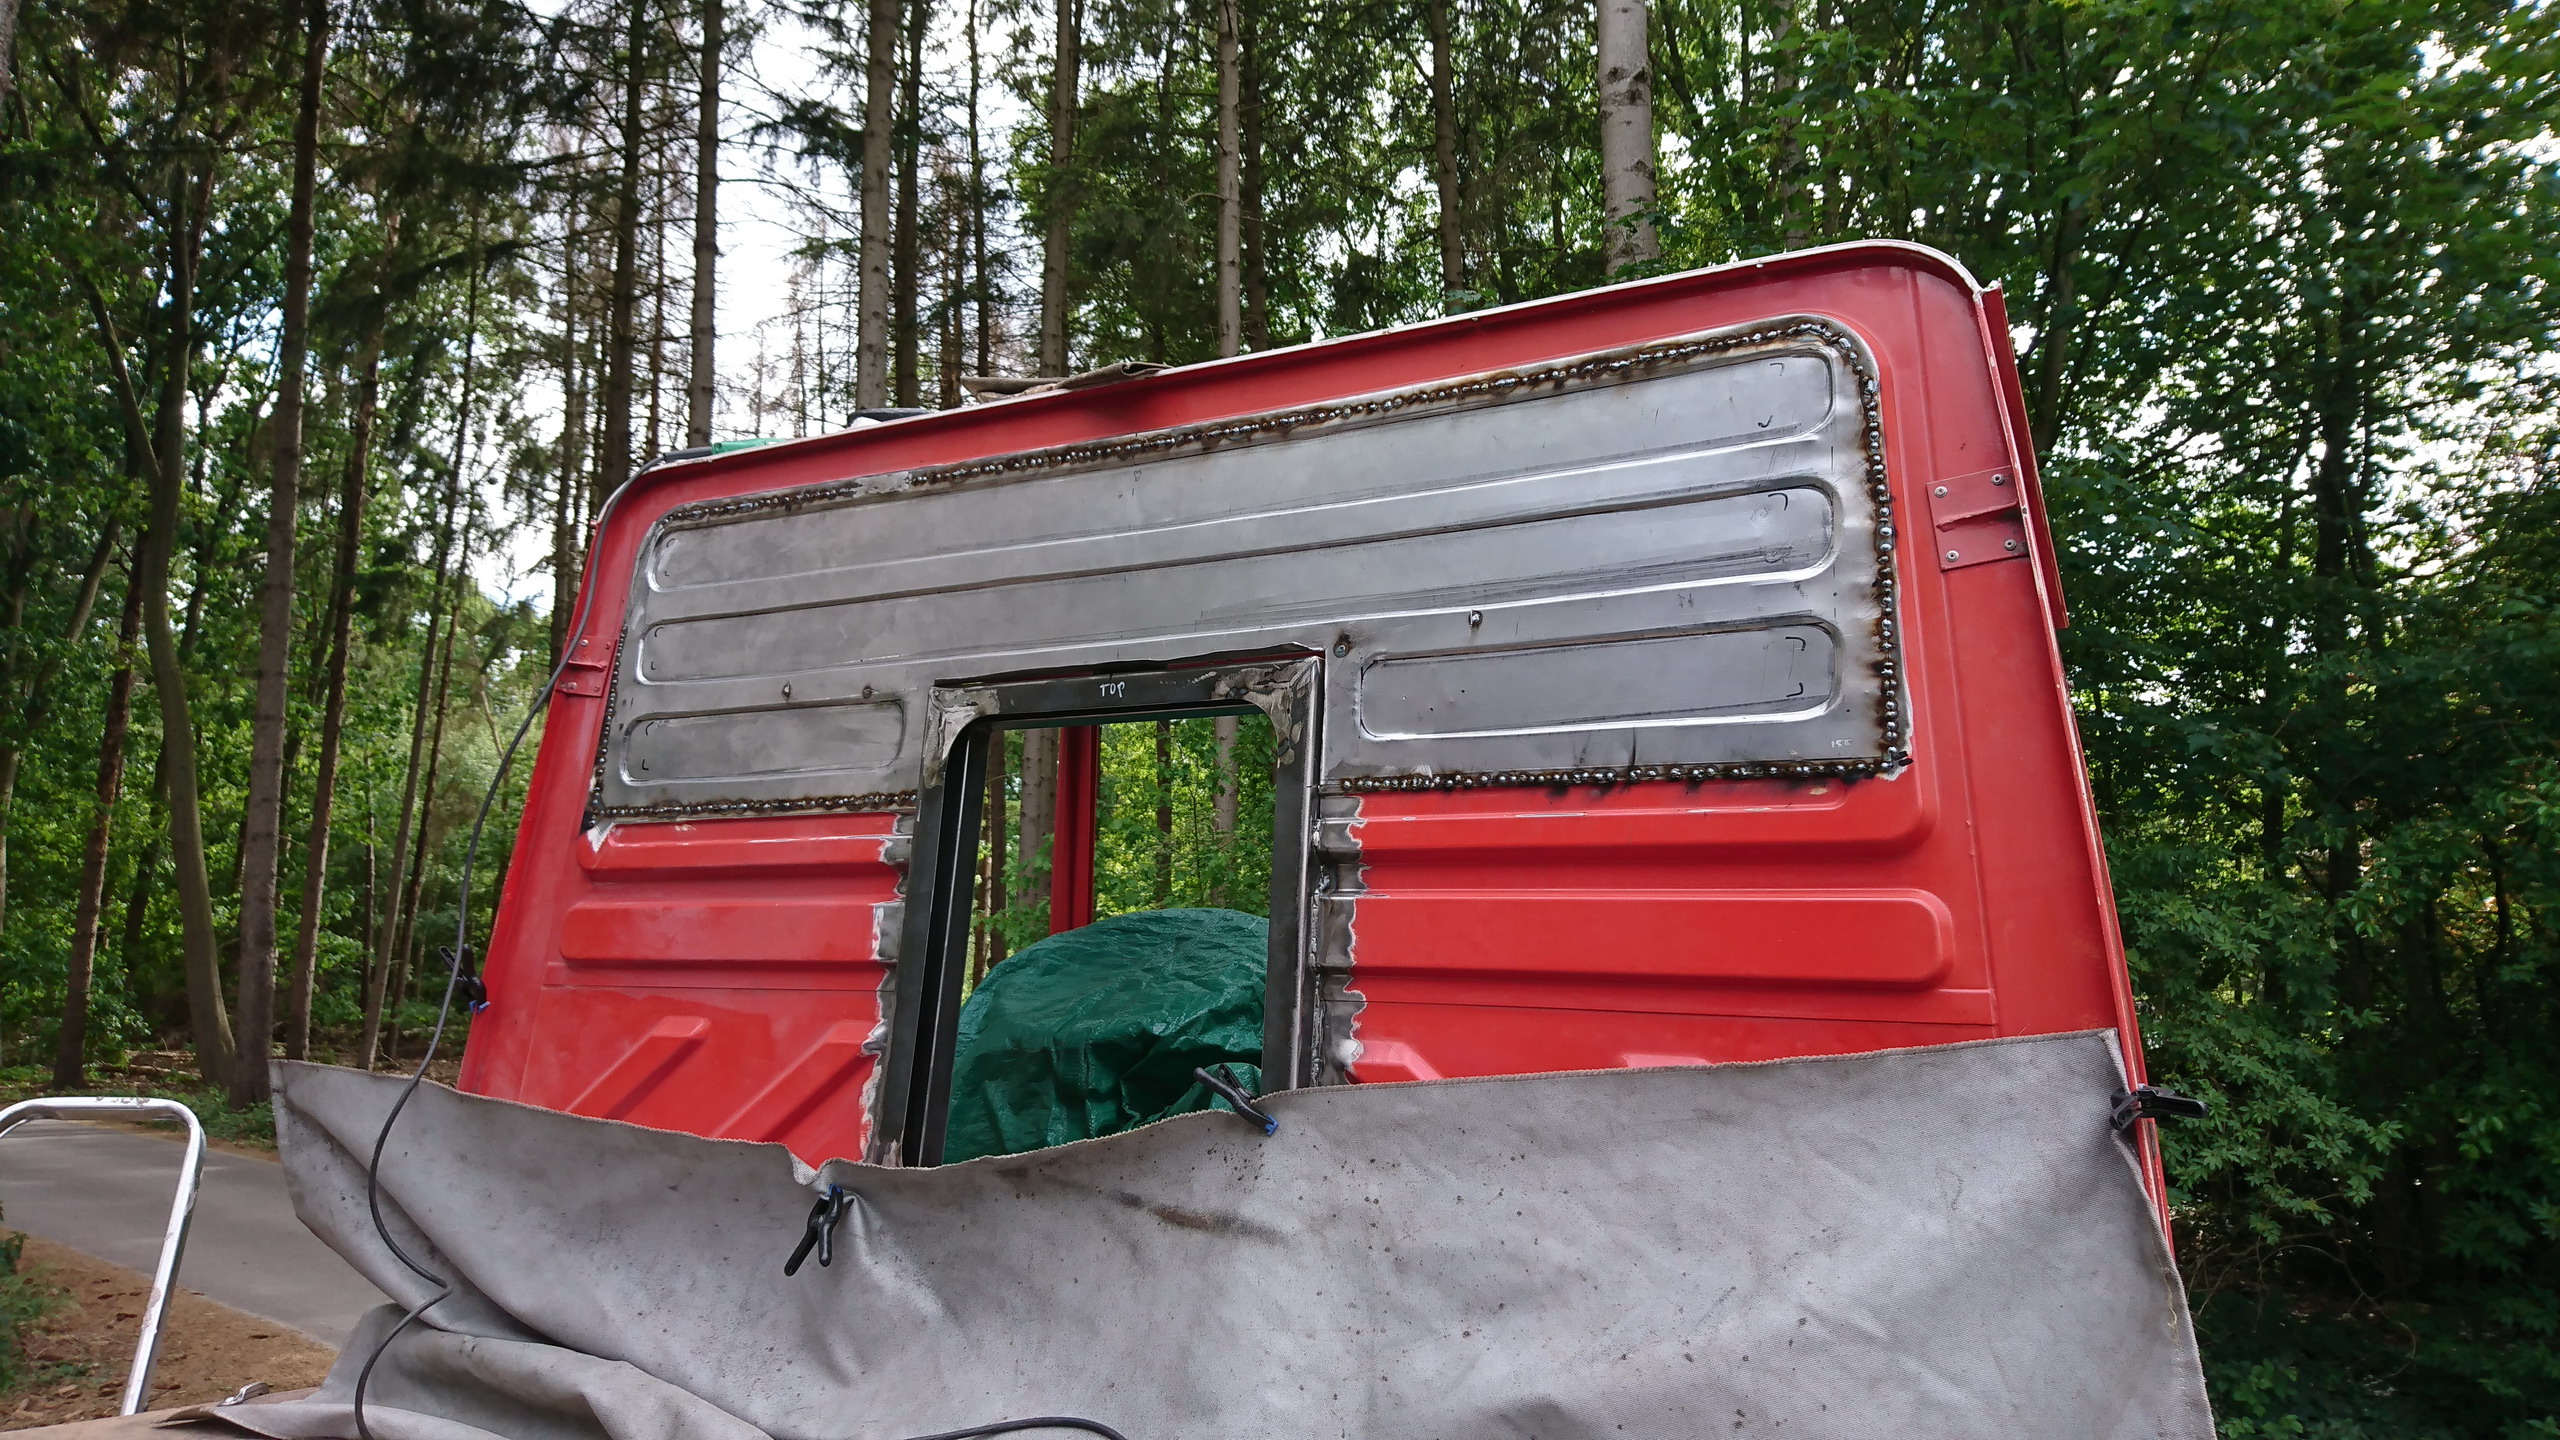
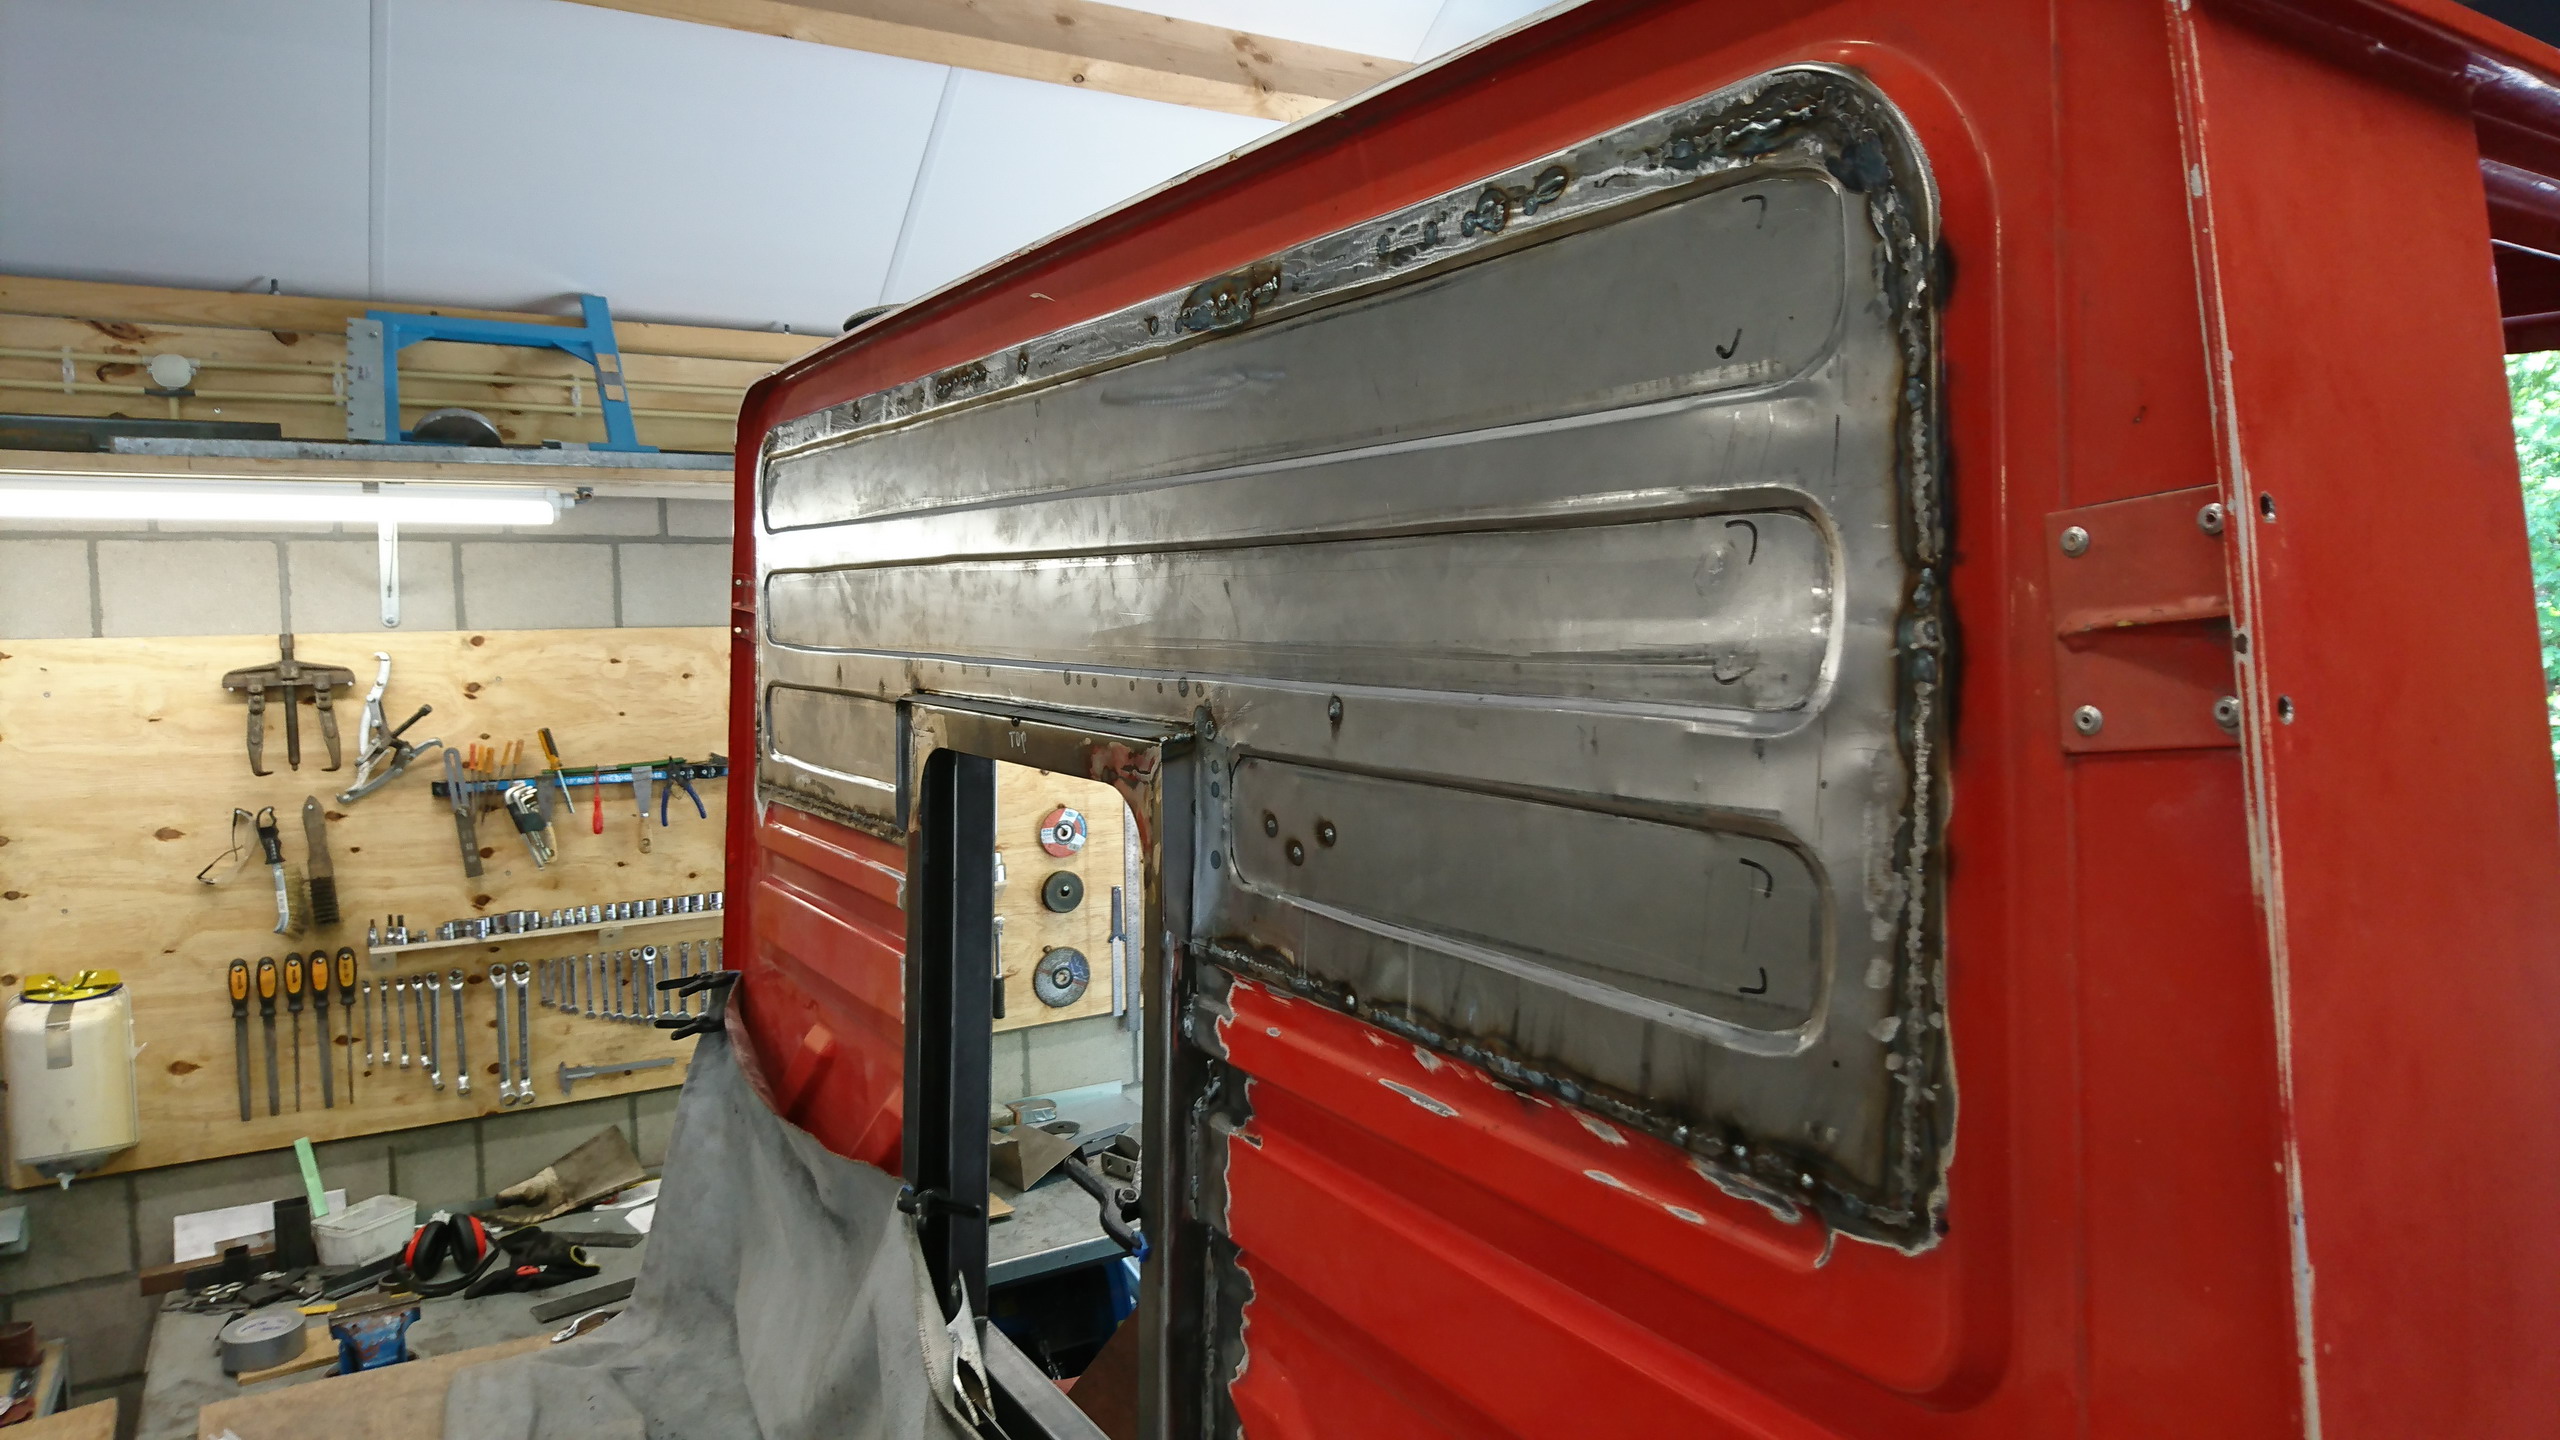
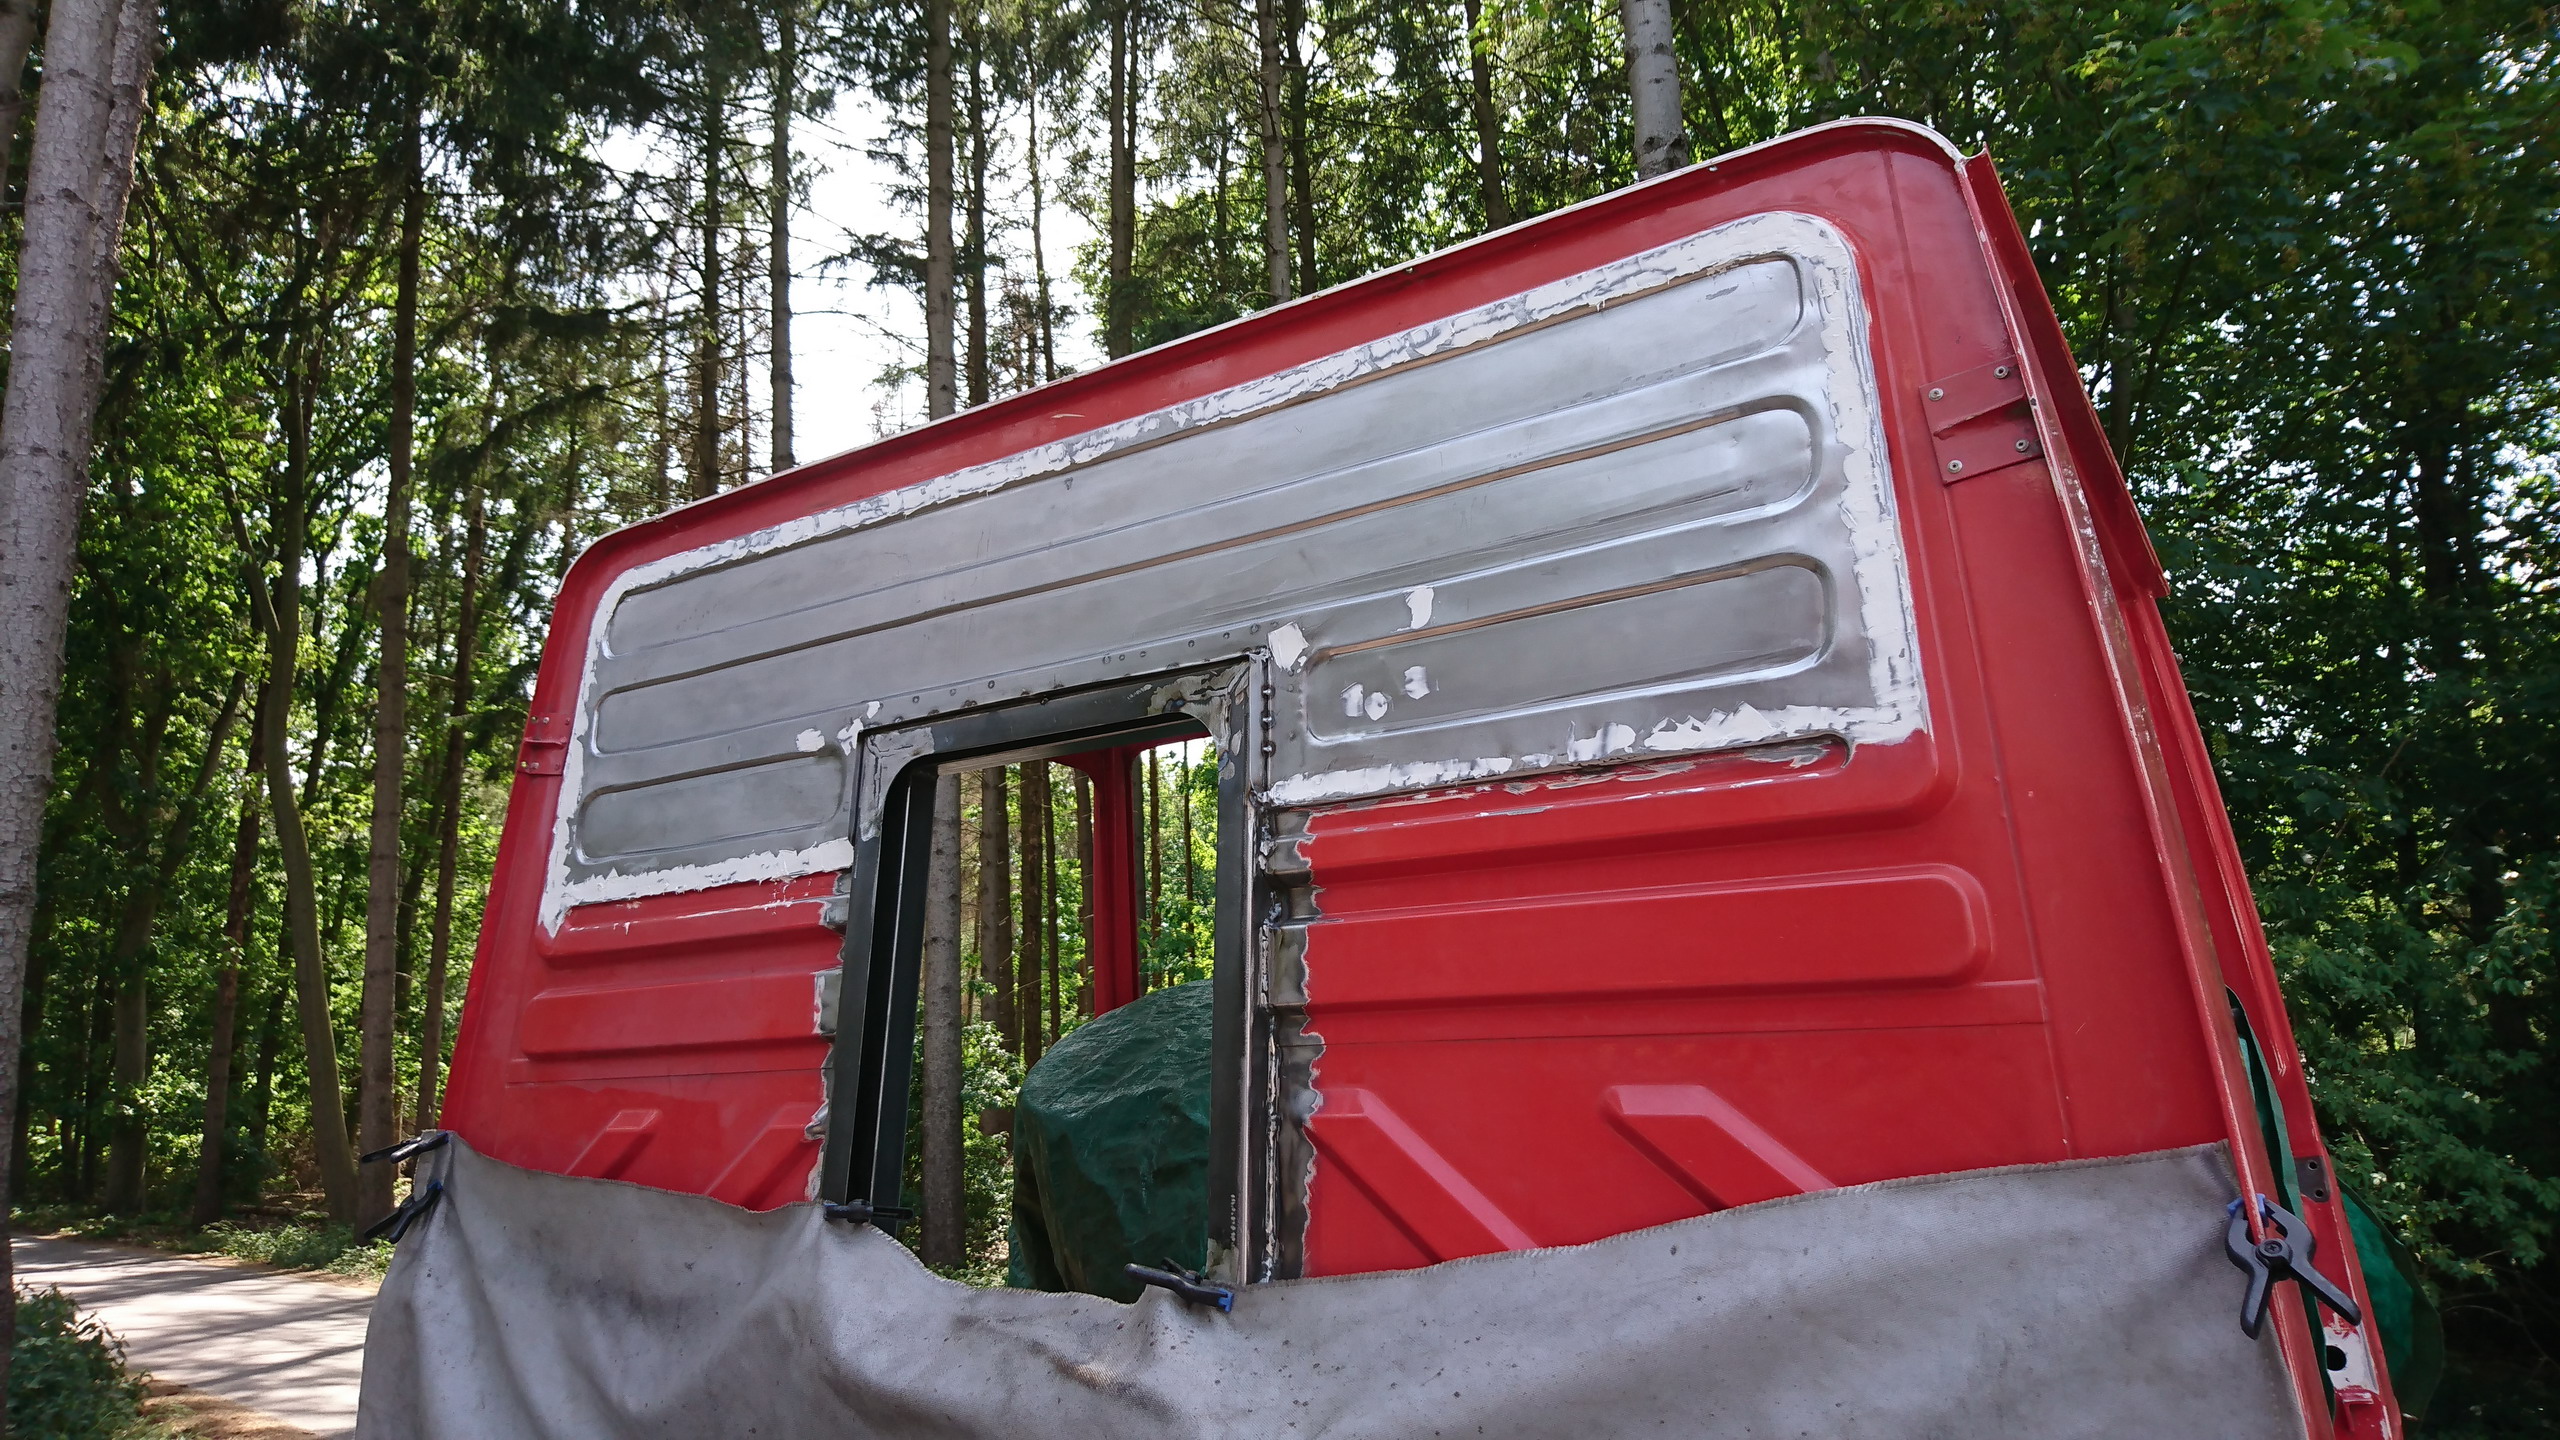
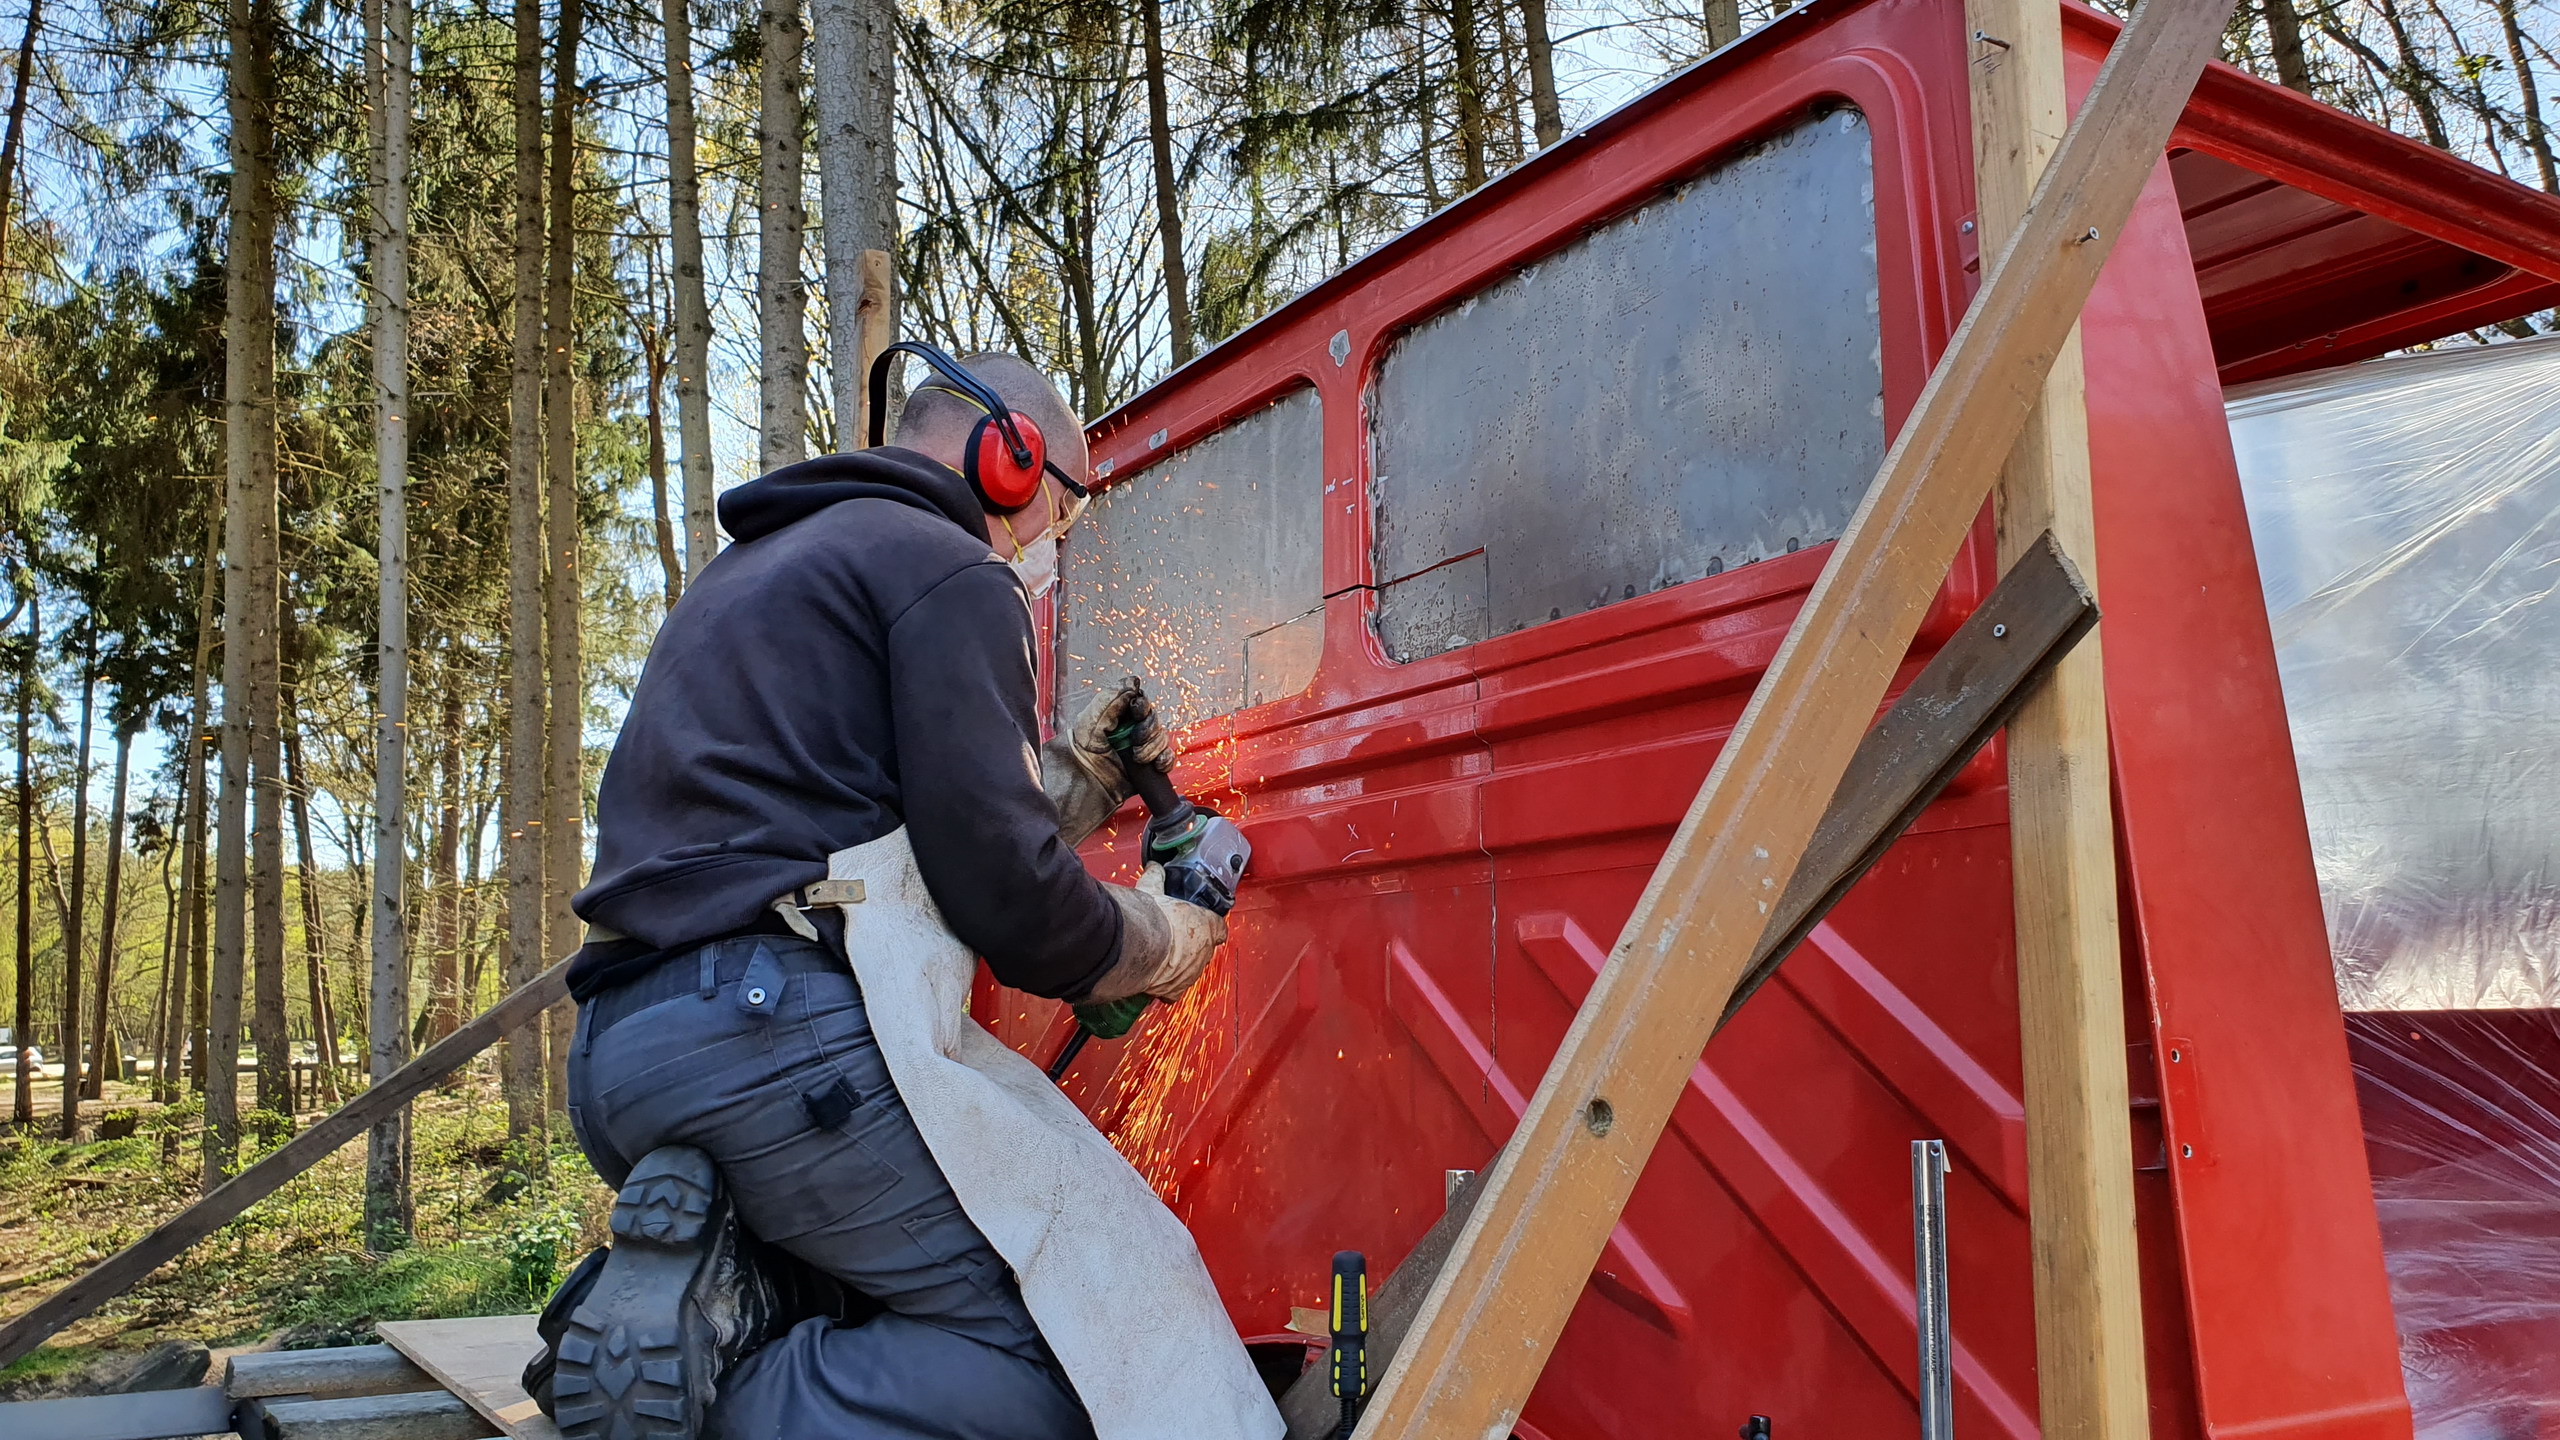
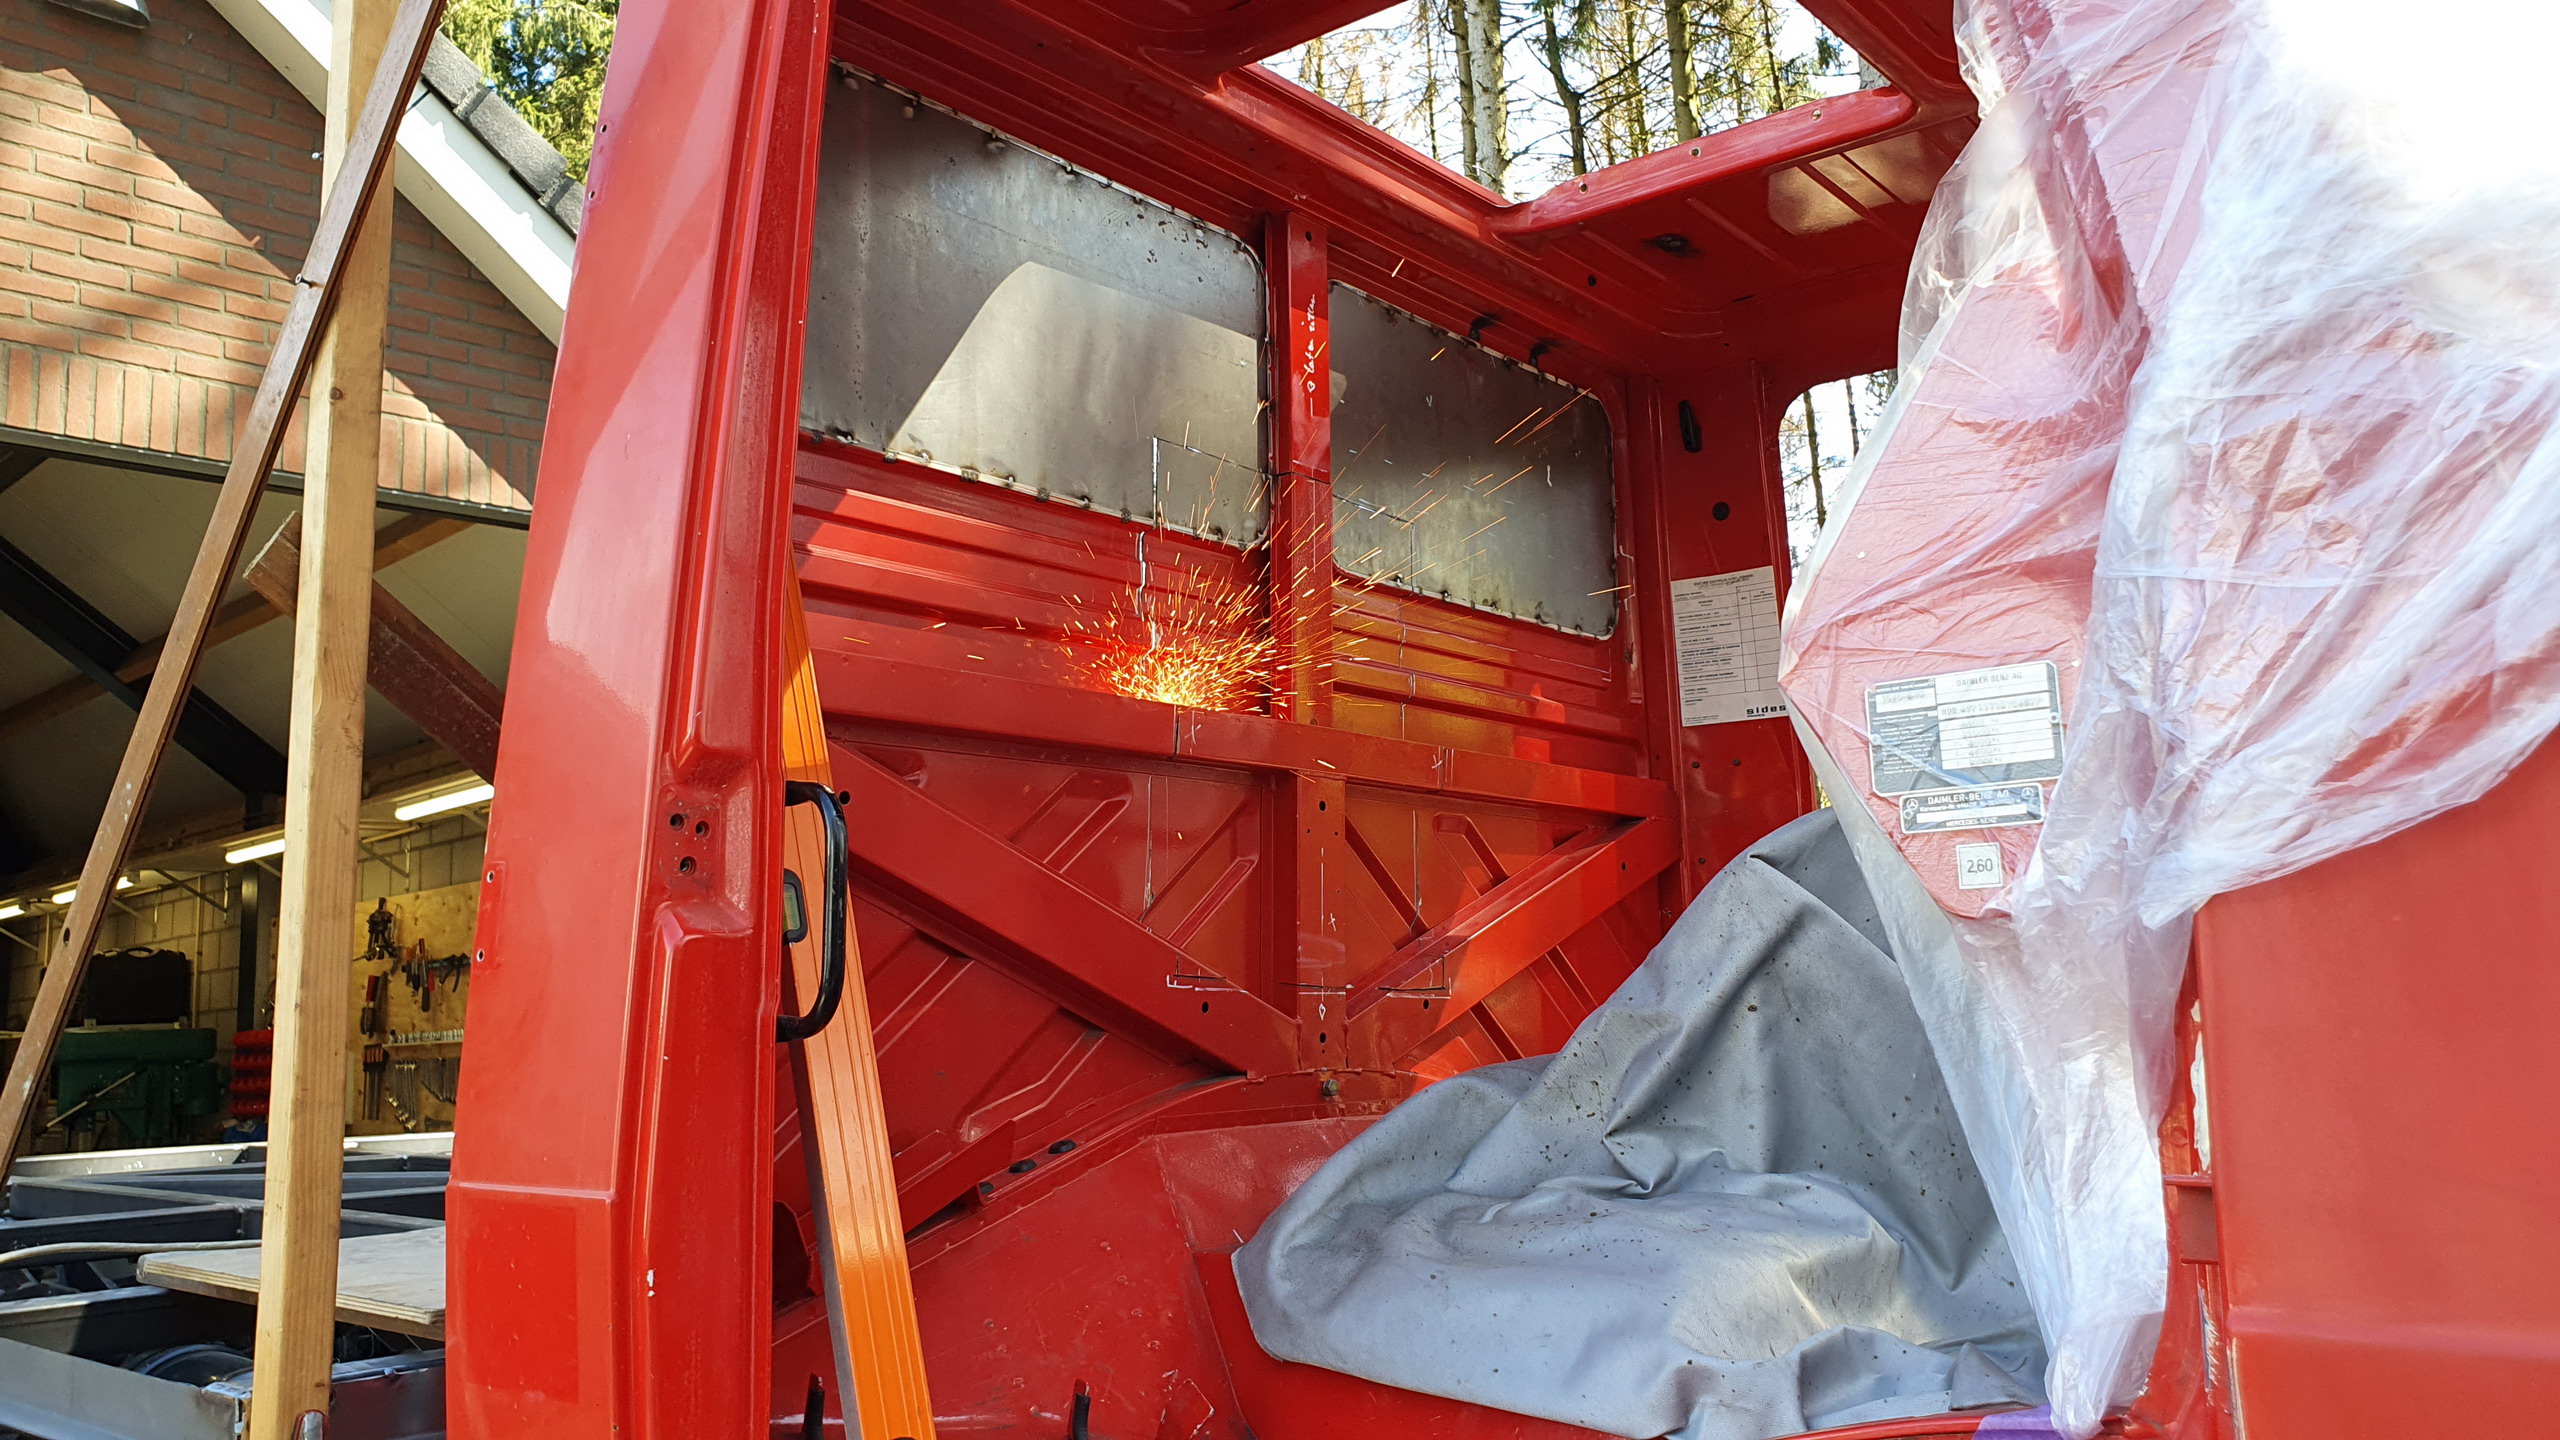
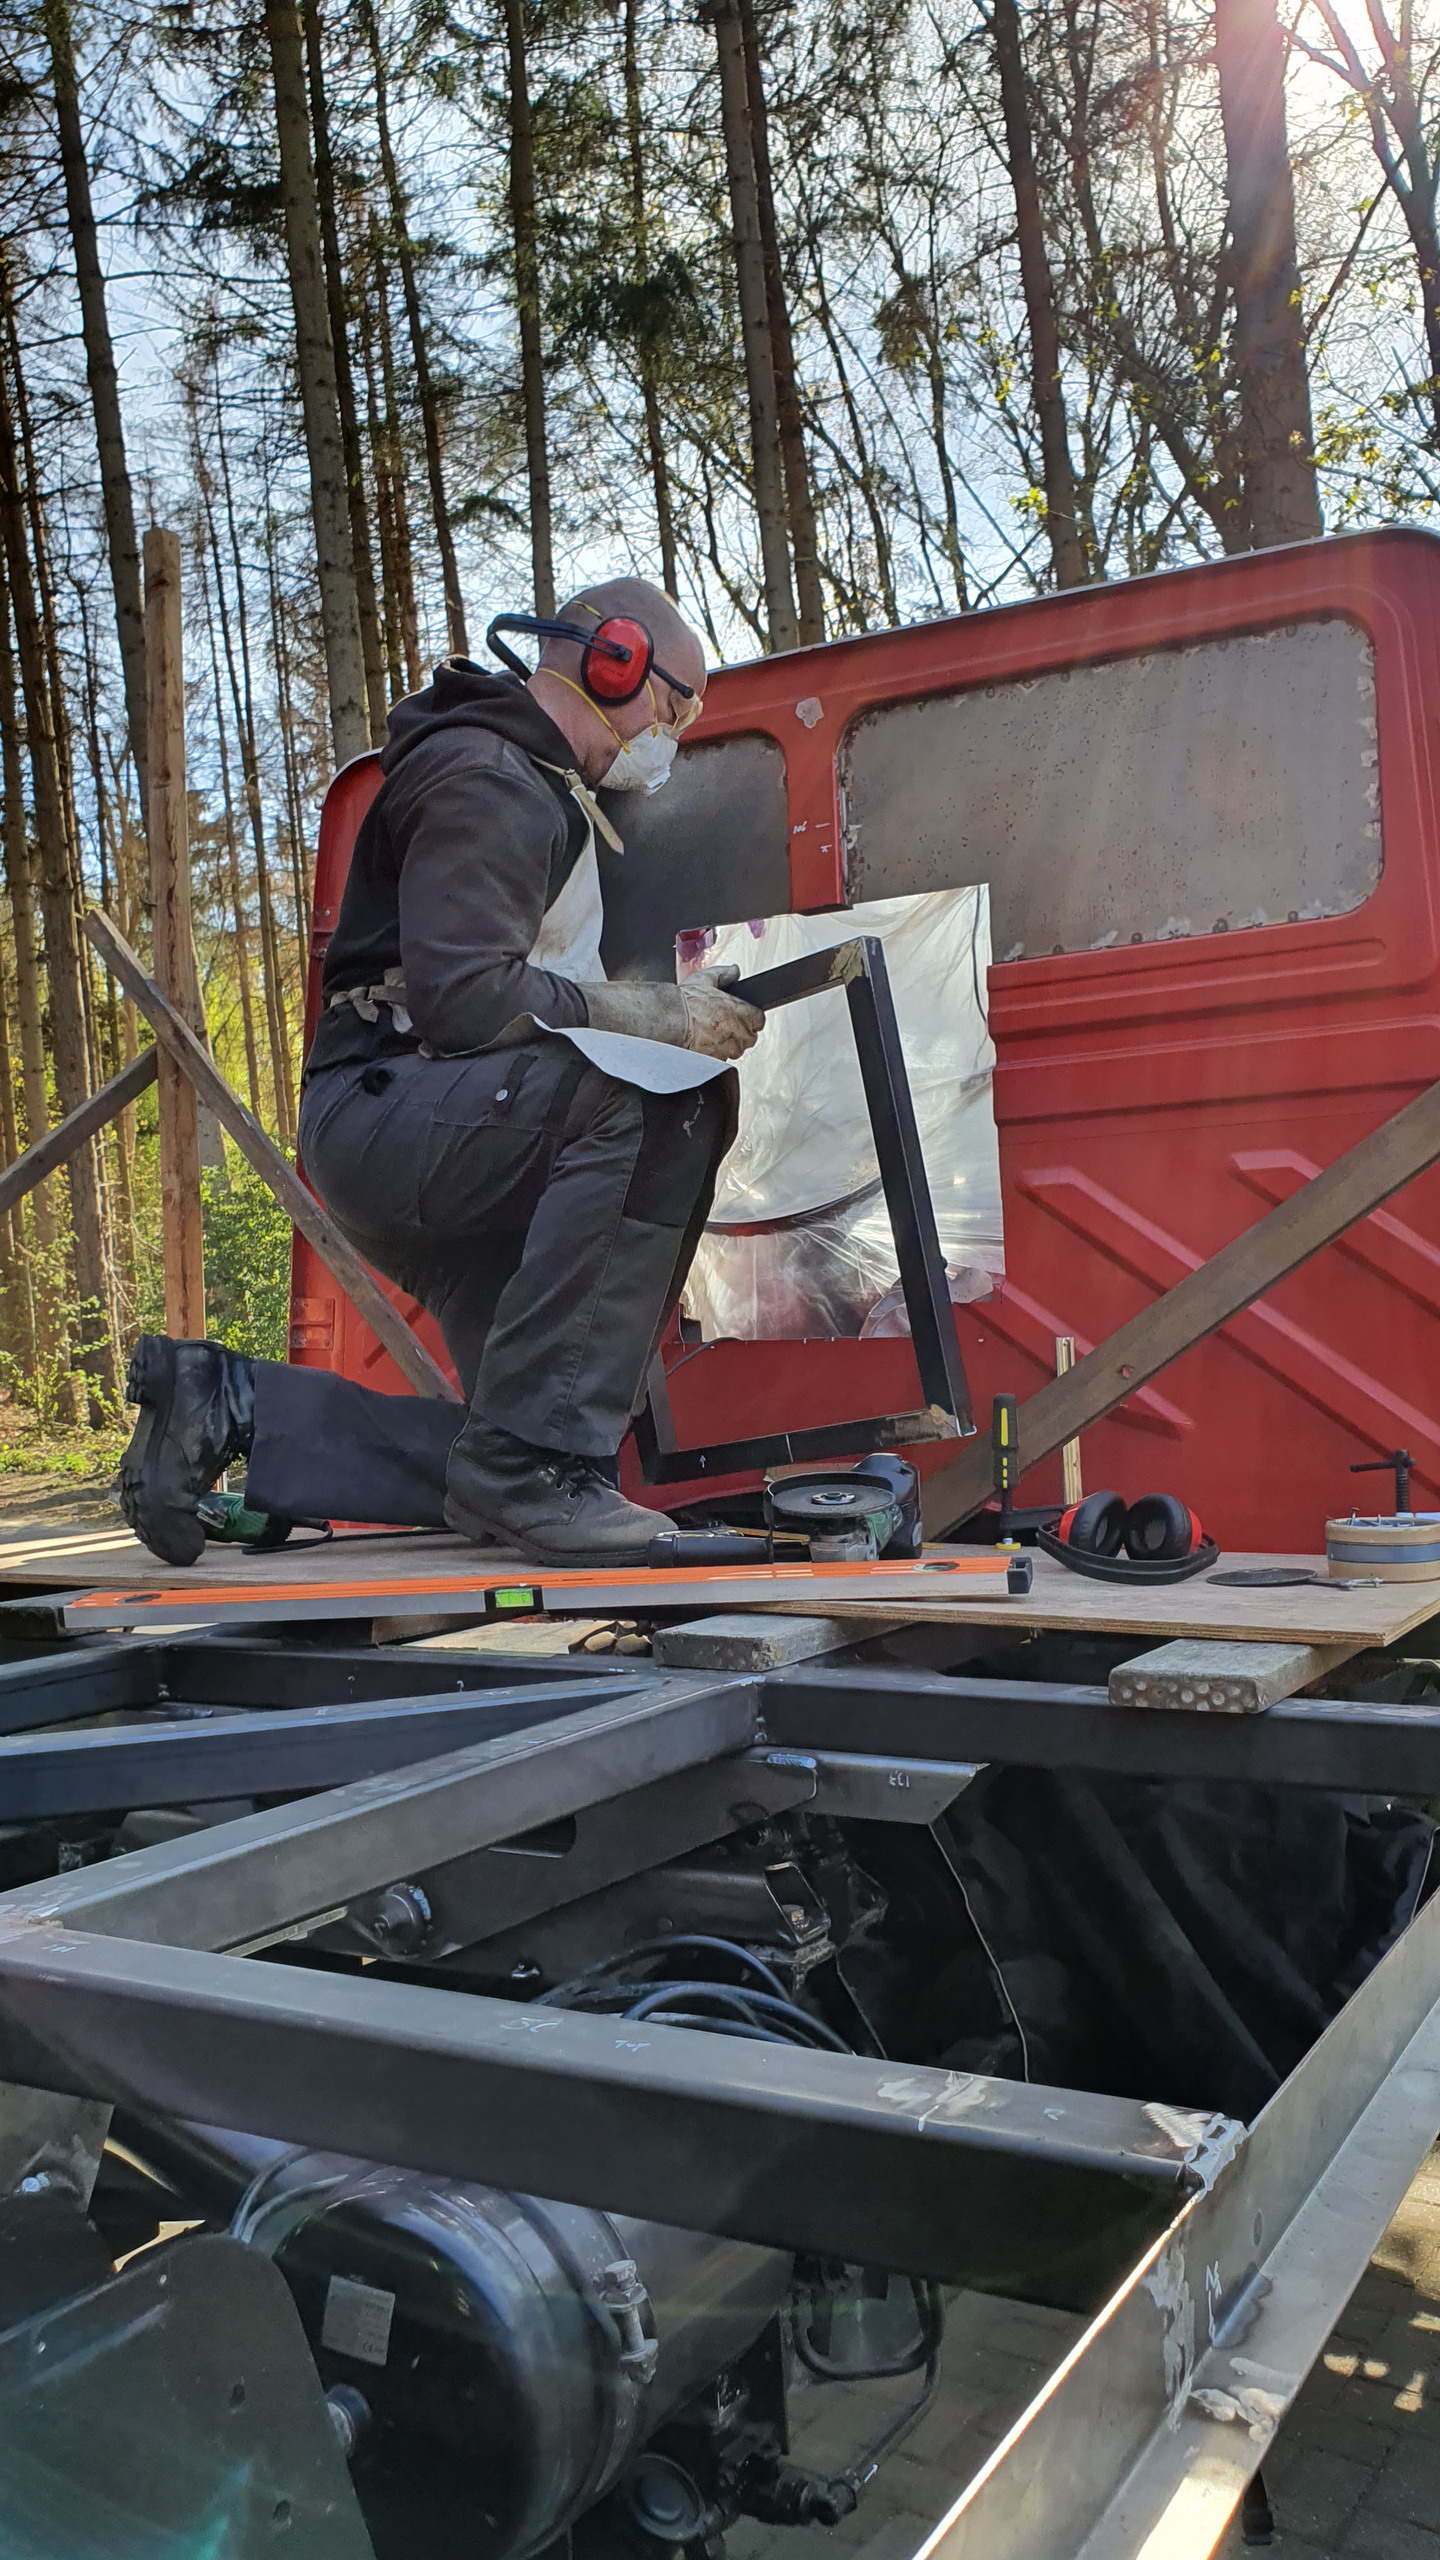
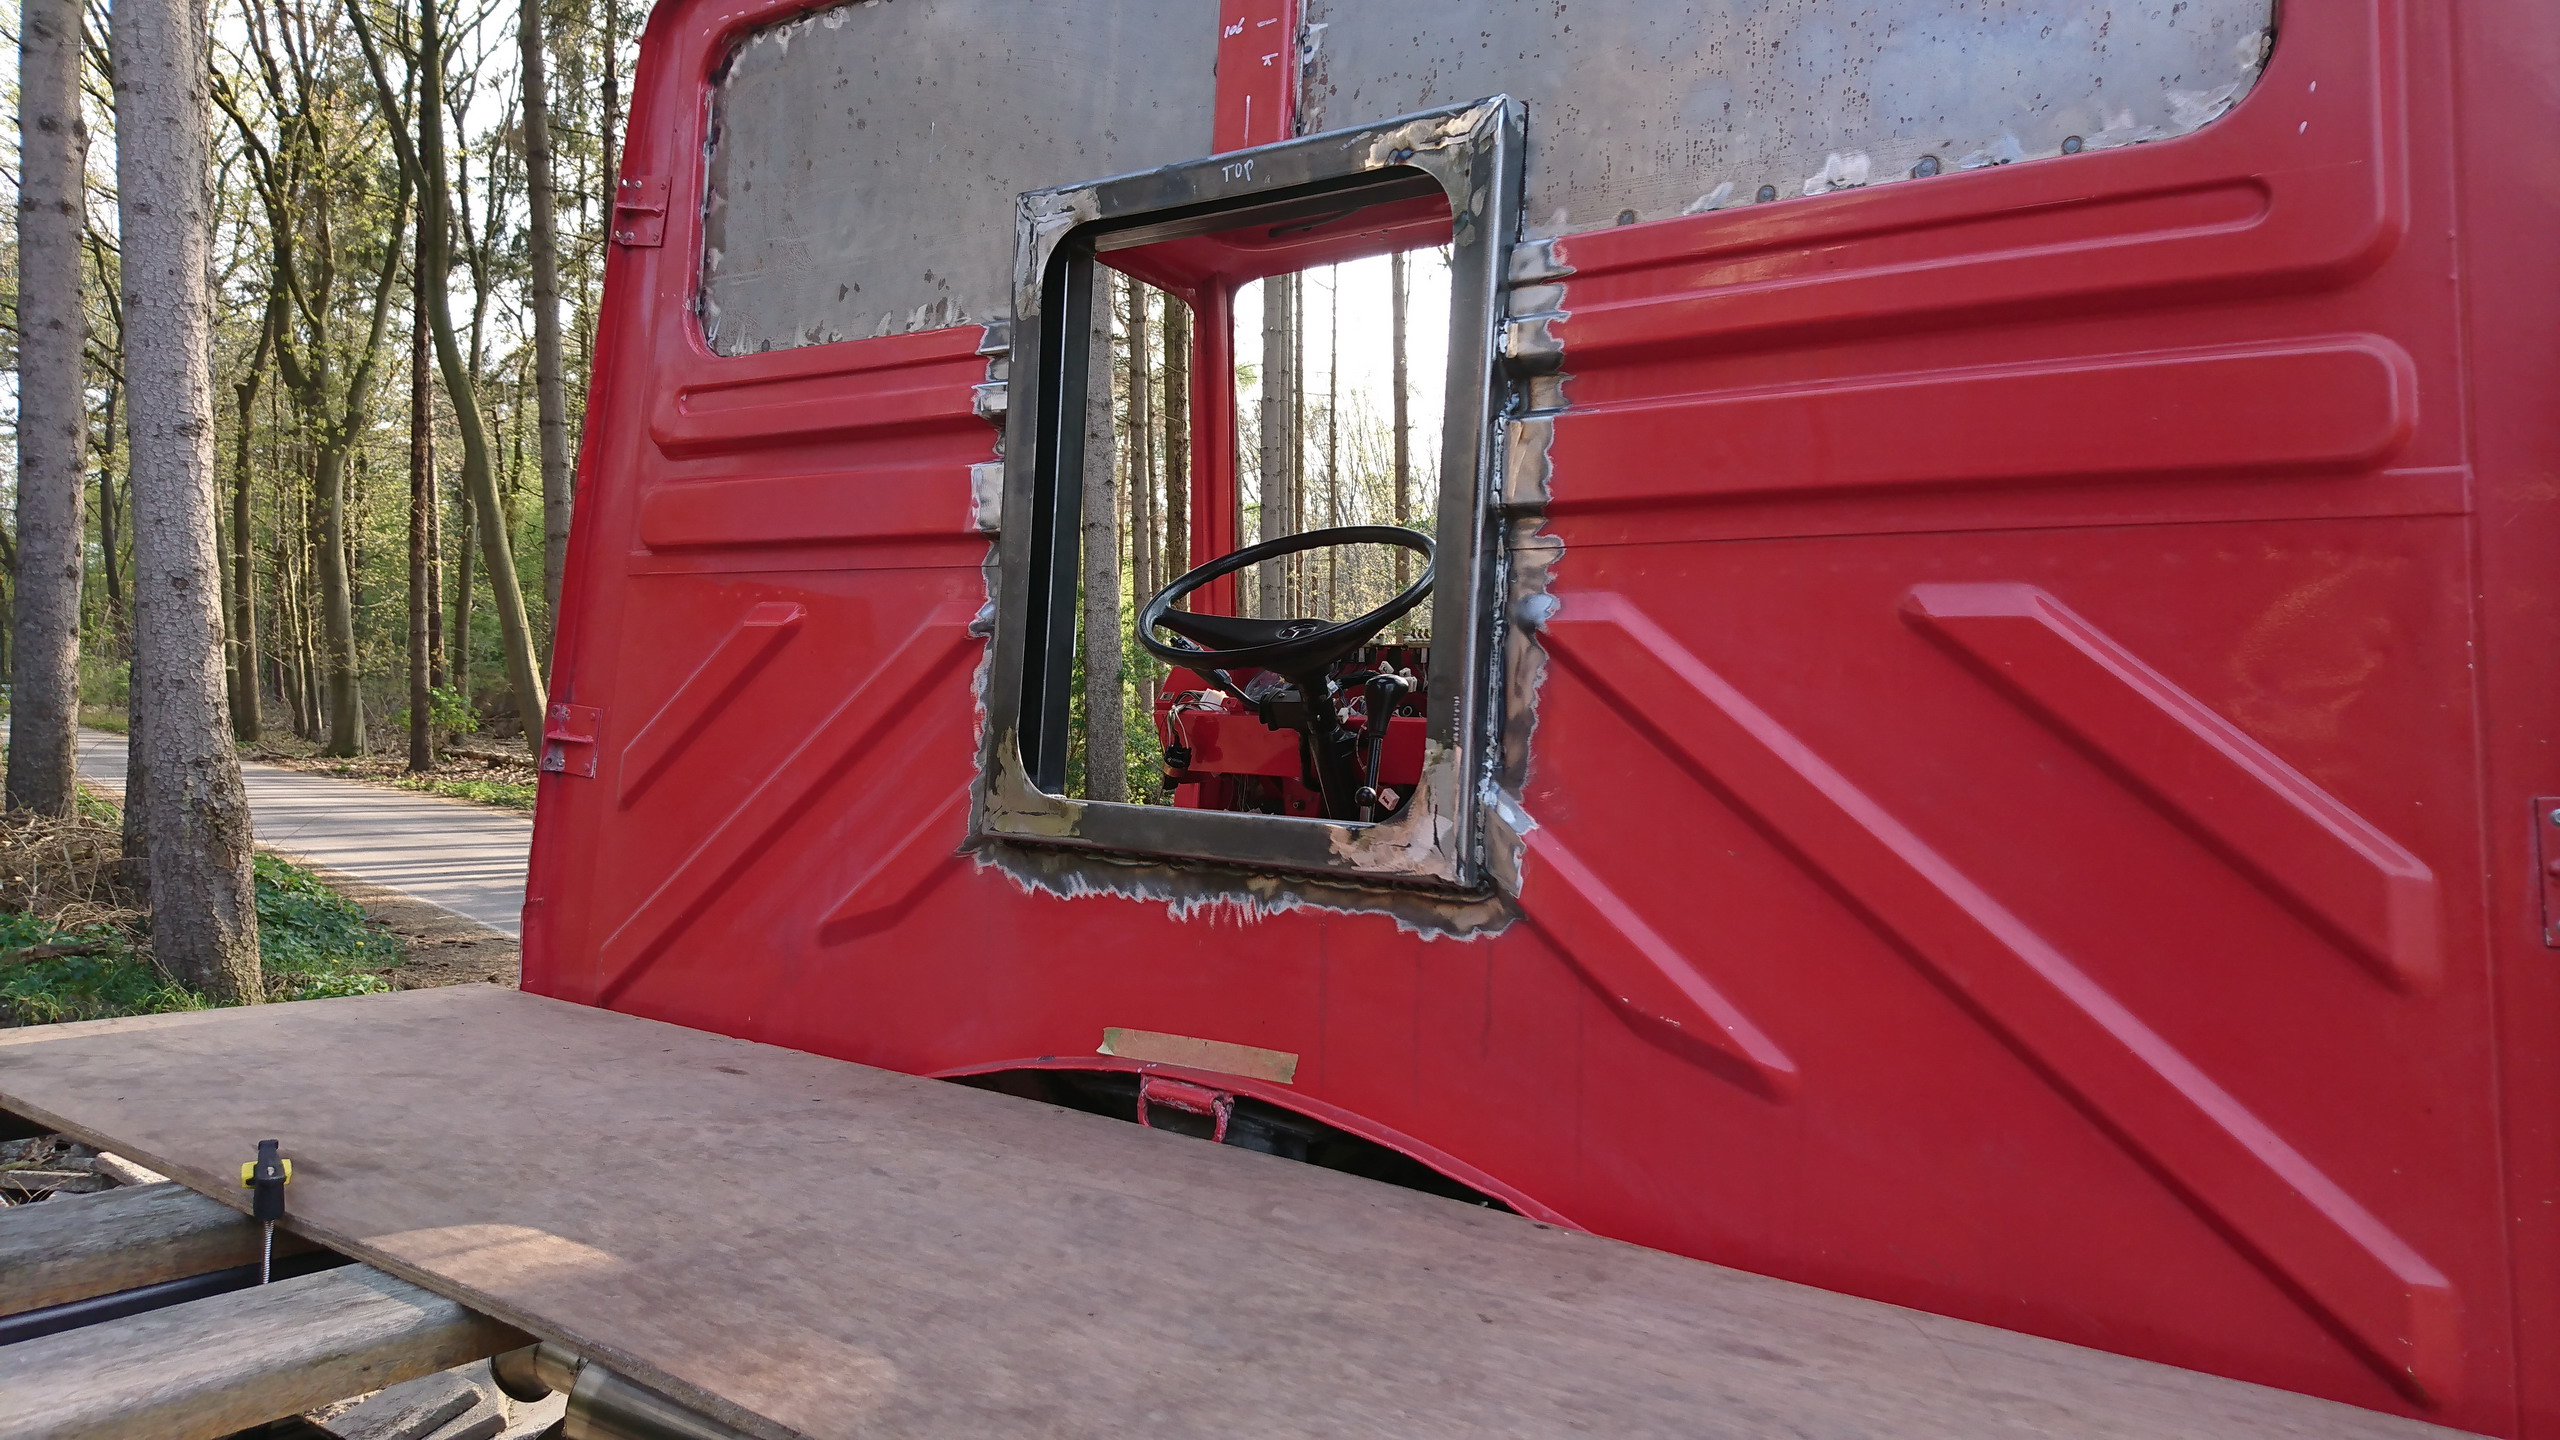
  • cut a hole in the rear wall of the cab and welded the pass through frame in place
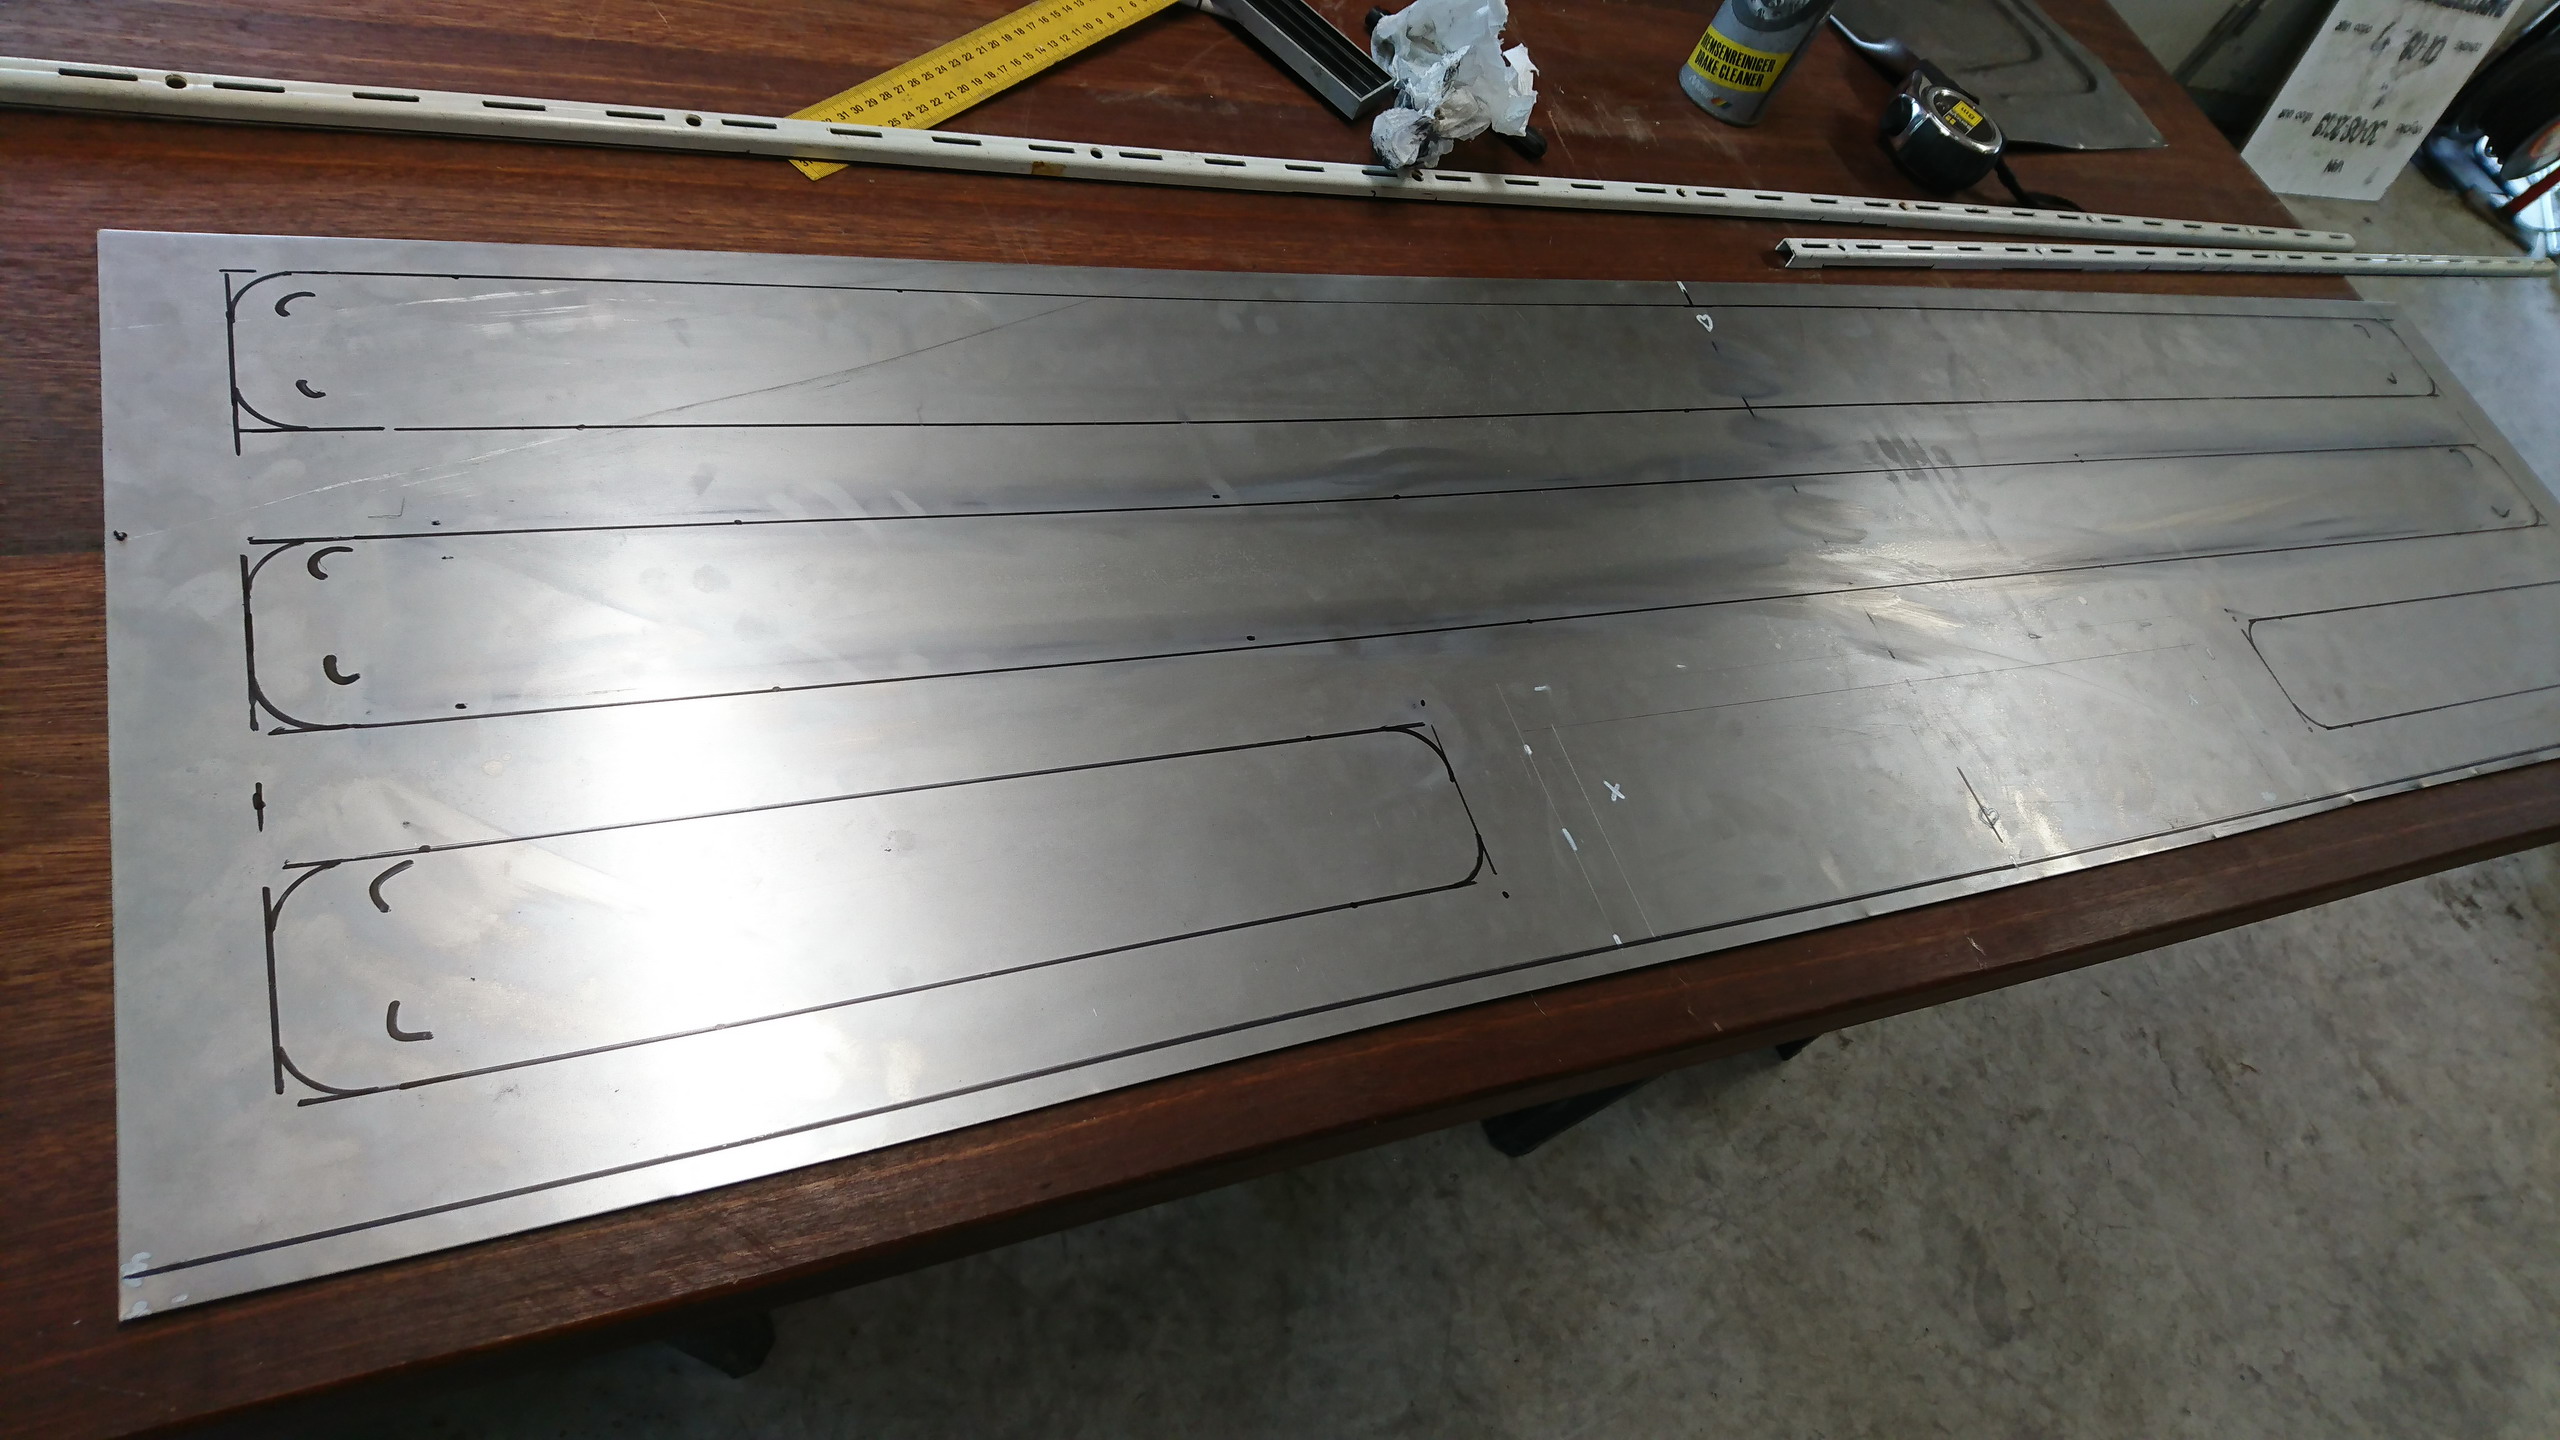
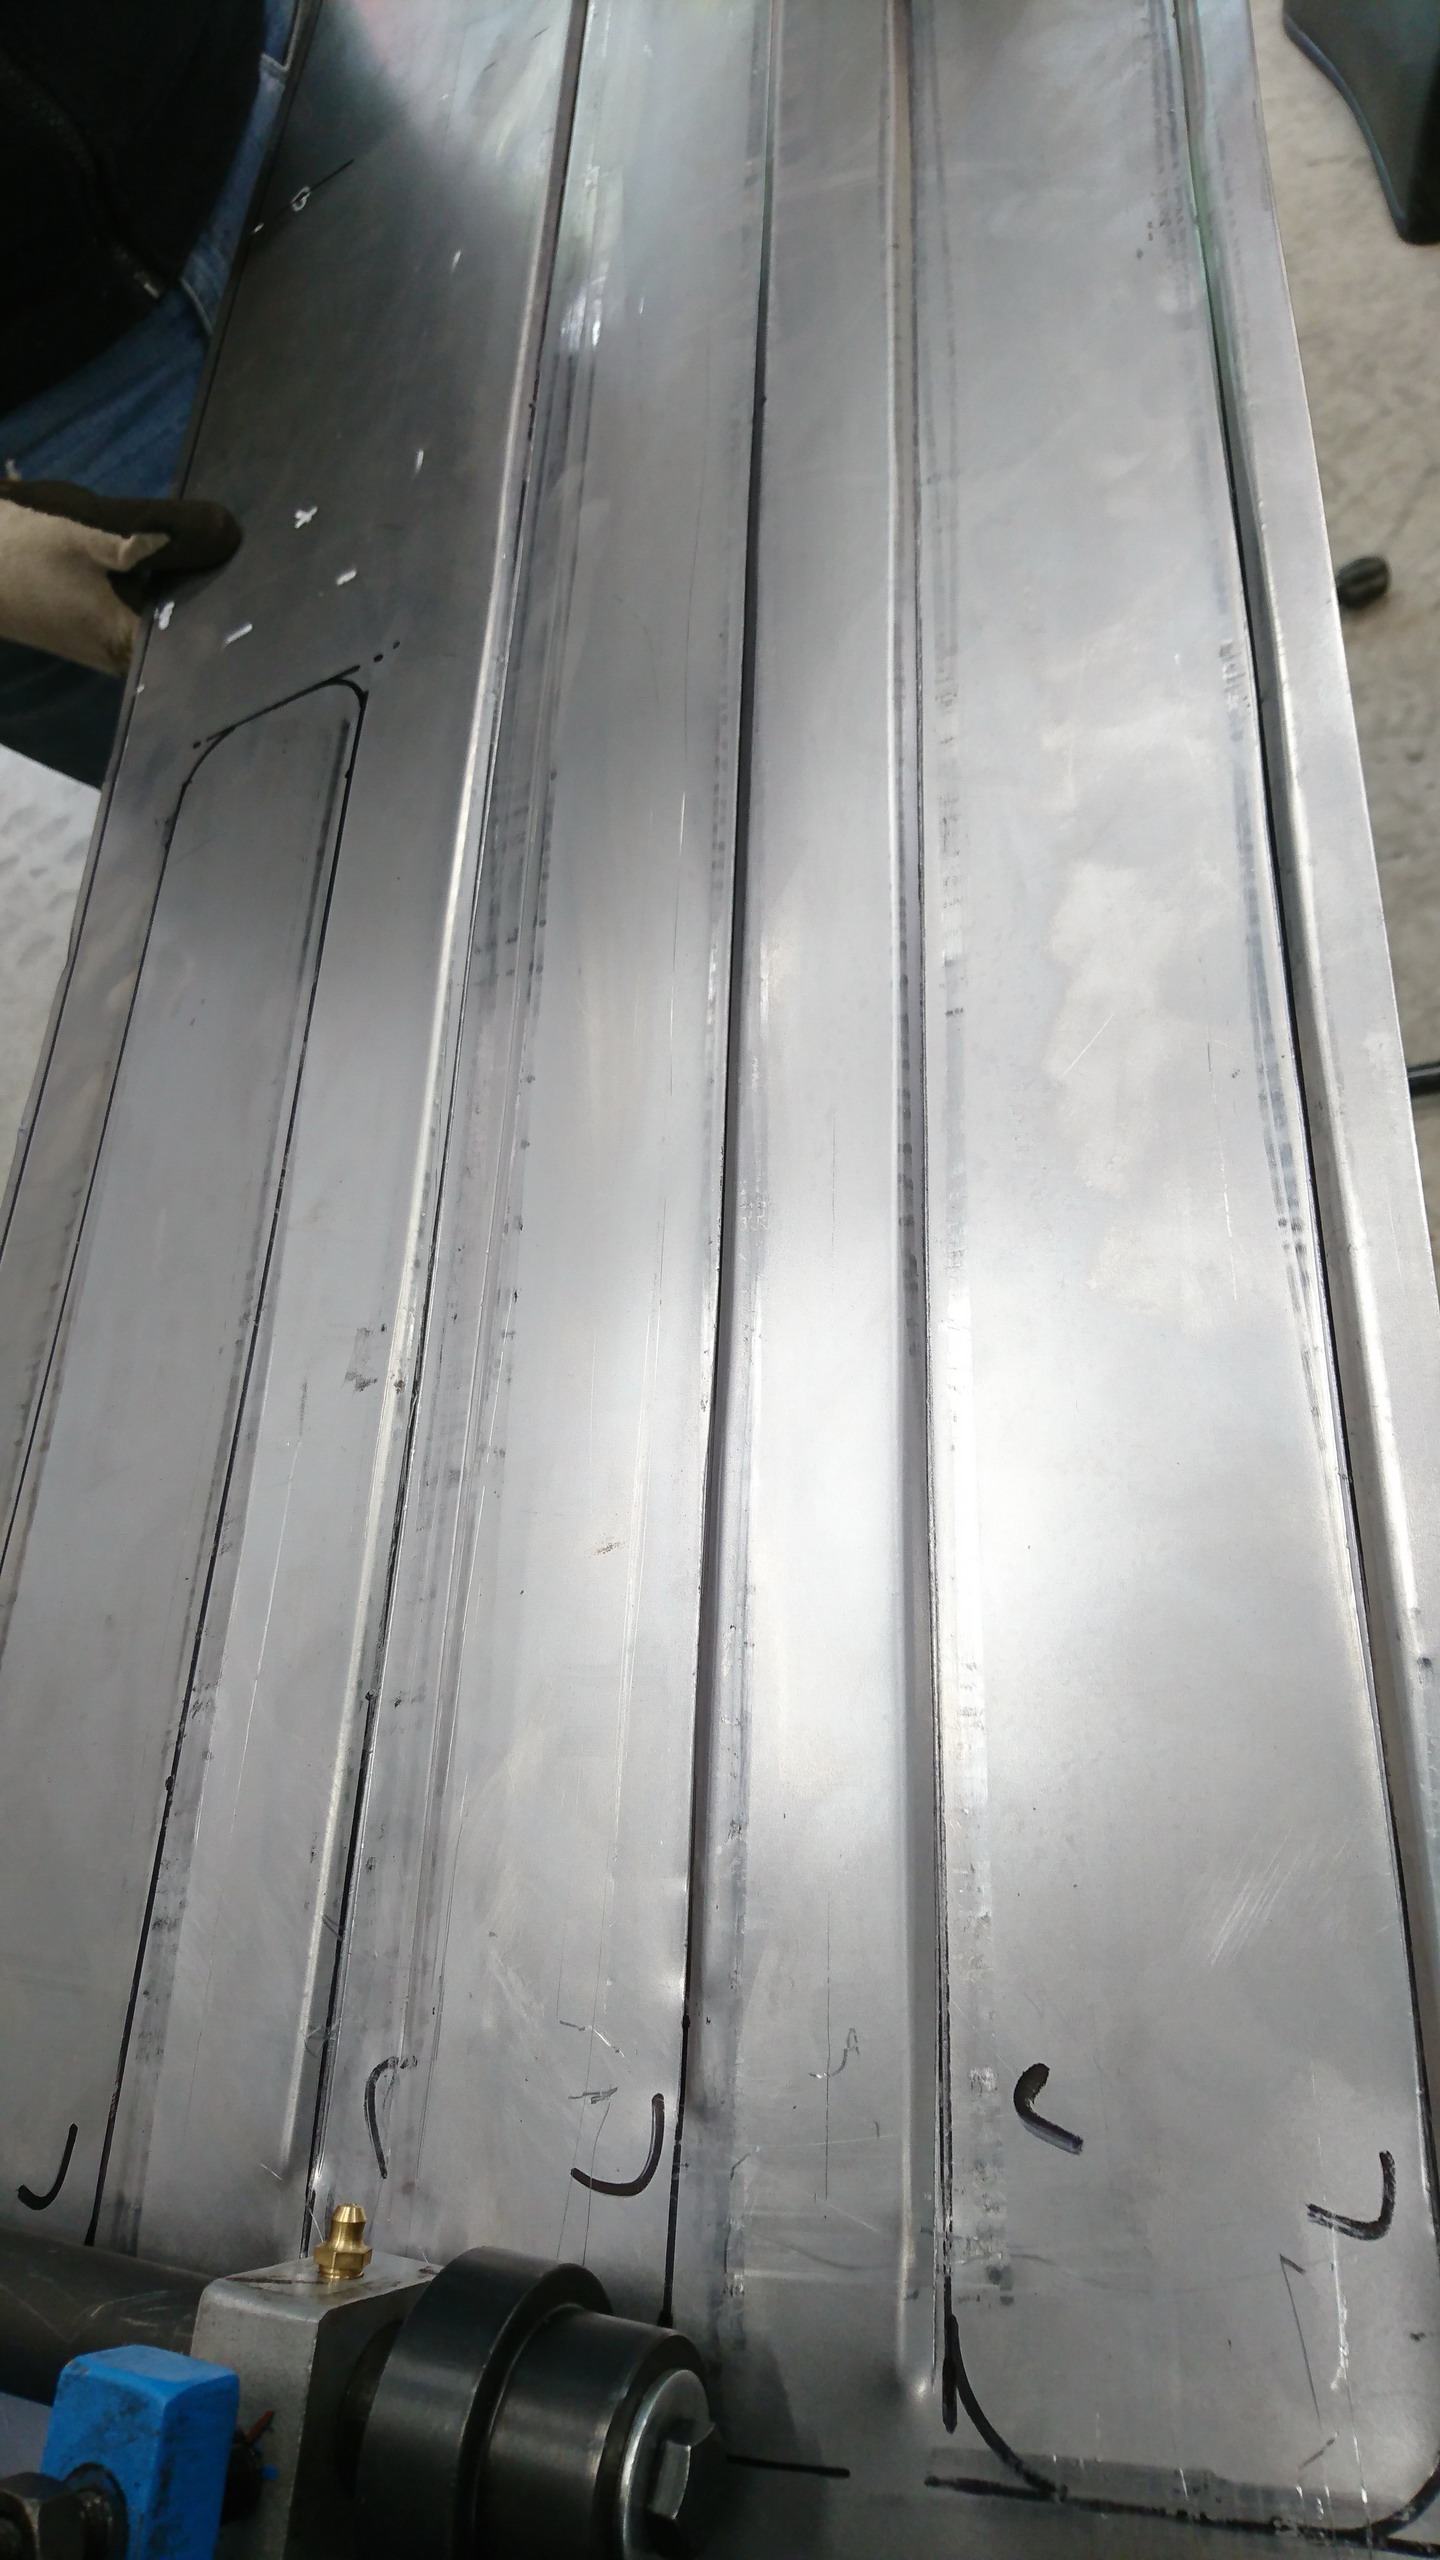
  • decided to cut the upper part of the rear wall and replace it, creating a more uniform look for the cab
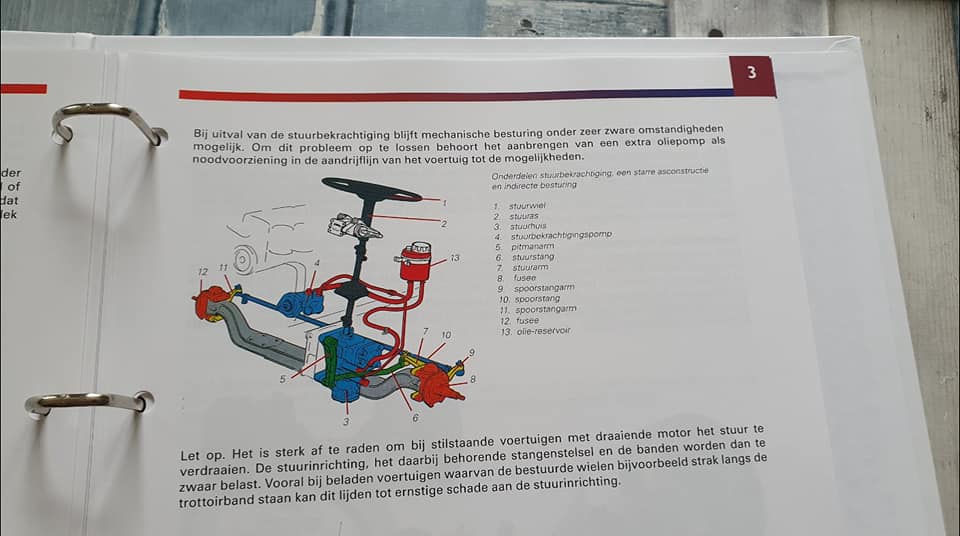
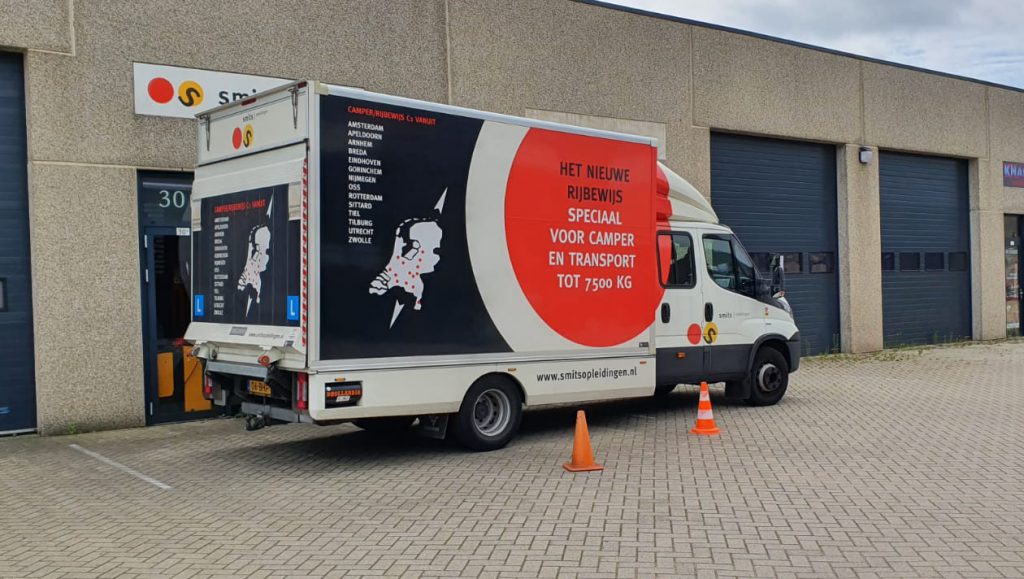
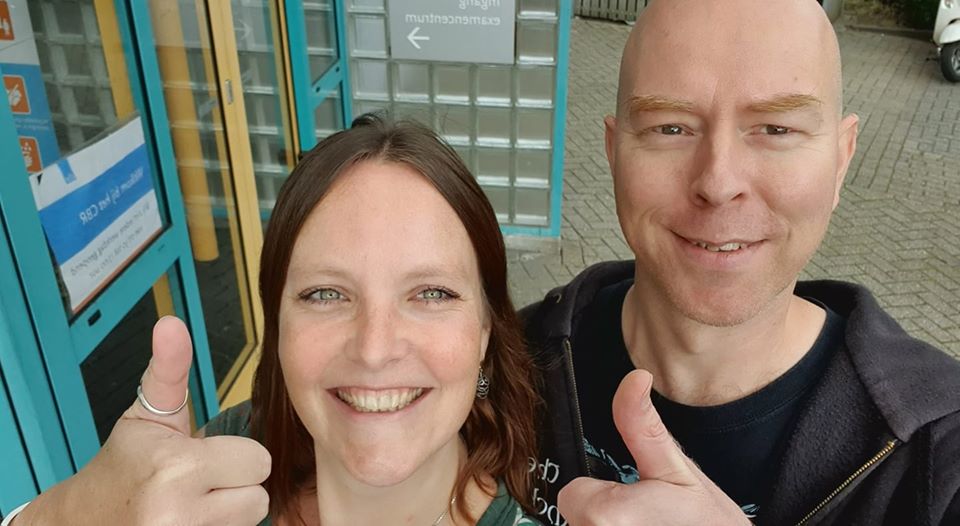
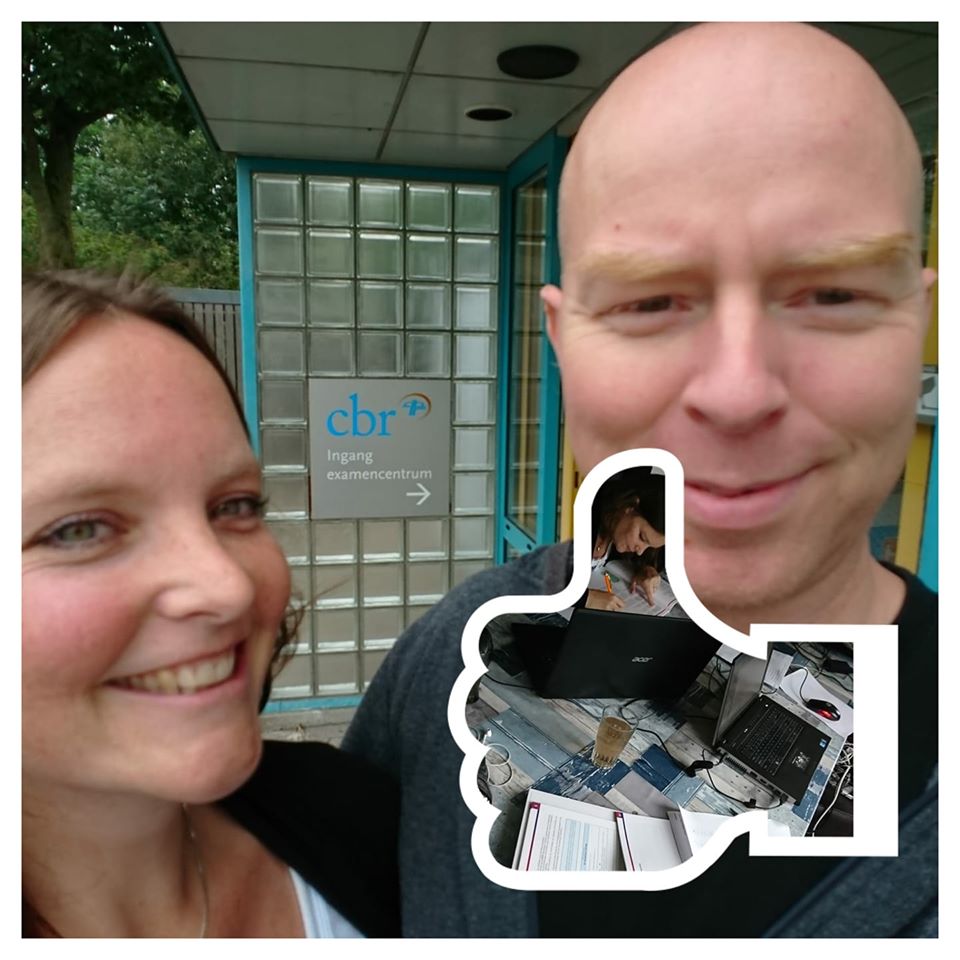
  • got our C1 (truck up to 7500Kg) drivers license
  • removed all other items from the cab
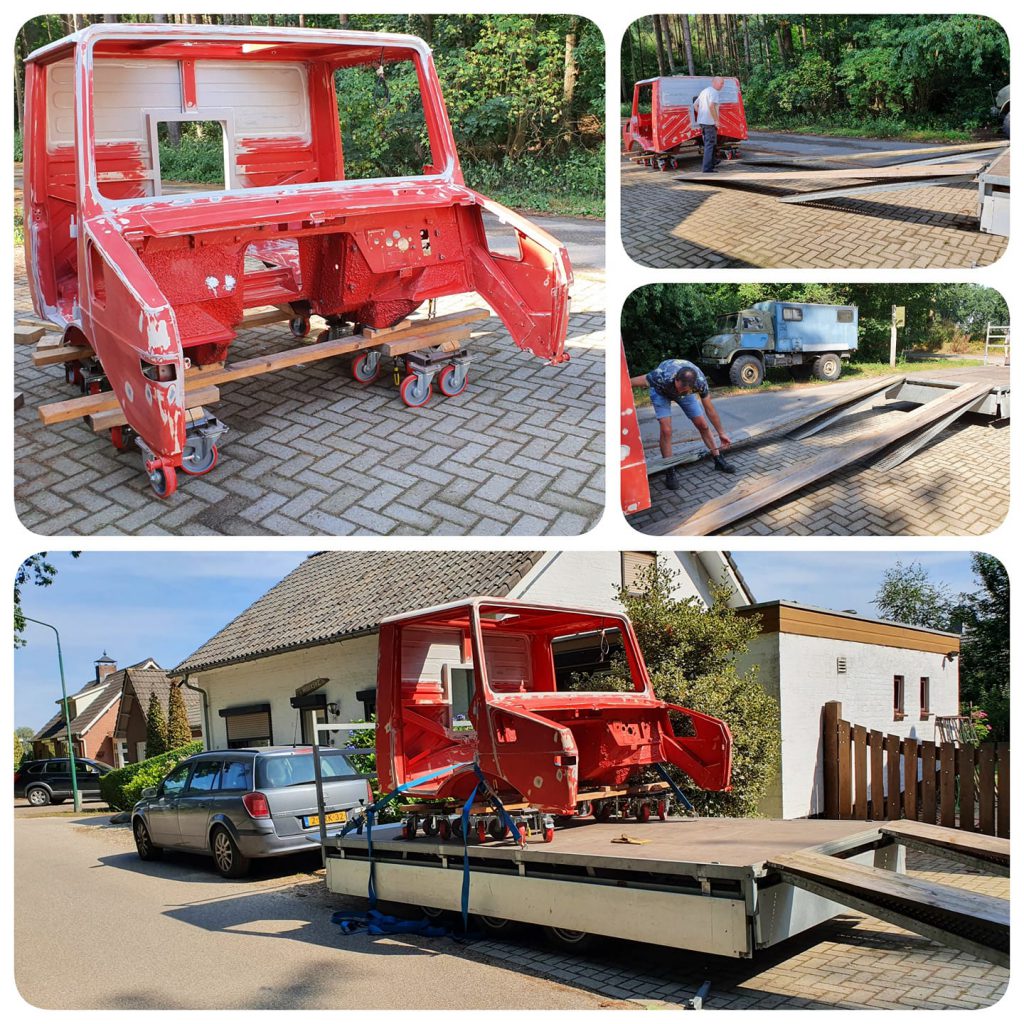
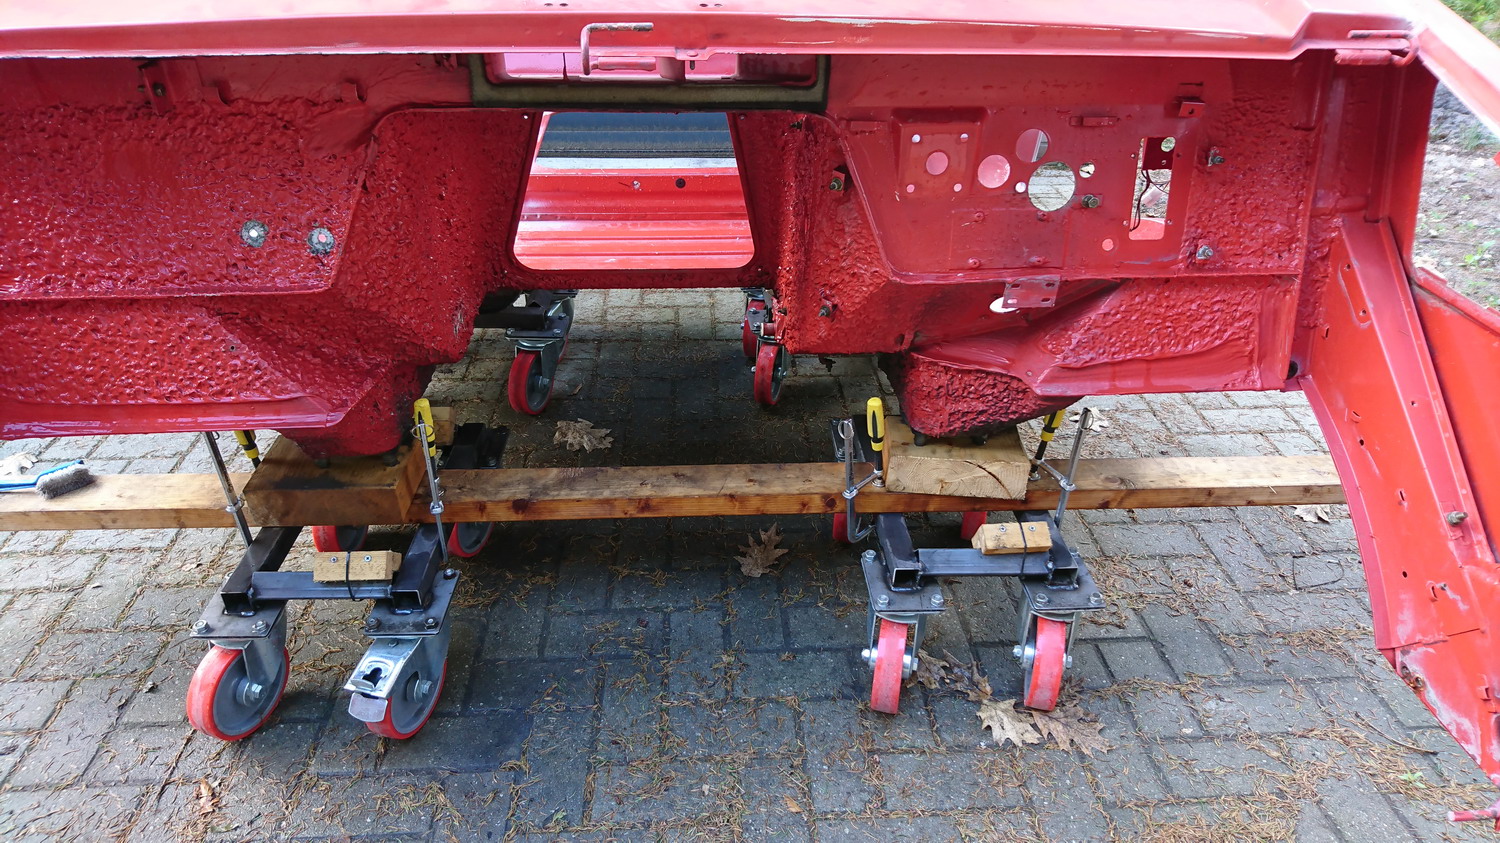
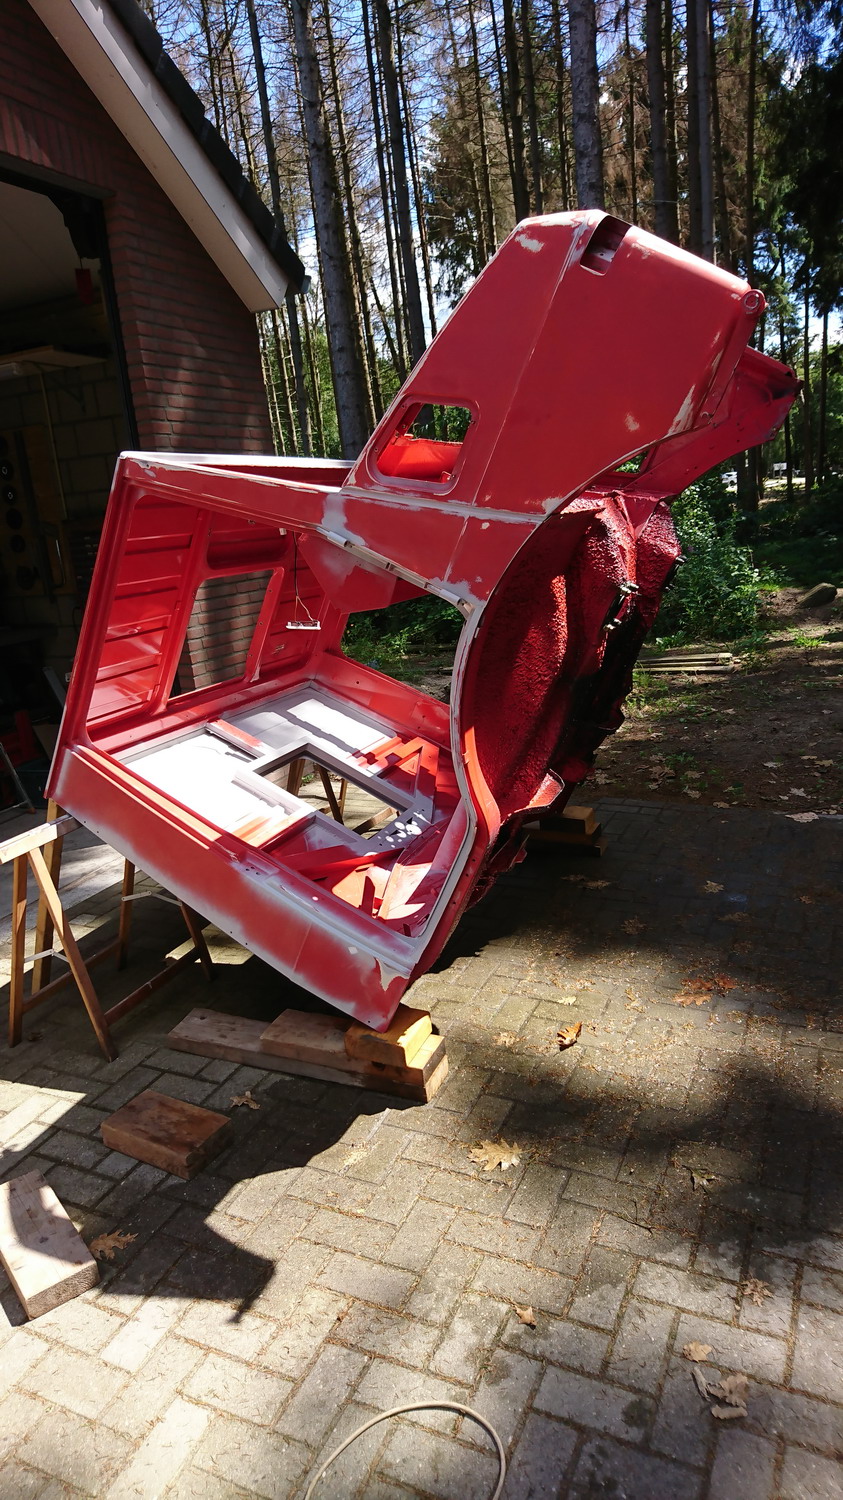
  • removed the cab from the Unimog, emptied and cleaned it
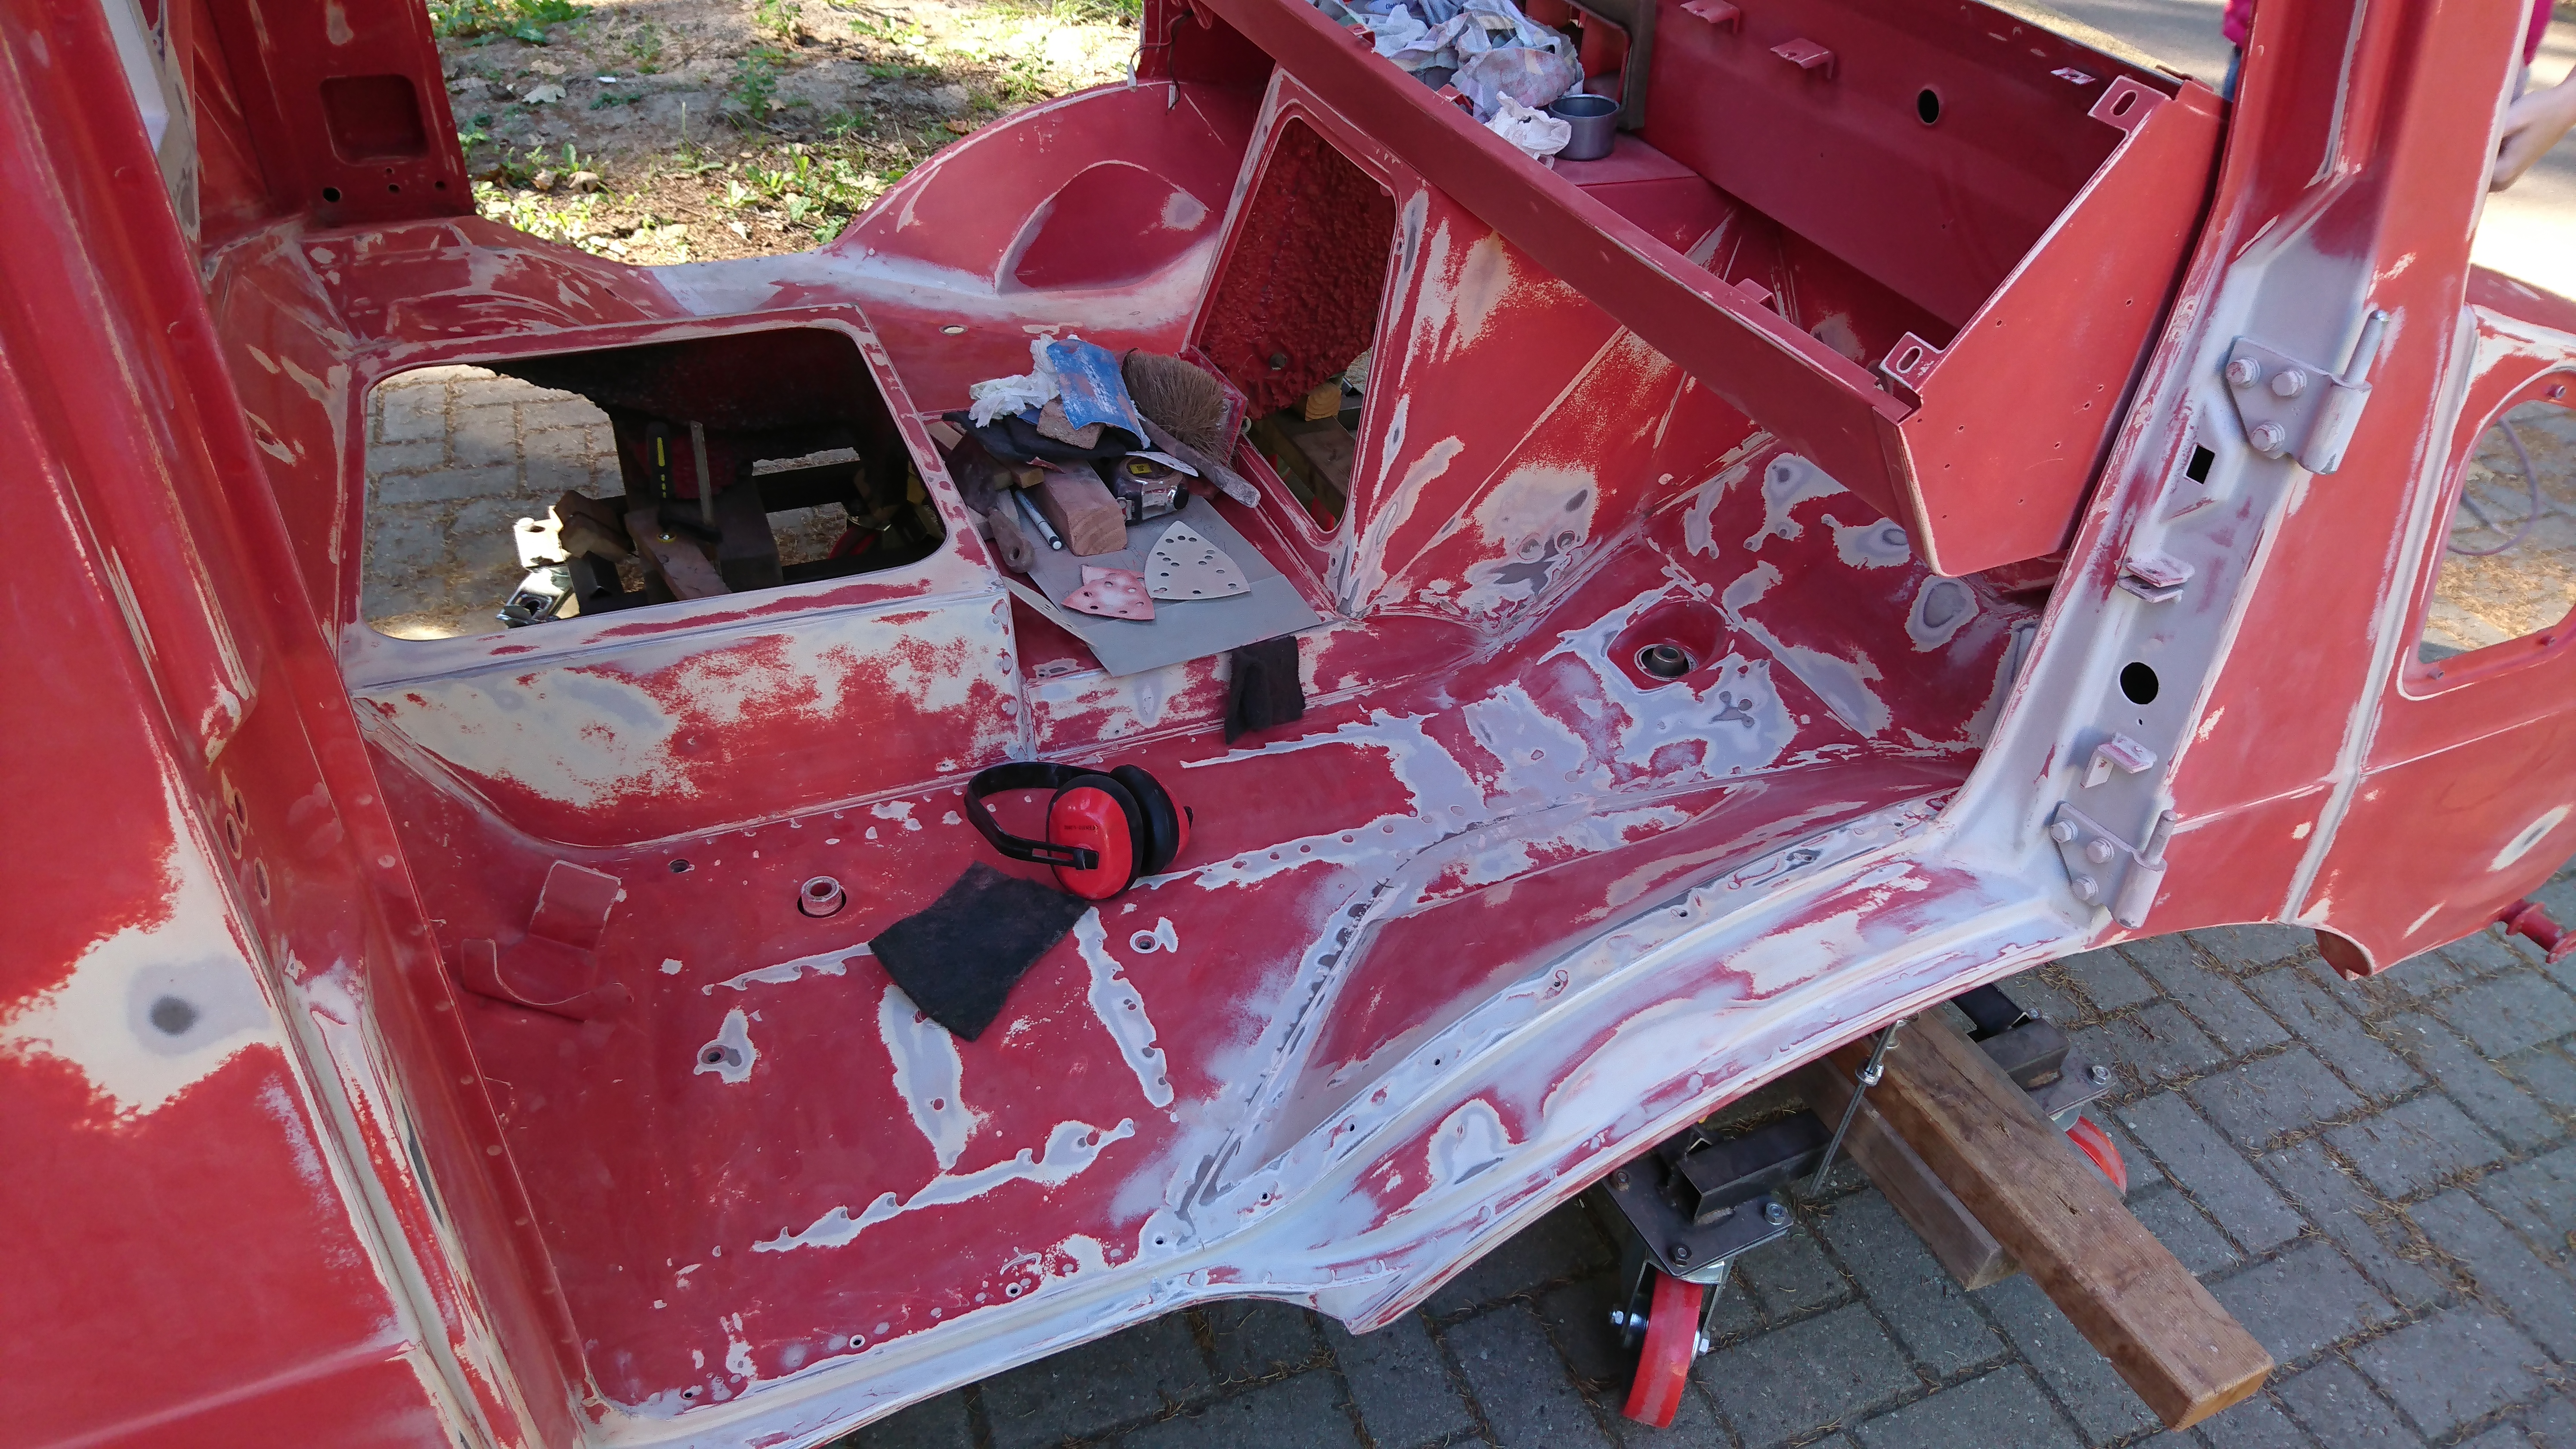
  • started sanding, filling, sanding etc
  • removed the metal compartment from the driver-side door
  • removed gearbox cover, sanded and painted it
  • painted engine cover
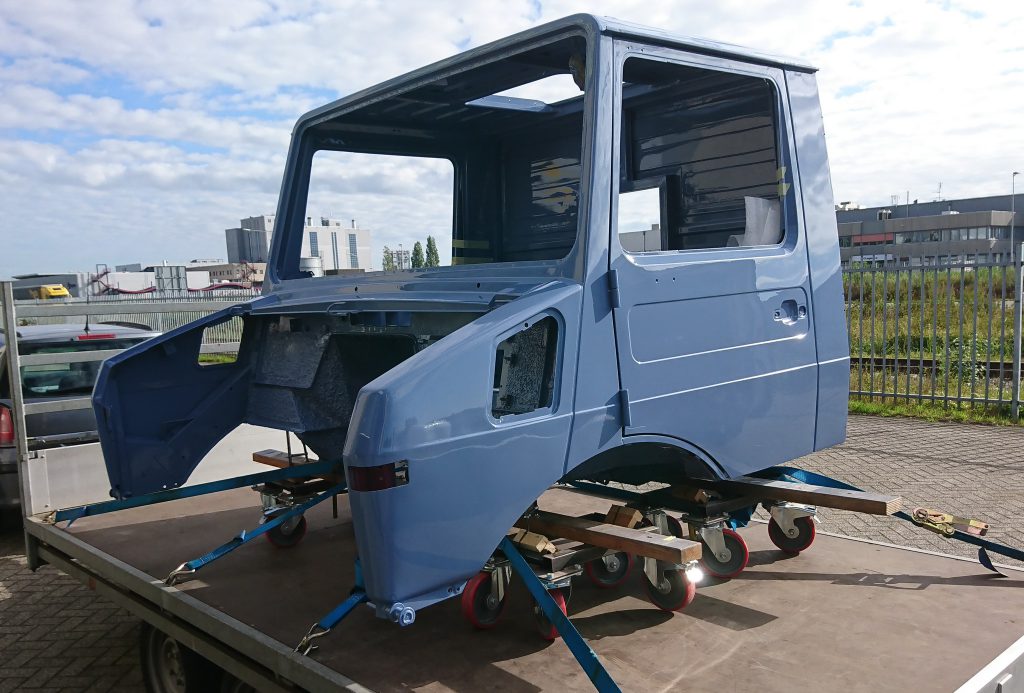
  • had the cab painted, reinstalled several items
  • put our beautiful dove blue cab back onto the Unimog
  • added sound-deadening to the floor, body, ceiling, rear wall and doors
  • uplifted all grey looking plastic items of the cab so they’re all new black again
  • installed bumper, headlights, directional indicators, raised air intake, Mercedes grill star
  • exchanged the original 4-wheel and lockers valve with electronical valves
  • added floor-covering and sound absorption material to back side, installed door seals
  • added wiring for rear view camera
  • created new ceiling covers
  • cleared break fluid and replaced it
  • replaced clutch fluid
  • added centrol doorlocking wiring to dashboard and doors
  • purchased a passenger seat support
  • purchased air-suspension seats
  • created adaptors for seat supports
  • installed wiring and air for the seats
  • installed seats
  • reinstalled door windows and up/down mechanism
  • added rear-view wiring to dashboard
  • installed other cab-parts like stearingwheel, pedals, windshield-wiper motor and others items
  • installed plastic door compartments to both doors
  • added multi-cable from dash to rear of chassis
  • added working lights to rear and switch in the dashboard
  • removed the black foil from dashboard and glove compartment and replaced it with grey synthetic leather
  • created new ‘door cards’ with the same leather, replaced door grips with second hand washed black ones
  • finished reinstalling all parts of the door
  • replaced the red door lock sliders with black ones
  • finished the new dashboard and installed it
  • reinstalled mirros
  • glued new rubber seal to hatch
  • bolted on the winch and engine cover
  • search and found universal window seal, installed a temporary window in the pass through opening
  • purchased interior airfilter bracket and installed air filter
  • ordered walls for the camper body
  • replaced a cover on the passenger seat, it was broken
  • created new light-supports for the rear side of the truck
  • created side safety items
  • measured floormats and made technical drawings for custom floor mats
  • installed rear view camera to cab with magnetic holders

All in all, quite the list to be proud of!

A new windshield!

In order to repair the cab near the window sill, and to sand it properly, we removed the windshield. It broke while doing so and we had to purchase a new one. Not all bad, the new windshield is tinted: less sun and flare.

It wasn’t an easy job, but working together, we managed to do it! We’ve got a windshield again and this feels so much ‘more finished’, it’s great.

Truck drivers!

Last June and July, we studied hard to pass two theoretical exams. We were totally up-to-speed to the latest traffic regulations, and then some… but we had to wait until September for our 1-day drivers course followed by an exam. That was today!

Right, we had to get up early, practice for about 5 hours and … exam time! We both passed! We’re truck drivers now!

We’re now officially allowed to drive trucks below 7500 kilos. Yay!

Oh, one more thing, you can now follow us on Instagram: @bluebeastmog

The cab returns

After emptying, removing and cleaning the body it’s time to start sanding, more sanding, and then do some more sanding. Some of this was done with the cab still on the truck, but it’s much easier now. It’s a lot of work though. Some areas can be done using a machine sander, but there’s a plenty of places that can’t be reached and have to be done by hand. But another milestone is met: to the painter it is!

The cab is rolled onto the trailer, doors attached and some loose parts thrown into the trunk of the car. And after a while it’s time to pick it up!

The cab, ‘dove blue’ (RAL 5014)

Excellent! We’re so happy with this color!

Back home we have to attach some parts before the cab is put back onto the truck. In part because it’s easier and because for some parts it cannot be done once the cab is back on the truck.

After rolling the chassis into the open, we carefully lift the cab and hoist it back onto the truck. This went very well and it was over within the hour!

Drivers license “C1”, part 2

After passing the first exam, it’s time for Technical and Traffic. Two heavy binders, one with all things technical related to trucks, like breaks, engine, suspension, trailer hitch and stearing. The other with, of course, traffic regulations.

Actually, it feels good to take another look at the rules for traffic, it’s been quite some years for the both of us and things have changed or simply been forgotten. It’s a nice refreshment course. There’s 6 evenings online and lots of exam practicing.

The weekend before our exam, it’s time for 1 drivers lesson in order to get an advice about whether we should take a 1-day, 2-day or even 3-day course. It’s fun, and we both get the advice to take a 1-day course, followed by an exam the same day.

“Our” vehicle

Wednesday is the day, our second exam in Arnhem. It’s a lot to learn, but we succeeded!

Passed!

Removing the body!

We’ve spent quite some time already, with sanding the body in order to have it spraypainted. It isn’t easy, you have to crawl into the truck or stand on a small ladder.

So, considering that the body is nearly empty already, we’ve decided to take it off after all. It’s a bit of extra work, but makes the sanding and the painting much easier.

It sure it a daunting task, but things are going quite well and it just fits.

We are now the proud owners of a body on miniature wheels.

After removing the last few items, it gets a good cleaning and then … sanding, sanding and more sanding.

Drivers license “C1”

In order to drive our Unimog, we need a light-truck drivers license: C1. With this license you’re allowed to drive truck with a maximum weight of 7500 kilos.

There’s two exams with theoretic knowledge about required administration, technical knowledge and of course, traffic regulations. We started in June and because of the covid19 virus, our classes were online: 4 times 3 hours and quite a heavy binder to work through.

We’re learning everything a pro truck driver needs to know. Actually, this is way beyond what we will be using, but the law is the law. The day after our last online lesson, it’s exam time!

Made it!

There goes the cab!

So, after we’ve cut the cab and welded the frame in place, we decided that it was time to destroy the cab even further, eh, ‘modify the cab’.

We closed the gaps of the windows a long time ago, but with the pass through in place, we noticed it doesn’t look good…

Depth variance in the cab back wall

We figured it would be time for a larger modification: the whole upper part of the back wall is removed, removing the depth variant of the old window frames. And we’ll put a new piece of back wall in place.

Weld the piece in place and then spot-weld while grinding away the pieces of cab behind the steel. This way it fits exactly.

Removing dents with filler and sanding, much sanding… All in all, a new back wall that looks much better than before!

Happy with the result!

Cut the cab!

OK, it had to happen: cutting the cab, a hole for the cab-to-camper-body passthrough. We want to have a passthrough because of two reasons: first, so that our dog Usko can enter the truck via the camper body and walk to his seat in the cat. He really dislikes being lifted. And the second reason is the ability to start the truck without having to go outside, in case of emergy. A safety reason.

It all starts with a frame, with rounded corners for the boot that will create a closed connection between cab and camper body.

After that, it’s time to cut the cab. And of course, to weld the frame in place.

An exciting step in our plan. It seems it fits quite well.

Cabine mount, part 3

The mounting of the living area, the cabine, consists of 4 parts. The third party we’re creating is for the front-to-back attachment point.

I wasn’t able to put the laser-cut parts together using magnets and clamps, things were moving constantly.

So, in the end, I drilled some holes and used threaded rods with bolts, now things were nice and tight.

Time to test-fit these chassis parts with the floor-frame attachment parts.

These connecting rods should be as a tight fit as possible. The holes in the welded rings have been made slightly larger… too large. This is a failure.

Test-fitting (upside down)

With the other attachments this failed as well, so I’m removing all the rings.

Instead, we had Bad Decision Works create a site of bushings with the lathe, this is a tight fit, as required.

In order to get an exact measurement of where to weld everything in place, we have to bolt all the attachments to the chassis and floor frame, see part 4.